A pluck is the first melodic sound most EDM producers reach for after the drums, and building one in Sylenth1 takes about fifteen minutes once you know where the modules sit. The short version: a detuned saw on Osc1 with a few unison voices, a quieter Osc2, a touch of noise, a 24 dB lowpass filter with a fast filter envelope sweeping the cutoff down, and a very fast amp envelope on the decay.
What is a pluck sound, exactly? A pluck is a short, percussive synth tone: a fast attack, a quick decay, a low sustain level and a short release, shaped by a filter envelope that chops brightness away a fraction of a second after the note starts. It chops rather than sings, which is why it punches through a kick and a hat instead of fighting them.
Below is the whole build in the order the signal actually flows, with starting values you can type in. Then I cover the genre variants, and the handful of mistakes that stop plucks from sitting properly in a mix.
Table of Contents
- What You Need
- How to Make a Pluck Sound in Sylenth1: Step-by-Step
- 1. Start With a Short Pluck Patch
- 2. Shape the Fundamental Tone With Osc1
- 3. Add Osc2 and a Touch of Noise
- 4. Set the Filter and Cutoff
- 5. Add the Decisive Filter Envelope
- 6. Control Amplitude and Add Motion With the LFO
- 7. Process the Pluck for Clarity
- 8. Arrange, Automate and Test the Final Pluck
- Master Settings Table
- Genre Variations
- Common Mistakes and How to Fix Them
- The attack is weak and nothing cuts through
- The sound is dull and flat
- The low mids get muddy
- The highs are harsh or sibilant
- The pluck sounds overly wide and hollow
- The pluck disappears when reverb and delay are added
- The tail is too short or too long
- The modulation sounds artificial
- Notes are being stolen on big chords
- Frequently Asked Questions
- What is the best filter setting for a pluck in Sylenth1?
- Should I use a Sylenth1 preset or build the pluck from scratch?
- How do I make a Sylenth1 pluck sound wider without breaking mono?
- Can a Sylenth1 pluck work for trance, house, and future garage?
- How many voices or oscillators should I use for a clean pluck?
- Why does my Sylenth1 pluck disappear when I add reverb and delay?
- Conclusion
What You Need
You need Lennar Digital’s Sylenth1 and a host. That is the whole requirement list. Sylenth1 is a VST virtual instrument, so it loads in any DAW that accepts VST or AU plugins, and it runs on Windows and macOS. If you do not own it, the settings below port cleanly to Vital, Surge XT or Serum, and there is a note on that at the end of the build section.
Two version details matter here. Sylenth1’s interface shows three oscillators, and the controls inside Osc1 and Osc2 are identical. Some older builds label the filter type selector slightly differently, and in a few versions the noise level lives under the oscillator tab rather than its own tab, so look for the word Noise near the filter if you cannot spot it immediately.
You also need to decide whether you want a synthesized pluck or a sample-based one. A sample pluck is a one-shot recording of an instrument played and chopped, so its character comes from the recording and you control only level, pitch and filtering. A synthesized pluck is generated live from oscillators and envelopes, which means every part of the tone is yours to move. Everything below is synthesized, because that is the version you can tune to your own track.
Optional but useful
- A distortion or soft clipper in your DAW, for edge on the transient
- A short plate reverb and a dotted delay, both on sends rather than inserts
- A reference track with a pluck you like, muted at 50 percent so you are comparing not copying
How to Make a Pluck Sound in Sylenth1: Step-by-Step
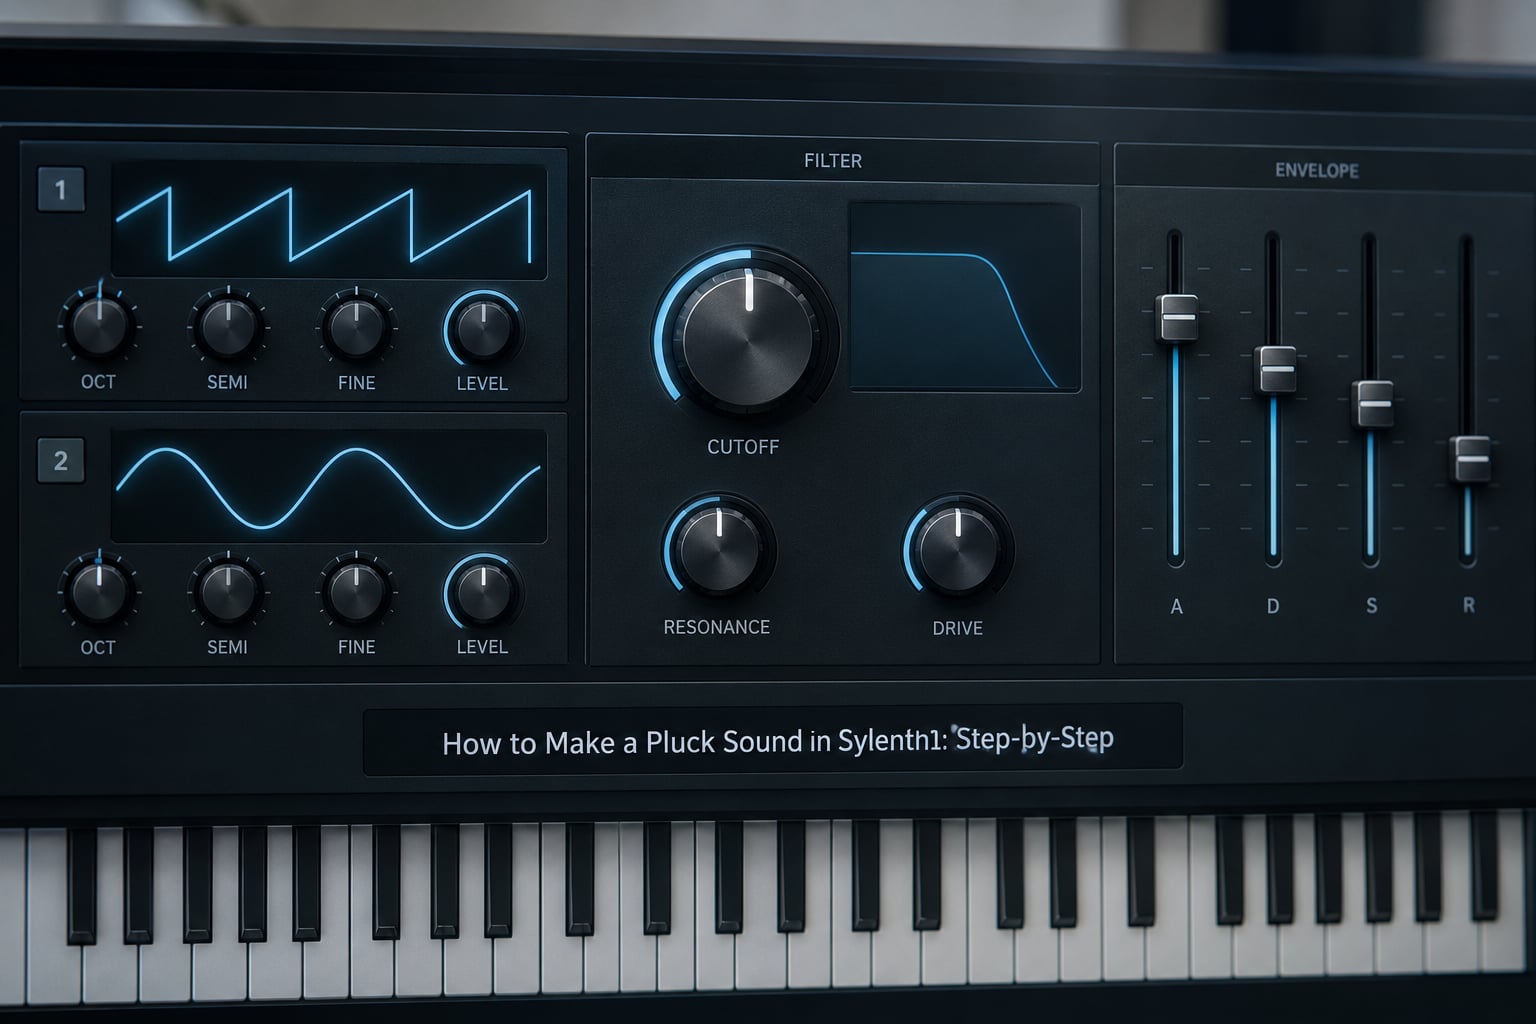
Hit the INIT patch in the top left so you start from a clean slate, then work down the signal flow. Each step only makes sense once the one before it is in place, and you should play a single note after every step rather than a pattern. One note tells you the truth about a pluck.
1. Start With a Short Pluck Patch
Open the amp envelope first, because the envelope defines the shape of everything downstream. Set attack to about 2 ms, decay to roughly 180 ms, sustain down near zero, and release around 80 ms. That gives you a click of a transient and a tail that is basically gone before the next beat lands.
If the sound feels sluggish at this point, that is normal. The oscillator and filter work below is what makes it hit.
2. Shape the Fundamental Tone With Osc1
On Osc1, choose a saw wave and turn unison up to 7 voices. Detune each voice by about 20 cents, spread them across the stereo field, and switch the voice mode to Free or Phase mode rather than a hard-synced mode. Phase mode keeps the voices tight and adds a natural thickening at the top; free mode spreads them more and sounds airier.
Leave Osc1 at zero semitone transpose so the pitch is where you played it. Set the waveform position and pulse width on the square side only if you want a thinner, more hollow pluck, since a saw alone is the more forgiving starting point.
3. Add Osc2 and a Touch of Noise
Osc2 carries the character. Two options work well: run a second saw an octave up at around 60 percent volume for brightness and edge, or run the same saw detuned by 7 cents for a thicker, phasing tone. Either way, keep Osc2 quieter than Osc1, or the pluck turns into a wall of saw.
Now turn the noise level up to roughly 10 to 15 percent. This is the step almost every pluck tutorial skips, and it is the one that gives the attack its bite. Noise is what your ear reads as the initial chop, so a touch of it makes a soft pluck cut through. More than about 25 percent and it turns to static.
4. Set the Filter and Cutoff
Turn the filter on, pick a 24 dB lowpass, and start the cutoff around 6 kHz with resonance near 0.2. Higher resonance adds a ringing edge that helps the pluck cut through a mix, but push past about 0.5 and the tail starts whistling on every note.
The cutoff figure people quote most often is around 4 kHz with resonance at 0.3, which is a good target for a plainer, more minimal house pluck. Start higher than that and sweep down when it sounds too bright for your track.
5. Add the Decisive Filter Envelope
This is the step that turns a stab into a pluck. On the filter envelope, set the amount to roughly 70 percent so the envelope actually reaches the filter, then set a fast attack of about 1 ms and a decay of around 200 ms. Hold the sustain at zero so the envelope returns to your base cutoff rather than parking at a mid-frequency.
What that does: the note opens at the filter’s highest cutoff, bright and hard, then the envelope drags the cutoff down over 200 ms so the tail gets darker and quieter. Players refer to this as the filter falling. A short fall gives a tight techno pluck, a 300 ms fall gives a warmer deep house one.
6. Control Amplitude and Add Motion With the LFO
Go back to the amp envelope and trim it against the filter envelope. If the pluck seems to vanish before you can hear the tail, raise the decay rather than the volume. A pluck whose decay and filter fall match will read as one sound rather than two events.
For movement, route the LFO to pitch at a shallow amount, around 5 to 8 percent, and set the rate to something slow and musical. Eight bars at a tempo where one cycle equals one bar works well. Faster rates turn the vibrato into an obvious effect, and the pitch stops sounding like a played note.
A second option is to use LFO 2 with a different rate and a small amount on filter cutoff, which gives a slow opening and closing across longer chords. Keep it subtle, or the sound starts wowing.
7. Process the Pluck for Clarity
Save the patch to your user area before you start adding effects, so you always have the dry version to compare against. Then work in a fixed order:
- Distortion or soft clip. A gentle clipper at low drive on Osc1 and Osc2 adds harmonics to the transient. Push it only until the waveform on the output starts showing flattened peaks.
- High-pass EQ. Cut everything below about 150 Hz. A pluck has no useful low end, and that range belongs to your bass and kick.
- Compression. A short attack of 5 to 10 ms and a ratio of 3:1 evens out the variation between accented and off-beat notes.
- Dotted delay and reverb on sends. A delay set to a dotted eighth, mixed at around 25 percent, and a plate reverb pulled right back so they sit behind the sound rather than on it.
Stereo width comes from the unison spread on Osc1 and Osc2, not from a widener. Leaving the sound mono-compatible costs you nothing and avoids the phase-swallowing effect most club systems and headphones make obvious.
8. Arrange, Automate and Test the Final Pluck
Build a two-bar loop at your target tempo and audition it in context. Plucks that sound good in isolation often turn to mush once a kick and a hat are playing, so the loop test is not optional.
Program the notes short and let the envelope do the work, roughly 60 to 80 percent of a sixteenth. Longer notes with a short amp decay just leave silence between the tail and the next note. Add a few velocity changes across the pattern, maybe 90 to 115, so the arpeggio breathes instead of sounding machine-gunned.
Automate the filter cutoff upward over eight or sixteen bars for a build, and automate decay longer as the track progresses. Then run through the checklist before you save it:
- Does the transient still read at low volume, and does it still read on phone speakers?
- Is the tail fully gone before the next downbeat, or is it smearing into reverb?
- Does it still sit forward when the kick and bass come in?
- Does the unison spread add shimmer without thinning the note?
- Is the resonance below the level where it starts whistling at high notes?
- Does the CPU hold with eight voices playing a sixteen-note pattern?
Master Settings Table
These are the starting values in one place, in the order you should set them.
| Module | Parameter | Starting value |
|---|---|---|
| Amp envelope | Attack / Decay / Sustain / Release | 2 ms / 180 ms / 0 / 80 ms |
| Osc1 | Waveform | Saw |
| Osc1 | Voices / Detune / Mode | 7 voices / 20 cents / Phase |
| Osc2 | Waveform / Transpose / Volume | Saw / +12 semitones / 60 percent |
| Noise | Level | 10 to 15 percent |
| Filter | Type / Cutoff / Resonance | 24 dB lowpass / 6 kHz / 0.2 |
| Filter envelope | Amount / Attack / Decay / Sustain | 70 percent / 1 ms / 200 ms / 0 |
| LFO1 | Rate / Pitch amount | 1 cycle per bar / 5 to 8 percent |
| Voice control | Polyphony / Voice mode | 8 to 16 voices / Polymono |
Genre Variations
The core patch stays the same and only a few values move. This is the whole difference between a deep house pluck and a trance arp.
| Style | Filter cutoff | Filter env decay | Osc2 transpose | Note |
|---|---|---|---|---|
| Deep house | 4 kHz | 300 ms | +12 semitones | Warm, rolling, sits under the vocal |
| Progressive house | 6 kHz | 200 ms | +12 semitones | Clean, mid-forward, arpeggiated |
| Future bass | 8 kHz | 150 ms | +12 semitones | Bright and metallic, add extra detune |
| Trance arp | 7 kHz | 120 ms | +24 semitones | Very short decay, long notes, heavy delay |
| Melodic techno | 5 kHz | 250 ms | +7 cents detune | Darker, thicker, sidechained to the kick |
One more variation worth trying: for a harder, distorted pluck, put the saws in Osc1 and Osc2 into the same distortion stage and pull the resonance up to 0.4 for a ringing edge. For a softer house pluck, drop the noise level to around 5 percent and let the filter envelope do the percussive work on its own.
If you do not own Sylenth1, the mapping is close. In Vital and Surge, the oscillator tab replaces Osc1, Osc2 and the noise stage sits under the same tab, the filter envelope amount control exists in the amp-style modulation section rather than as its own tab, and the LFO routing works the same way. Serum needs two oscillators plus a noise oscillator, with the filter envelope in the LFO tab. The values translate directly; only the labels move.
Common Mistakes and How to Fix Them
Most failed pluck sounds are one setting away from working, and it is almost always the same handful of parameters. Here is what the problem sounds like and what to move.
The attack is weak and nothing cuts through
Bring the noise level up to 15 percent and shorten the amp attack to 1 or 2 ms. If it is still soft, raise the filter envelope amount so the cutoff sweep opens wider. This is the single most common complaint on pluck threads, and it is nearly always a noise level problem rather than a volume problem.
The sound is dull and flat
Raise the base cutoff from 4 kHz to around 6 kHz, then lengthen the filter envelope decay so the bright part lasts longer. If the filter envelope sustain is above zero, the cutoff never returns to your base value and the note stays dark. Set sustain to zero.
The low mids get muddy
You have too much unfiltered saw energy sitting under the vocal and the kick. High-pass the synth at 150 Hz, and drop Osc2 volume if the second oscillator is adding body you cannot hear properly in the mix.
The highs are harsh or sibilant
Pull the resonance down to 0.15 and cut 1 to 2 kHz with a narrow EQ band. If the distortion stage is the culprit, back the drive off before touching the EQ.
The pluck sounds overly wide and hollow
Reduce the unison spread, and move Osc2 back from a full octave to a smaller interval. Wide plucks lose their body on small speakers and in mono, which is exactly where a lot of people first hear them.
The pluck disappears when reverb and delay are added
Send levels are too high. Pull the delay to around 20 percent and the reverb below 15 percent, then raise the dry signal. If it still vanishes, the fix is in the amp envelope: lengthen the decay so the dry note has more body before the tails arrive.
The tail is too short or too long
Too short means the decay is under about 100 ms and the pluck has no body. Too long usually means the release is carrying the note, and it smears into the reverb. Set release between 60 and 120 ms and let the amp envelope’s decay do the work.
The modulation sounds artificial
The LFO pitch amount is too high, or the rate is not related to the tempo. Drop the amount to 5 percent or remove it. Vibrato should be felt rather than heard on a pluck.
Notes are being stolen on big chords
Lower polyphony to 8 or 16 voices so the voice manager prioritises the newest notes, and cut unison voices per oscillator if your pattern is dense. Fewer voices with more movement sounds cleaner than more voices fighting each other.
Frequently Asked Questions
What is the best filter setting for a pluck in Sylenth1?
Start with a 24 dB lowpass, a cutoff around 6 kHz, and resonance at 0.2. Then set the filter envelope amount to about 70 percent with a 1 ms attack and a 200 ms decay, and hold its sustain at zero so the cutoff falls back to your base value. For a plainer minimal house pluck, drop the cutoff closer to 4 kHz and raise resonance to 0.3.
Should I use a Sylenth1 preset or build the pluck from scratch?
Build it from scratch the first time, because a pluck is fast to make once you know which module does what. Every factory pluck preset ships with its own modulation routings and effects sends already wired in, which makes it hard to see where a change came from. Starting from INIT gives you a plain signal path you can reshape, and once you like the result you can save it as your own starting point.
How do I make a Sylenth1 pluck sound wider without breaking mono?
Use the unison spread controls inside Osc1 and Osc2, set in a phase or free voice mode, and keep each voice detuned by around 20 cents. That widens the sound using the oscillators themselves, so it stays mono-compatible on small speakers and club systems. A stereo widener plugin on top is what usually breaks mono and thins the note. Check by soloing the track in mono in your DAW before you commit.
Can a Sylenth1 pluck work for trance, house, and future garage?
Yes, because a pluck is defined by a fast filter envelope and a short amp envelope rather than by any one genre. The same patch covers all three if you move three values: cutoff from roughly 4 kHz for deep house up to 8 kHz for future bass, filter envelope decay from 300 ms down to 120 ms, and the Osc2 interval. Trance and future garage lean on a very short decay and a heavier dotted delay.
How many voices or oscillators should I use for a clean pluck?
Two oscillators and about seven unison voices on each is the sweet spot: enough thickness to sound played, not so much that the note turns to mush. Keep Osc2 quieter than Osc1, around 60 percent, and set polyphony to 8 or 16 voices so the voice manager does not steal the notes you need most. More voices mainly costs CPU and clarity, not quality.
Why does my Sylenth1 pluck disappear when I add reverb and delay?
Usually the send levels are too high, so the wet signal covers the dry pluck instead of sitting behind it. Pull the delay to around 20 percent and reverb under 15 percent, then raise the dry channel. If it still gets lost, fix the amp envelope instead: lengthen the decay past 150 ms so the dry note has enough body to register before the tails arrive.
Conclusion
Open a blank patch, set the amp envelope to a 2 ms attack and a 180 ms decay, load a detuned saw with seven unison voices on Osc1, and turn the noise up to about 15 percent. Then set a 24 dB lowpass at 6 kHz and give the filter envelope a fast fall. That is the pluck, and everything after this is taste: move the cutoff for the genre, copy the patch, and refine a second version for your own track.