If you want a number to dial in right now, start at 4:1 on the drum bus with a slow-ish attack, then pull the threshold down until the loudest hits show 2-3 dB of gain reduction. For individual channels, work from 4:1 to 6:1 on kick and snare and 2:1 to 3:1 on overheads. Anything past 8:1 is a deliberate choice, not a starting point.
Published advice on this splits in two, and the split is worth explaining. One camp says the kick wants 3:1 to 4:1, another says 5:1 to 8:1. Both are describing real mixes — they just sit on opposite ends of the density range. What ratio should you use for drum compression depends on how much dynamic range the record needs and how consistent the drummer or the loop already is.
Everything below is written for producers working in Ableton Live, FL Studio, Logic Pro, Cubase, Studio One or Bitwig. All of them ship with a compressor that has the same core controls, so the numbers here transfer even though the names and menu paths do not.
Table of Contents
- What Ratio Should You Use for Drum Compression?
- How Does Compression Ratio Affect Drums?
- Ratio tiers from transparent to crushing
- What Is a Good Starting Ratio by Drum Sound?
- How Do You Set Drum Compression Ratio and Other Controls?
- 1. Gain stage first
- 2. Bypass and match levels
- 3. Pick the ratio by job
- 4. Set attack and release before threshold
- 5. Set the threshold for gain reduction, not for a level
- 6. Trim and re-check
- Does Genre Change the Best Drum Compression Ratio?
- What About Attack and Release When Compressing Drums?
- Should You Use Parallel Drum Compression?
- Common Mistakes When Setting Drum Compression
- Setting a ratio and leaving the threshold alone
- Compressing the overheads too hard
- Double-compressing everything
- Pushing signal into the compressor
- Judging compression by loudness
- Copying settings from one drum to another
- Symptom and fix
- Frequently Asked Questions
- Is 4:1 a good compression ratio for drums?
- Should I use parallel compression for drums?
- What compression ratio is best for punchy electronic drums?
- Why does my drum compression sound like pumping?
- Is a 10:1 compression ratio too much for drums?
- Should I compress the kick, snare, or the whole drum bus?
- Conclusion
What Ratio Should You Use for Drum Compression?
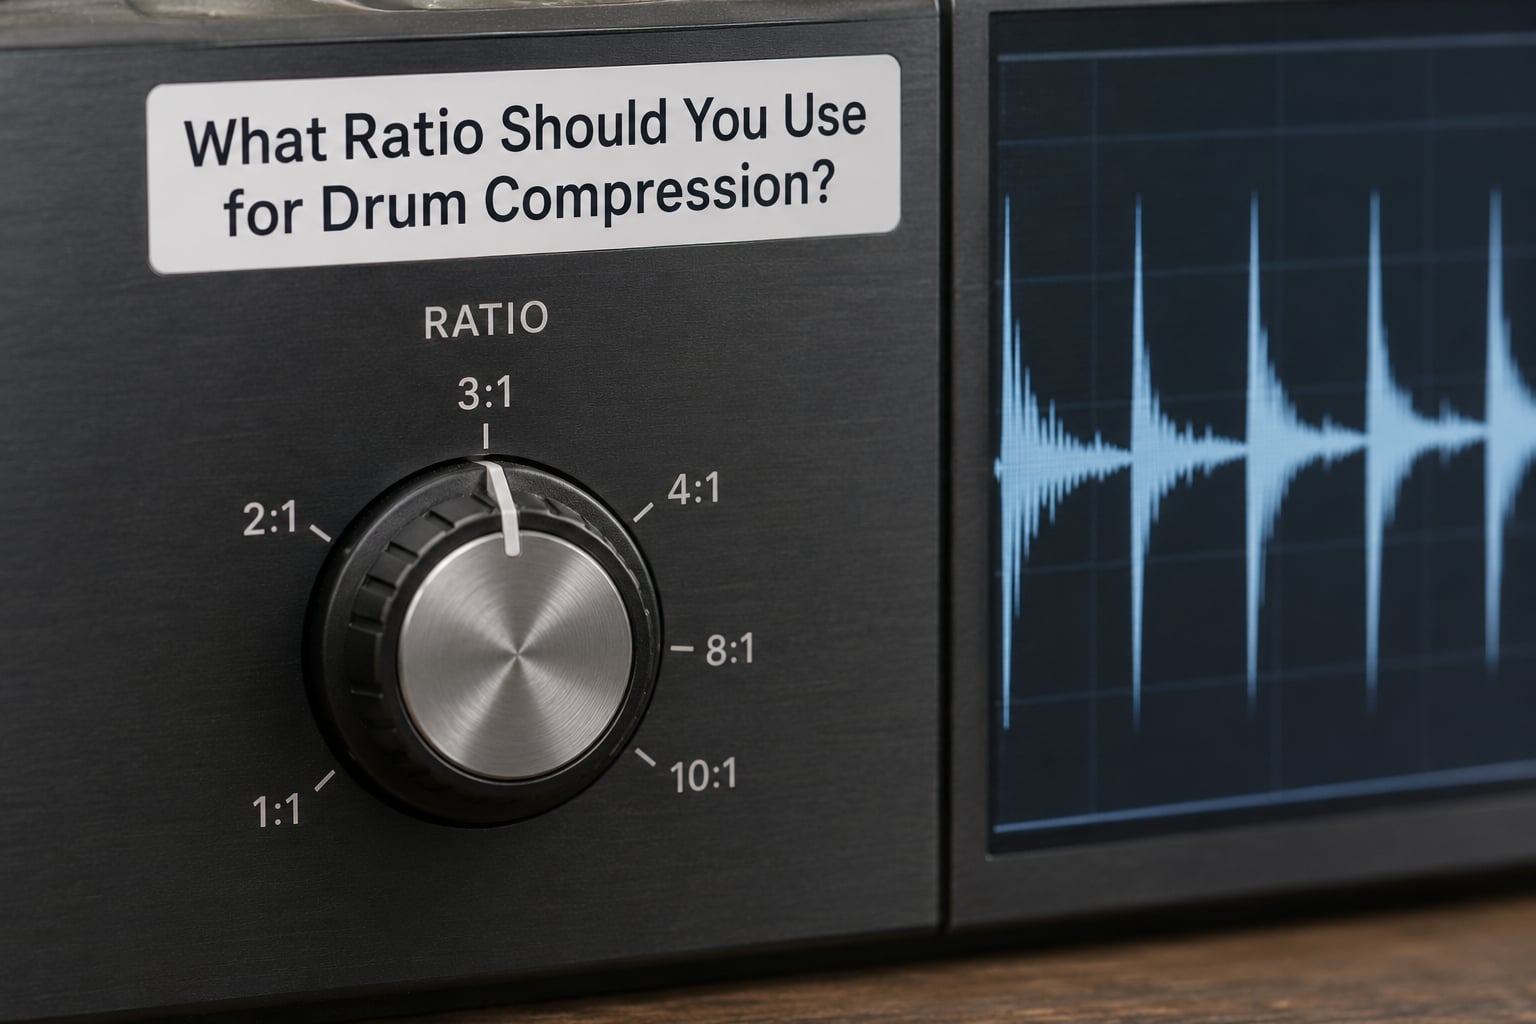
The honest answer has two halves. There is a sane starting range, and then there is a reason the range exists.
- 2:1 to 3:1 — gentle leveling and glue. The overheads, hi-hats and the drum bus live here most of the time.
- 4:1 — the default bus setting. Controlled, consistent, still leaves the kit breathing.
- 4:1 to 6:1 — kick and snare when you want more forward impact and less variance between hits.
- 8:1 — only when one drum genuinely needs locking to a fixed level, and the threshold is set so it does not ride the meter constantly.
- 10:1 and higher — limiting territory. Useful on a parallel bus or a room mic, almost never on a live kit bus.
Now the reason. Ratio is a slope, not an amount. At 4:1, every 4 dB the input goes above the threshold pushes the output up by only 1 dB. That is the whole mechanism, and once you can see it as arithmetic the conflicting advice stops being confusing.
Ratio also matters far less than most guides admit. A 4:1 with a 30 ms attack on a tight loop and a 6:1 with a 1 ms attack on a live kick are two completely different sounds. Ratio sets how hard the compressor pulls; attack and release decide what it grabs and when it lets go. Pick the ratio first as a rough choice of restraint, then let timing shape the character.
How Does Compression Ratio Affect Drums?
A compressor watches the input level. Once the input passes the threshold, the ratio decides how much extra gain the output is allowed for each extra decibel the input gains. Below the threshold nothing happens at all, which is why a high ratio with a low threshold sounds completely different from the same ratio with a high one.
Take a kick peak landing 12 dB over the threshold and run the arithmetic at each setting:
- 2:1 — 12 dB over becomes 6 dB over. Peaks get pulled back but shape survives almost intact.
- 3:1 — 12 dB over becomes 4 dB over.
- 4:1 — 12 dB over becomes 3 dB over. This is the number that makes a drum bus feel even without feeling squashed.
- 6:1 — 12 dB over becomes 2 dB over. Loud hits and soft hits end up closer together.
- 10:1 — 12 dB over becomes 1.2 dB over. From here the compressor is behaving like a limiter.
- 20:1 — 12 dB over becomes 0.6 dB over. Essentially a ceiling.
Notice what that does to a drum recording where one hit is 8 dB louder than the others. At 2:1 the spread collapses to about 4 dB. At 6:1 it collapses to roughly 1.3 dB. The kit stops being a performance and becomes a loop, which is exactly what some records want and exactly what others cannot survive.
Because drums are percussive, the ratio also interacts with the waveform shape in a way it does not with sustained instruments. A kick that ramps over 3 ms gives a slow compressor very little to hold; the ratio only acts on the peak. Compress a kick that arrives instantly and the same ratio does far more work.
Ratio tiers from transparent to crushing
| Ratio | What it does to drums | Where it belongs |
|---|---|---|
| 2:1 | Very gentle leveling, long-range smoothing | Room mics, overheads, drum bus glue at low threshold |
| 3:1 | Subtle peak control with the kit still moving | Overheads, sparse loops, bus pre-comp |
| 4:1 | Clear control of the loudest hits without obvious squash | Default drum bus, snare top end |
| 6:1 | Firm, forward, noticeably tighter between hits | Kick, snare, toms in dense mixes |
| 8:1 | Heavy control; transients visibly rounded | One drum that must sit at a fixed level |
| 10:1 and up | Peak limiting more than dynamic shaping | Parallel crush bus, loud room mics, final drum ceiling |
| 20:1 to infinity | Turns transient peaks into a flat ceiling | Parallel bus only, mixed low under the dry signal |
What Is a Good Starting Ratio by Drum Sound?
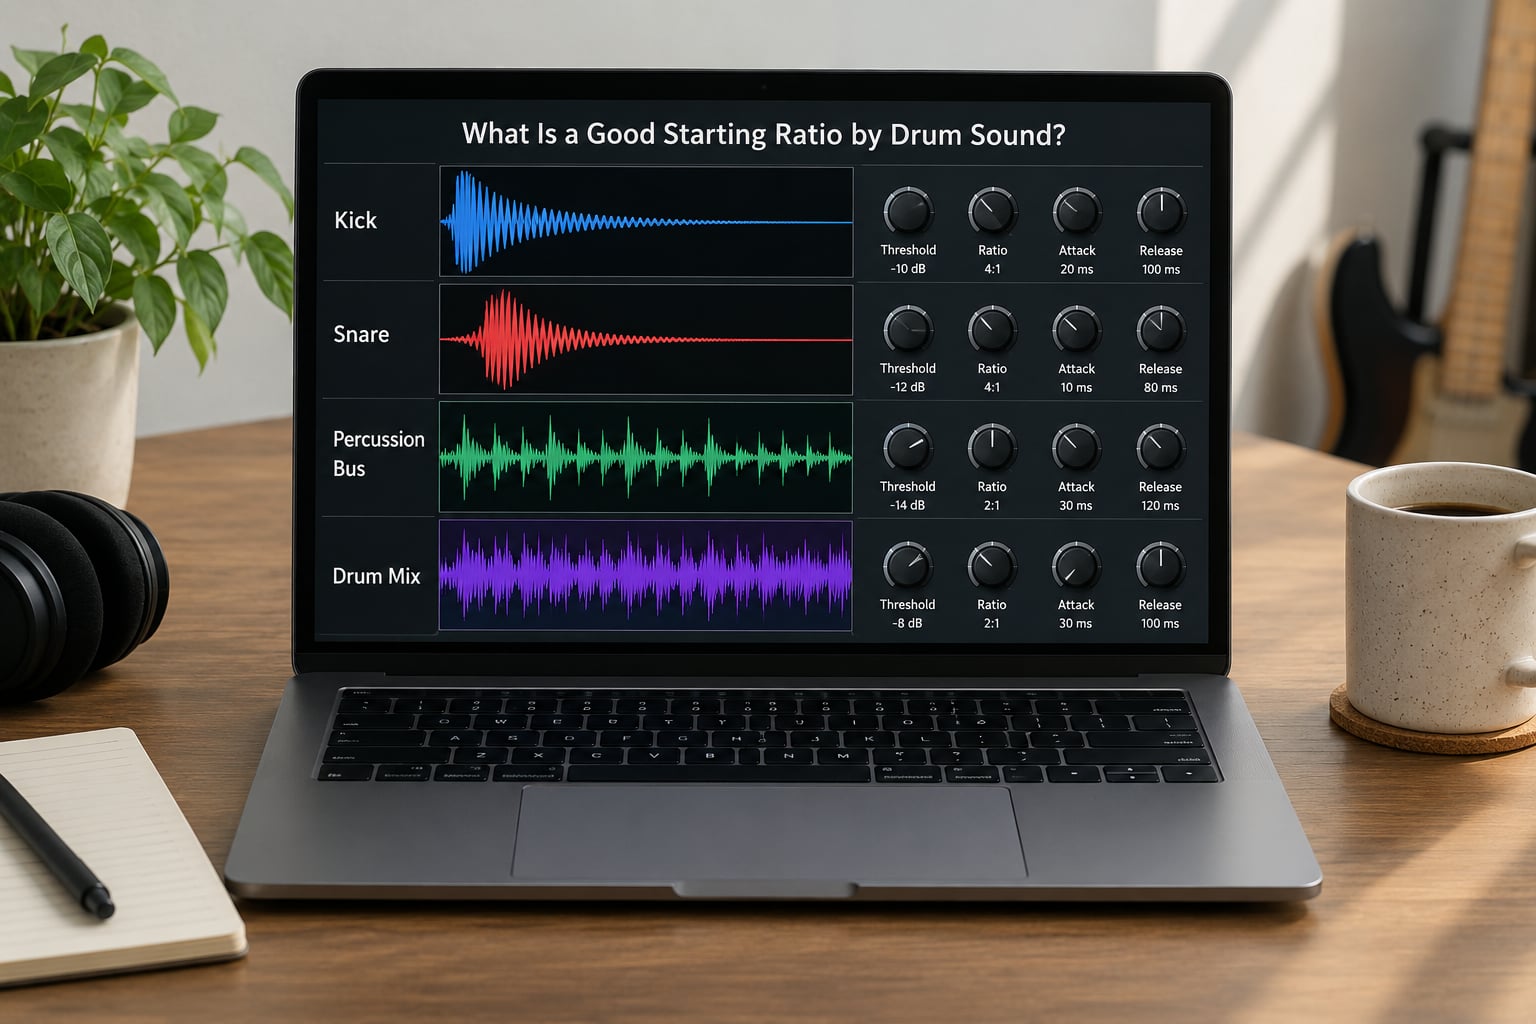
Here is the table I keep open in a text file. Every number is a starting point, not a target — the threshold column matters more than the ratio column, because threshold is what actually turns the compressor on.
| Source | Goal | Ratio | Attack | Release | Target gain reduction |
|---|---|---|---|---|---|
| Kick | Punch and consistency | 4:1 to 6:1 | 5 to 20 ms | 80 to 180 ms | 3 to 6 dB |
| Snare top | Forward and consistent | 4:1 to 6:1 | 5 to 15 ms | 80 to 200 ms | 3 to 5 dB |
| Snare bottom | Body, less ring | 4:1 to 8:1 | 10 to 30 ms | 100 to 250 ms | 3 to 6 dB |
| Toms | Sit with the kick and snare | 3:1 to 4:1 | 10 to 30 ms | 120 to 250 ms | 2 to 4 dB |
| Hi-hat | Even feel across bars | 3:1 to 4:1 | Fast, under 5 ms | Medium, 80 to 150 ms | 1 to 3 dB |
| Overheads | Cymbal control without wash | 2:1 to 3:1 | 10 to 30 ms | 150 to 300 ms | 1 to 2 dB |
| Room mics | Tame the ambience, keep it musical | 3:1 to 6:1 | 10 to 30 ms | 200 to 400 ms | 2 to 4 dB |
| Drum bus glue | Cohesion across the kit | 2:1 to 4:1 | 15 to 40 ms | 150 to 300 ms | 1 to 3 dB |
| Parallel crush bus | Density and weight | 10:1 to 20:1 | 30 to 80 ms | Auto or slow | 6 to 12 dB |
Two notes on the numbers. First, the overheads row is deliberately the lowest ratio in the table. Overhead mics carry the whole kit plus the cymbals, so a crash already 10 dB over the threshold will hold the compressor down through the entire phrase and shift the kit image every time somebody hits it. That is the washy, pumping overhead sound people complain about most, and it is a threshold and ratio problem, not a mystery.
Second, sampled drums and 808 kicks accept higher ratios than live ones. A synthetic 808 has no performance variance to hide, so there is nothing to even out — you are only controlling peaks. A live kick played by a drummer who rushes every backbeat can take 6:1 and still sound alive.
How Do You Set Drum Compression Ratio and Other Controls?
Setting the ratio before the threshold means setting a number that has no audible effect yet. This order works better and takes about two minutes.
1. Gain stage first
Get the signal hitting the compressor at a sensible level before you touch anything. Most software compressors sound fine at roughly -18 to -10 dBFS peak, and some emulations change character when starved or slammed. If the drum bus peaks near -3, the compressor is doing level conversion rather than dynamics.
2. Bypass and match levels
Find the bypass button and use it constantly. Every time you change a setting, flip back and forth on the same phrase at the same monitoring level. If the compressed version is louder, your comparison is useless and you will conclude the settings are better when they are only louder.
3. Pick the ratio by job
Choose from the table rather than from memory. 2:1 to 3:1 for overheads and bus, 4:1 to 6:1 for kick and snare. Do not push past 6:1 on a channel compressor unless you can immediately say what problem it solves.
4. Set attack and release before threshold
Fast attack catches the transient, slow attack lets it through and compresses the body. For punch, start around 10 ms on a kick and let the click escape. For a dense, loop-driven kit, a slower attack around 30 ms keeps the initial hit intact. Release decides how fast the compressor refills; a release shorter than the gap between hits produces pumping, so pick something a little longer than your slowest gap.
5. Set the threshold for gain reduction, not for a level
Now lower the threshold until the meter reads your target — 3 to 6 dB on individual drums, 1 to 3 dB on the bus. This is the step most guides skip, and it is the reason a plugin sitting at 4:1 might be doing nothing at all. Watch the meter over a full bar, including the loudest fill, not the average.
6. Trim and re-check
Use the makeup or output gain to bring the compressed signal back to the pre-compression level, then compare again. If it sounds worse, back off the threshold before lowering the ratio — a shallower dip at a moderate ratio usually beats a deep dip at a high one.
Live’s Glue Compressor, Logic’s Compressor and Studio One’s Studio Compression are all opto or VCA style and forgiving at low ratios. Cubase and Bitwig give you more control over the knee and timing curves than Live does, which matters more on the overheads. FL Studio’s Fruity Compressor is a simple feedback design that suits the dial-in order above well.
Does Genre Change the Best Drum Compression Ratio?
Yes, and usually for the same underlying reason: genre decides how much room the drums need to breathe. A jazz trio needs the drummer’s dynamics intact. A techno track needs every element sitting at a fixed, dense level for four minutes.
| Style | Kick | Snare | Overheads | Drum bus | What drives it |
|---|---|---|---|---|---|
| Trance | 4:1 to 6:1 | 4:1 to 6:1 | 2:1 to 3:1 | 3:1 to 4:1 | Loop-forward, kick needs to survive a long arrangement |
| Progressive house | 4:1 | 4:1 | 3:1 | 2:1 to 3:1 | Groove matters more than density |
| Techno | 5:1 to 6:1 | 5:1 to 6:1 | 2:1 | 4:1 | Maximum consistency, repetitive patterns |
| Dubstep | 6:1 to 8:1 | 4:1 to 6:1 | 2:1 to 3:1 | 4:1 | 808 weight, heavy sidechain pumping around it |
| Trap | 6:1 to 10:1 | 4:1 | 2:1 | 3:1 | 808 sub and hat staccato need control, not glue |
| Rock and metal | 4:1 to 6:1 | 4:1 to 6:1 | 2:1 | 2:1 to 3:1 | Fast attack, short release, preserve shell |
| Pop | 4:1 | 4:1 | 3:1 | 2:1 to 3:1 | Balance and consistency across loud and quiet sections |
| Jazz and funk | 3:1 | 3:1 to 4:1 | 2:1 or none | 2:1 or none | Keep the performance dynamics readable |
Electronic drums built from loops already have tight dynamics, so the compressor is there for glue and peak safety rather than for evenness. Live kits have variance, which is where the higher ratios earn their place — and where 8:1 on a snare can quietly flatten a good drummer.
What About Attack and Release When Compressing Drums?
Attack and release usually change the character of drum compression more than the ratio does, and they are almost always where the fix lives when something sounds wrong.
Attack controls whether the compressor reacts to the initial hit. Under about 1 ms it grabs the beater click and the transient itself, which flattens the drum and makes it sound thin and plastic. Around 5 to 15 ms it ignores the click and catches the body, which is where most punch comes from. Past 30 ms it barely reacts to the hit at all and only shapes what follows, useful on a dense bus where you want every transient to survive.
Release controls how fast the compressor refills after each hit. A drum hit lasts a fraction of a second, so the release determines whether the compressor is ready for the next hit. If the release is shorter than the gap between hits, the compressor recovers fully between hits and the level rides up and down audibly — that is pumping, and it is a release problem, not a ratio problem. A release slightly longer than your slowest gap keeps the compressor working continuously and the kit steady.
Quick A/B test for a ratio change: set the bus at 4:1 with a musical release, note the gain reduction, then switch to 6:1 without touching anything else and listen to a bar with a fill in it. If the fill sounds like the loudest part of the loop has been flattened, the ratio is too high for that material, and no amount of release tuning rescues it.
Should You Use Parallel Drum Compression?
Parallel compression means compressing a copy of the signal and mixing it underneath the untouched original. The dry version keeps every transient, the wet version adds density and weight. That is why it sounds different from simply turning a ratio up on the dry signal, where the transient is the first thing sacrificed.
On drums it is genuinely useful in three situations. Hitting a hard wall on a loop that needs more weight than any direct setting gives. Restoring the punch after heavy direct compression. Building a parallel crush layer for a drop, usually at 10:1 to 20:1 with slow attack and a long or automatic release.
The discipline is the blend control. Start with the parallel return fully down, bring it up until you hear the layer thicken the kit, then back off slightly. The best parallel compression is the least you can get away with. If the wet layer is doing the work and the dry signal is just filling gaps, you have built a second drum mix that is fighting the first.
Make sure the dry and wet paths are level-matched before you judge anything, and check the phase relationship. A parallel layer that is 90 degrees out of phase with the dry kit will hollow out the low end as you bring it up, and that is a problem no ratio setting fixes.
Common Mistakes When Setting Drum Compression
Most of these come from applying a setting to something it was never measured on.
Setting a ratio and leaving the threshold alone
A 4:1 with the threshold too high does absolutely nothing, so people raise the ratio to feel something and end up at 12:1 by accident. Set the threshold for target gain reduction first, and only change the ratio when the dip no longer gives you the control you want.
Compressing the overheads too hard
Overheads carry the entire kit. Compress them at 2:1 to 3:1 with 1 to 2 dB of gain reduction and manage bleed with gating and mic placement instead. If a crash makes the whole kit image pump, back the threshold down rather than raising the ratio.
Double-compressing everything
Compressing kick, snare, toms, overheads and then the bus multiplies the ratios. A 4:1 on a channel followed by 4:1 on the bus is far from 4:1 — and nobody can predict the result. Compress a couple of channels for control, then glue lightly, and check the bus behaviour by ear rather than by theory.
Pushing signal into the compressor
Turning the input up to get more compression is gain staging backwards, and it pushes some emulations into distortion. Lower the threshold instead; the ratio and the threshold do similar jobs at very different costs to the sound.
Judging compression by loudness
It is always easier to think something sounds better when it is simply louder. Match the output level, bypass, listen, decide. If you skip this step every time, your settings are being chosen by volume rather than by what you actually heard.
Copying settings from one drum to another
A hi-hat needs a fast attack and short release. A floor tom needs a slow attack and long release. Copying a snare patch to the toms gives you a short, dead flanging sound and a tired kick. Start each drum from the table, then tune.
Symptom and fix
| Symptom | Likely cause | Fix |
|---|---|---|
| Kit sounds flat and lifeless | Ratio too high or threshold too low across channels | Back the threshold off so gain reduction drops to the target range |
| Crash makes the whole kit pump | Overhead ratio too high, threshold too low | Drop overheads to 2:1 or 3:1, or gate the cymbal bleed |
| Drums lose click and punch | Attack too fast on the kick or snare | Raise attack to 10 to 20 ms and let the transient escape |
| Compressed and crunchy, breaks on peaks | Ratio pushed to limiter range on a channel | Return to 4:1 to 6:1 and use a limiter on a parallel bus instead |
| Level breathes between hits | Release shorter than the gap between hits | Lengthen release until it exceeds the slowest gap |
| Hi-hats disappear at high frequencies | Too much broadband compression on the hat channel | Reduce ratio, or catch only the 2 to 5 kHz band with multiband compression |
Frequently Asked Questions
Is 4:1 a good compression ratio for drums?
Yes, 4:1 is the most useful default drum compression ratio there is. On a drum bus it gives real control of the loudest hits while leaving the kit recognizable, which is why most engineers land there. On kick and snare it sits in the range where punch survives. The number only works with the threshold set for 1 to 3 dB of gain reduction on the bus and 3 to 6 dB on a channel.
Should I use parallel compression for drums?
Use it when direct compression cannot get you the weight you want without losing the transient, or when you want a crush layer for a specific moment in the arrangement. Duplicate the drum bus, compress the copy at 10:1 to 20:1 with slow attack, and bring the return up gradually. Level-match first and back the blend off once you hear the thickening, otherwise the wet layer takes over.
What compression ratio is best for punchy electronic drums?
For punchy electronic drums, 4:1 to 6:1 with an attack around 10 ms is the range to start from. The attack matters more than the ratio here: it lets the initial hit and click pass before the compressor clamps down, which is what keeps a loop sounding like a drum instead of a thud. On a programmed kick you can go higher because there is no performance variance to hide.
Why does my drum compression sound like pumping?
Pumping almost always means the compressor is fully recovering between hits, so the level audibly rises and falls. Either the release is shorter than the gap between your hits, or the threshold is low enough that the compressor never stops working. Lengthen the release past your slowest gap, or shorten it deliberately and lower the ratio. Check the gain reduction meter to see which one it is.
Is a 10:1 compression ratio too much for drums?
On a drum bus, yes, 10:1 is usually too much. At that setting a hit 12 dB over the threshold only comes out 1.2 dB over, so the compressor is limiting peaks rather than shaping dynamics and the kit starts sounding flat. It is appropriate on a parallel crush bus, a loud room mic or a final drum ceiling where you only want to catch strays.
Should I compress the kick, snare, or the whole drum bus?
Start with the kick and snare, because those two carry the most variance and the most impact. Once they are controlled, add light glue compression on the bus at 2:1 to 4:1 with 1 to 3 dB of gain reduction. Leave overheads and hi-hats alone unless there is a specific problem to fix. Compressing everything at full strength usually gives a kit that feels lifeless.
Conclusion
Here is the first thing to do: duplicate your drum bus, set the ratio to 4:1, leave the attack around 20 ms and set a release longer than your slowest gap. Then pull the threshold down until the meter shows 2 to 3 dB of gain reduction on a loud bar, trim the output back to match, and listen with the bypass on a few times.
After that, work on the kick and snare at 4:1 to 6:1 with 3 to 6 dB of gain reduction, and leave the overheads at 2:1 to 3:1. Once the kit sits right in the mix, add a parallel crush layer if it still needs weight. Change one control at a time, and trust what the meter and your ears say over any printed number — including the ones on this page.