To check phase and mono compatibility, fold your stereo mix down to one channel, listen for parts that vanish, thin out or gain a strange hollow tone, then confirm anything suspicious with a phase correlation meter and a null test. Every major DAW ships with both a correlation meter and a mono utility, so the whole job takes about twenty minutes inside a session you already have open. Work through the seven steps below in order and you will finish with a mix that survives phone speakers and club PAs, not just your studio monitors.
Table of Contents
- What You Need
- How to Check Phase and Mono Compatibility Step by Step
- Step 1: Set Consistent Monitoring Conditions
- Step 2: Locate Tracks That Become Weak in Mono
- Step 3: Read the Phase-Correlation Meter
- Step 4: Perform a Null or Phase-Cancellation Test
- Step 5: Check Polarity Without Confusing It With Phase
- Step 6: Audition the Entire Mix in Mono
- Step 7: Verify Phase and Mono Compatibility Before Export
- Common Mistakes
- Fixes for Common Phase and Mono Problems
- Quick DAW Control Reference
- Export Checklist
- Frequently Asked Questions
- What phase-correlation reading should I aim for in a stereo mix?
- Why does an instrument disappear when I check my mix in mono?
- Is phase the same thing as polarity?
- How do I check mono compatibility in Ableton Live, FL Studio, or Logic Pro?
- Do I need to master a track in mono for streaming or club playback?
- Conclusion
What You Need
You need five things, and most of them are already in your room.
Your current stereo mix, bounced or on the master bus. Test the real output path, not a rough cut, because limiter and EQ moves change how a mix reacts in mono.
Headphones and a pair of speakers. Headphones reveal midrange phase problems that speakers blur. Speakers reveal low-end collapse. Use both, and if your interface has a mono or sum-to-mono switch, know where it is before you start.
A trusted reference track. Level-match it against your mix so you are comparing balance rather than loudness. Reference tracks built for mono playback make the comparison sharper.
Your DAW’s stock correlation meter and mono controls. Every DAW listed in the reference table below has both. If yours does not, free metering plugins such as Voxengo Span or MELDA MMultiAnalyzer will cover it.
A busy 20 to 30 second section of the song. Pick a chorus or drop where vocal, bass and drums overlap. A quiet intro will tell you nothing.
How to Check Phase and Mono Compatibility Step by Step
Seven steps, in the order that saves you the most time. Skipping to the meter first is how people end up chasing a number that does not match what they hear.
Step 1: Set Consistent Monitoring Conditions
Set your listening level once and leave it there. Bypassing a limiter to hear more clarity also changes the level, which changes how phase problems read on the meter and how tired your ears get by the third listen.
Level-match your reference track to your mix roughly by ear, then do the check in that same condition. A mono fold-down at a very quiet level hides low-end dropouts, because the missing bass is already near the noise floor. At an aggressive level, everything sounds like it is collapsing.
One caution on output paths: check that your monitor control or interface sum is engaging the master bus and not a separate cue mix. A mono switch placed after your master fader will not show the processing chain you think it is measuring.
Step 2: Locate Tracks That Become Weak in Mono
Flip to mono and leave the whole mix playing. Do not analyse anything yet, just listen and note what changes. Then work element by element: solo the kick, then the snare, then the clap, then the bass, then the lead vocal bus, and compare each against how it sounds in stereo.
Four things give a track away. It disappears almost entirely, which usually means it sits in only one channel. It gets an obvious gain boost, which means the other channel is partly cancelling it. It goes thin or hollow, which points to comb filtering in the midrange. Or it simply sounds unpleasant and forward, which is often a timing problem between takes rather than a polarity one.
Repeat each comparison a few times by toggling mono on and off rather than switching between two remembered states. Your ears adapt fast; alternating catches what a single sustained listen will miss.
Step 3: Read the Phase-Correlation Meter
A phase correlation meter shows how closely the left and right channels agree, on a scale from +1 to -1. +1 means the channels are nearly identical, 0 means they share little in common, and -1 means they are inverted copies of each other.
Most mixes land somewhere between +0.4 and +0.8 during loud passages and dip lower during wide, ambient sections. That is normal. There is no universal pass mark, because a heavily widened pad or a big hall reverb will drag the reading down while sounding exactly as intended.
Where it matters is on the elements you care about. Watch the meter while the kick and bass play alone, then while the lead vocal is soloed. If the reading dives toward zero or below during a specific instrument rather than during the reverb tail, you have found a real problem.
| Correlation reading | What it means | What mono does | Action |
|---|---|---|---|
| +1.0 to +0.8 | Channels nearly identical | Fully preserved | Nothing to fix |
| +0.7 to +0.4 | Normal stereo material | Mostly intact, slight level change | Listen for dips on key elements |
| +0.3 to +0.1 | Very wide material or strong decorrelation | Noticeable level loss and detail loss | Check low end and check specific instruments |
| 0 to -0.2 | Significant content cancelling | Parts weaken or disappear | Solo elements and find the offender |
| -0.3 and below | Substantial out-of-phase content | Obvious collapse | Fix before release; find the source with a null test |
| -1.0 | Channels are inverted copies | Silence | Look for a wrongly flipped or duplicated track |
Short transients also skew the reading. A single snare hit or a hi-hat pattern can drag the needle far lower than the sustained material around it, so judge the number over several seconds rather than one hit.
Step 4: Perform a Null or Phase-Cancellation Test
This is the precise way to check whether two copies of the same sound are timed and polarised identically. Duplicate the suspect channel so you have the original and a copy. Hard align the copy with the original: nudge it in small increments until the waveform peaks line up on the timeline.
Now invert the polarity of the duplicate, then solo the pair together and play. If the two are an exact match in both timing and polarity, they cancel and you hear near silence. What is left over is the part that is not identical: a low thump means the low end is offset, a comb-filtered texture means they are a few milliseconds apart, and a thin but present signal usually means a small level or processing difference rather than a timing fault.
In Logic Pro this whole job sits inside the Phase Multipressor in de-esser mode. Elsewhere it is duplicate, align, invert, solo. The test takes about a minute per suspect channel and it removes all guesswork.
Step 5: Check Polarity Without Confusing It With Phase
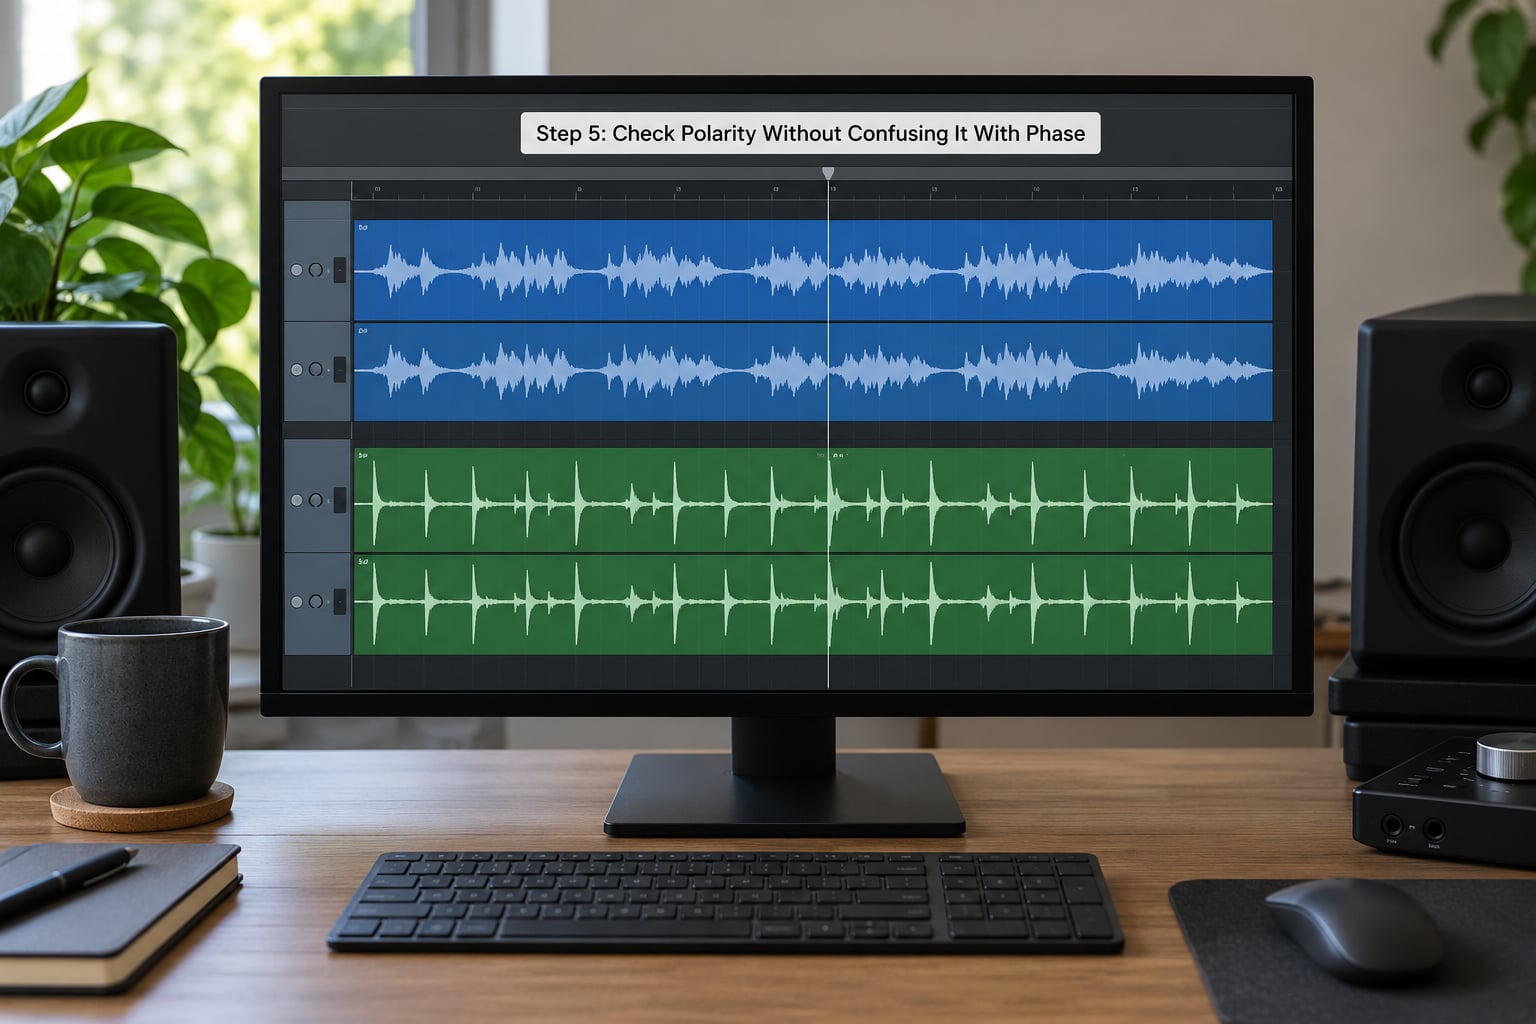
Polarity flips a waveform upside down. Phase describes the timing relationship between two signals. They are related, but they are not the same thing, and a flipped polarity button is not a phase correction tool.
The classic mistake is flipping an input, forgetting, and leaving the whole session reversed. On guitars, vocals and drums, that thins the mix in a way that is easy to mistake for a bad mix decision and hard to trace back. Check polarity at the start of a session, not in the middle of one.
Named controls: Ableton Live has polarity inversion in Utility and phase options around the track input and output, Logic Pro has phase controls in the Utility and I/O menu alongside the Phase Multipressor, Cubase has a Phase Invert button in the channel settings, Studio One offers it in its Utility plug-in, FL Studio uses the Fruity Balance phase knob, and Bitwig Studio has a Utility device with the same function. Reason’s mixer sits behind the Utility plug-in as well. Names shift between versions, so look in your channel or I/O section first.
Step 6: Audition the Entire Mix in Mono
There are four routes to a mono fold-down and any of them works. Use a mono utility or mono switch on the master bus, use your mixer’s mono or sum button, use a mono control on the monitor controller or interface, or set your operating system to mono audio as a last resort. The system-level setting is the least reliable because it lands after your interface monitor controls.
Listen to the full master in mono first, then audition isolated groups: the full drum bus, the bass and kick together, and the lead vocal with its doubles. Soloing groups is how you find the source of a collapse instead of just noticing it.
Do this in short passes of about a minute. Mono listening gets tiring faster than most people expect, and after a few minutes your judgement gets worse, not better.
Step 7: Verify Phase and Mono Compatibility Before Export
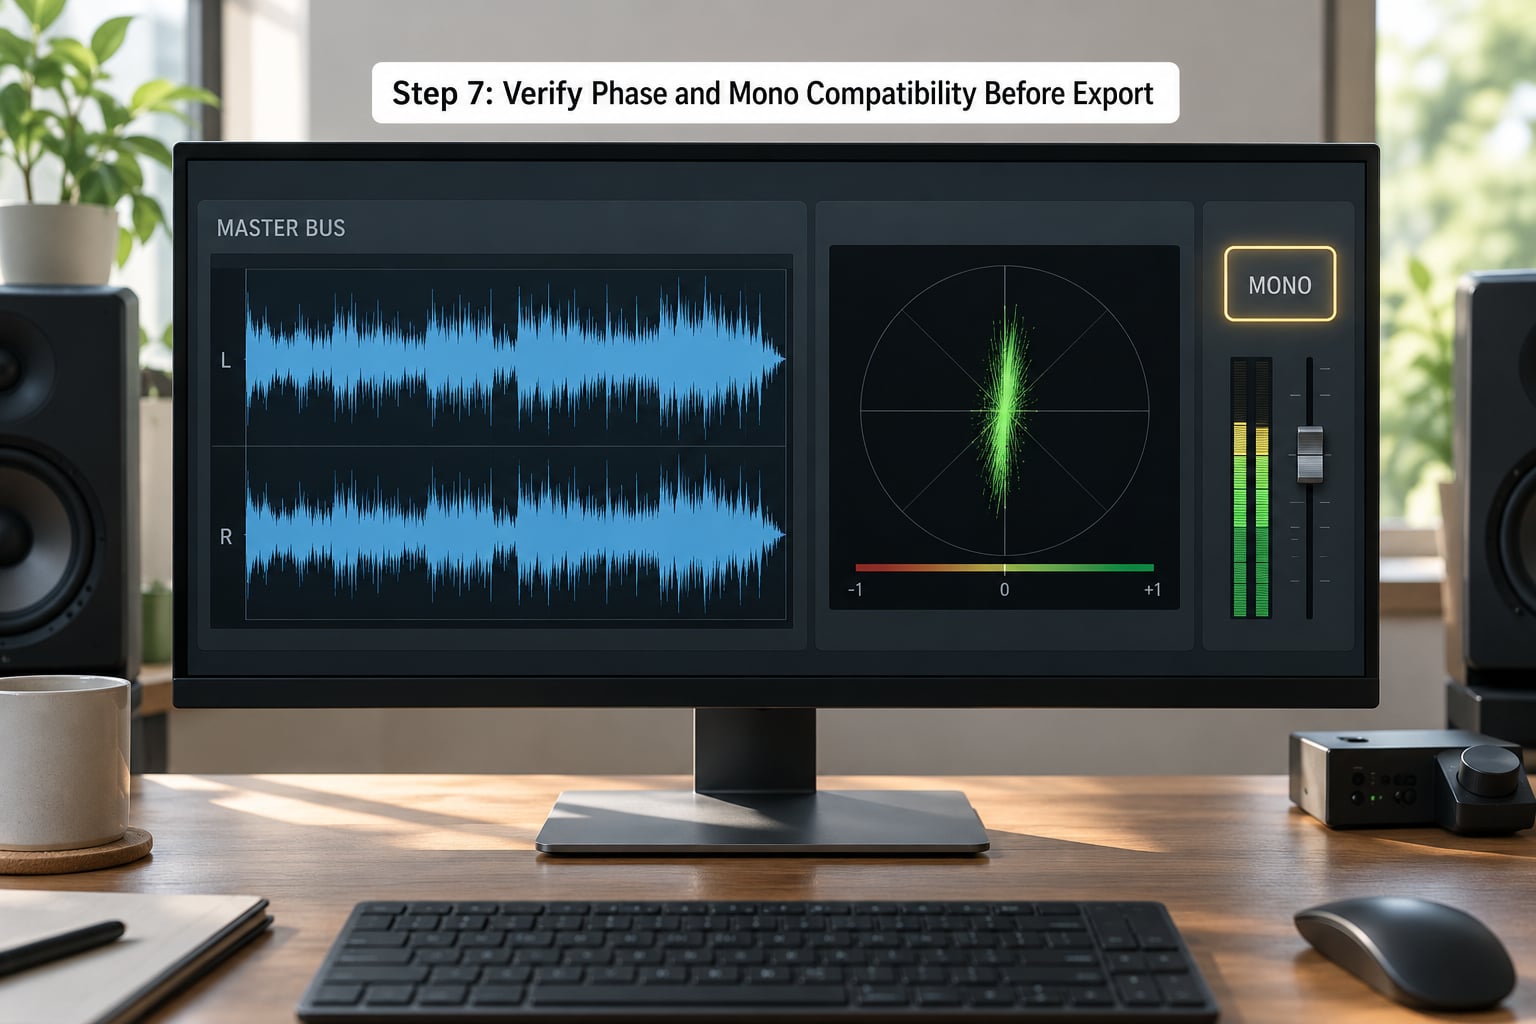
Play the whole arrangement in both stereo and mono, not just the chorus. Bridges, drops and dense sections are where phase problems hide because that is where the most doubling and the most effects stack up.
Write down any phase movement that is intentional. If a widening effect is supposed to collapse slightly in mono, note it so you do not chase it again next week.
Export a stereo master for release, and a separate mono bounce kept purely as a diagnostic file. Keep the mono file for reference, not for delivery, unless the client or platform specifically asks for it. Resist the urge to nudge timing globally to tidy up a meter reading; without a clear reference-based reason, global timing changes usually cost more than they fix.
Common Mistakes
Trusting the correlation number on its own. A reading of +0.2 can be a beautifully wide pad, or it can be a lost bass guitar. The number points at the problem; your ears tell you which part it is.
Testing only on headphones. Headphones mask the low-end dropout that matters most on a phone speaker. Test both.
Treating polarity as phase. One inverts, the other describes timing. Flipping everything is not a fix.
Aligning everything to the grid. Recorded audio does not always sit on the grid, and forcing it can introduce problems you did not have.
Soloing too many tracks at once. Solo in small groups or one at a time so you know what you are hearing.
Mastering before the fix. Get the mono collapse resolved in the mix. It is far harder to patch after compression and limiting have baked it in.
Changing five things at once. Save a version, fix one thing, listen, and move on.
Fixes for Common Phase and Mono Problems
Once you know which element is causing the collapse, the fix usually falls into one of four categories: timing, polarity, filtering, or stereo width.
Bass and kick disappearing. It almost always comes down to a stereo low end. Keep bass and kick energy mono below roughly 100 Hz, going lower for club and techno work where systems are mono anyway. On a mid-side EQ, take the side channel out of the bottom octaves with a steep high-pass. Everything under that crossover should exist in the mid channel only.
Frequency-dependent phase shifts from multi-mic and multi-amp sources. Guitar amps on different mics, drum overheads, and stereo condenser pairs all shift phase with frequency. Small timing nudges fix low mids; some cases need a dynamic EQ cut at the specific cancelling frequency instead.
Vocal doubling. Doubles panned wide and unprocessed can cancel in mono. High-pass the sides, or narrow the double with a stereo widener on its mid channel, so the two copies reinforce rather than fight.
Stereo reverb returns. Keep the reverb itself wide but filter its sides below the same 100 Hz mark, otherwise the reverb low end fights the dry low end.
Sidechain compression. Pumping from opposite sides of the image creates moving phase problems. Sidechain from a mono or mid-channel trigger instead.
Chorus, flanger and Haas delays. These generate phase movement by design. Use them on sends or returns, keep the affected band narrow, and re-check mono after any change, because each tweak moves the picture again.
Saturation and multiband processing. These act differently on each channel. Check the mix in mono after adding them rather than trusting the stereo image.
Quick DAW Control Reference
Labels change between versions, and some DAWs need a third-party meter for correlation. Check your own version’s menu names.
| DAW | Correlation meter | Polarity control | Mono audition |
|---|---|---|---|
| Ableton Live | Meter options in the master or session meters | Utility device, track input and output options | Utility mono mode on the master or a group |
| Logic Pro | Metering plus Phase Multipressor de-esser nulling | Utility plug-in and I/O menu | Utility mono setting or a hard-panned monitor send |
| FL Studio | Use a metering plug-in on the master | Fruity Balance phase knob | Mixer channel mono switch on the master |
| Cubase | Metering in the audio mixer, or a plug-in | Phase Invert in the channel settings | Mono toggle in the channel settings or mixer |
| Studio One | Console channel metering, or a plug-in | Utility plug-in phase invert | Console channel mono or mid/side buttons |
| Bitwig Studio | Phase Meter device from Utilities | Utility device phase option | Mono device on the master bus |
| Reason | Use a metering plug-in | Utility plug-in | Mixer routing or the Utility plug-in |
Export Checklist
Run through this once before you call a mix finished.
Confirm the mono switch sits on the master output after your full chain, not on a cue send. Play the full arrangement in mono from the top, not just the loudest section.
Switch back to stereo and check the same moments, then compare against your level-matched reference track. Listen once on headphones and once on speakers.
Look at your limiter and dither settings on the stereo master, since those are chosen for the stereo file and should not be altered by your diagnostics. Keep the mono bounce in a separate folder and never let it overwrite the stereo master.
If the platform or client wants a mono file, export it as a separate version rather than flattening your stereo master.
Frequently Asked Questions
What phase-correlation reading should I aim for in a stereo mix?
Most full-mix passages sit between +0.4 and +0.8, and that range is perfectly healthy for most music. There is no universal pass mark, because a wide pad or a long reverb tail will pull any reading down while sounding as intended. Judge the number on the elements that matter: watch it with the kick and bass alone, then with the lead vocal soloed.
Why does an instrument disappear when I check my mix in mono?
It usually means that instrument’s energy sits mostly in one channel, so the mono sum has almost nothing left from it. A bass that lives only on the left, or a guitar double panned with no mid content, will thin out or vanish. Solo the track in mono, check whether it is present in both channels, and if it is not, bring the low mids back into the mid channel.
Is phase the same thing as polarity?
No. Polarity inverts a waveform so it flips upside down. Phase describes the timing relationship between two signals, whether one arrives slightly before or after the other. Flipping polarity can accidentally fix a microphone or cable problem, but it does not correct a timing offset. Aligning timing is what fixes phase; polarity is a separate, simple on-off switch.
How do I check mono compatibility in Ableton Live, FL Studio, or Logic Pro?
All three put a mono control on the master path. In Live, use the mono mode on a Utility device on the master track. In FL Studio, use the mono switch on the master mixer channel. In Logic Pro, set the Utility plug-in to mono or hard-pan a monitor send. Add a correlation meter for Live, or a metering plug-in for FL Studio, and watch it while you solo each element.
Do I need to master a track in mono for streaming or club playback?
No, and doing so usually hurts. Streaming services and phones play back in stereo, so a mono master loses the width you worked on. Club systems are often effectively mono, which is why you check mono compatibility, not why you master in mono. Keep a mono bounce as a diagnostic file so you can spot collapse, and deliver the stereo master.
Conclusion
Start simple: flip the master to mono and solo the kick, snare, bass and lead vocal one at a time. Whatever weakens, disappears or sounds hollow is your suspect.
Watch the correlation meter on that suspect to see how bad it gets, then run a null test on it: duplicate, align, invert the polarity, solo the pair, and hear exactly what is left over. Fix the timing or the stereo content there, check the full arrangement again in both stereo and mono, and keep that mono bounce around for the next session.