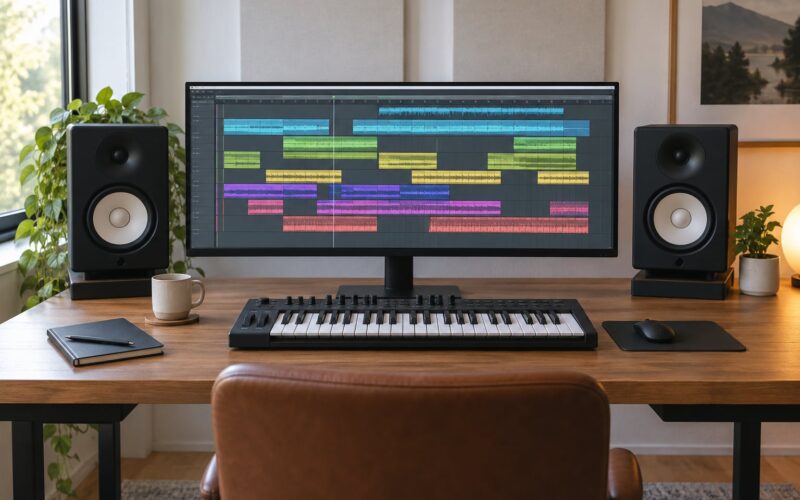
An uplifting trance track is built from repeating sections in 4/4 at roughly 138 BPM: intro, build-up, breakdown, pre-drop build, drop, and outro. Learning how to structure an uplifting trance track is mostly about bar counts and energy changes, not exotic sound design.
Six sections, arranged in that order, with a second build and drop added once the first one lands. That is the whole skeleton, and it is the shape most released uplifting trance has used for two decades.
The genre gets called formulaic for good reason. What separates a track people finish from one they skip at forty seconds is not a cleverer synth patch; it is how much you take away before you give the drop back.
Below is a nine-stage workflow with real bar counts and runtimes at 138 BPM, so the maths actually adds up to a full-length track instead of the three-minute loop most tutorials quietly produce.
Table of Contents
- What You Need
- Step-by-Step: How to Structure an Uplifting Trance Track
- 1. Define the Core Loop and Track Purpose
- 2. Arrange a Short Musical Introduction
- 3. Establish the Groove, Bass, and Harmonic Center
- 4. Introduce the Melody and Uplifting Character
- 5. Build Tension and Remove Energy for Contrast
- 6. Create the Climactic Drop: the Peak of the Uplifting Trance Track Structure
- 7. Shape the Release After the Drop
- 8. Design a Stronger Final Section
- 9. Finish with an Intentional Outro and Full Review
- Common Mistakes
- Frequently Asked Questions
- What BPM is best for an uplifting trance track?
- How long should an uplifting trance intro be?
- What should happen during a trance breakdown?
- Do uplifting trance tracks need vocals?
- How do I structure a shorter uplifting trance edit?
- Conclusion
What You Need
A finished core idea is the one thing you cannot fake. It can be eight bars of a kick, a bassline and one chord stab, but it has to exist before you open a timeline, because the arrangement serves the idea rather than the other way round.
Around that idea you need a DAW you actually know, a drum kit, a synth for bass, a synth or two for lead and pads, and one distinctive sound of your own. That last item is what makes the track memorable, and it is the first thing to find. A single recognisable element, even a strange texture, outranks five generic layers.
You also want a reference track in the style you are aiming at, a rough target duration (most released uplifting trance sits between six and eight minutes), and headphones or monitors for checking the low end.
The method below is DAW-neutral. Ableton Live uses Scenes in Arrangement View and Session View for launching ideas; FL Studio keeps audio in the Playlist with the Channel Rack holding patterns; Logic Pro X and Cubase arrange on a track-based timeline with locators; Studio One calls the timeline a Song section; Bitwig organises with Segments; Reason arranges through Blocks in Song mode rather than one continuous timeline. Same nine stages, different button names.
Step-by-Step: How to Structure an Uplifting Trance Track
The workflow runs in nine stages: define the core loop, arrange the introduction, establish groove and harmonic centre, introduce the melody, build tension, create the drop, shape the release, design a stronger final section, and finish with an intentional outro.
Arrange the timeline around energy changes rather than a fixed genre template. The bar counts below are starting points; adapt them to your track, to vocal content if you have any, and to whether the track is destined for a DJ set or a streaming release.
At 138 BPM in 4/4, one bar lasts about 1.74 seconds, so a 16-bar phrase is roughly 28 seconds and a 32-bar phrase is roughly 56 seconds. Everything in this table uses that number.
| Section | Bars | Runtime at 138 BPM | What plays | Energy (1-5) |
|---|---|---|---|---|
| Intro | 32 | 0:56 | Filtered pad, reverse cymbal, distant hats | 1 |
| Build-Up 1 | 32 | 0:56 | Kick, offbeat hats, bass enters on bar 17 | 2 |
| Breakdown 1 | 32 | 0:56 | Pad, arp, lead motif, no kick | 2 |
| Pre-Drop Build | 16 | 0:28 | Snare roll, riser, filter sweep | 3 |
| Drop A | 48 | 1:23 | Full kick, bass, lead, claps, sidechain | 5 |
| Post-Drop Break | 16 | 0:28 | Drums out, filtered arp or vocal chop | 2 |
| Breakdown 2 | 32 | 0:56 | Variation of breakdown, changed harmony | 3 |
| Pre-Drop Build 2 | 16 | 0:28 | Different riser, longer snare roll | 4 |
| Drop B | 32 | 0:56 | Everything, lead in higher register | 5 |
| Outro tail | 8 | 0:14 | Final loop, elements fade, reverb tail | 2 |
That is 264 bars, or about seven minutes thirty-nine seconds at 138 BPM. Every section lands on a 16-bar or 32-bar boundary, which is what keeps the track mixable.
1. Define the Core Loop and Track Purpose
Pick the main rhythmic loop, the core key, an approximate BPM, a total duration and the listening context, then write a short production brief covering mood, contrast and the role of vocals if you have them. Most producers skip the brief and pay for it later.
One concrete test: loop the eight or sixteen bars on its own. If it works alone and immediately reads as the trance style you are going for, you have a core. If you need the whole track to make it work, the loop is too thin or the idea is not finished.
Decide the starting order too. Bass first gives you groove and harmonic movement, which suits most beginners. Melody first gets you an emotional hook that you then have to fit drums around. Either works; what fails is switching approach halfway through.
2. Arrange a Short Musical Introduction
Open with atmosphere, filtered elements, subtle percussion or a recognizable motif rather than presenting every sound at once. Thirty-two bars at 138 BPM, about fifty-six seconds, is a working default for a club release. DJ-friendly openers can run to 64 bars.
Use automation, long fades and simple arrangement removals to reveal the core idea gradually. Mute a layer you liked in the loop, then bring it back later; that contrast is what makes the intro feel intentional rather than empty.
You know the intro is working when a listener describes something happening in it. If they just say nothing is going on yet, add one event per phrase: a filtered riser, a chord swell, a vocal chop.
3. Establish the Groove, Bass, and Harmonic Center
Build drums, bass and a clear tonal centre before any melodic material. Four-on-the-floor kick, 4/4, offbeat hats for the trance shuffle, and a rolling offbeat bassline that follows the root note of the chord underneath it. Sidechain compression on the bass and pads from the kick gives the whole thing its pulse.
Reinforce the kick with supporting rhythm rather than piling on low end. If the kick and bass are fighting, high-pass the bass around 40 to 60 Hz and let the kick own that band. Keep pumping depth modest; heavy sidechaining is the most common cause of distortion in beginners’ low end.
The listening test is balance and clarity: kick audible on small speakers, bass still moving on headphones, and a chord progression you can name. If you cannot name the chords, they are probably not doing enough.
4. Introduce the Melody and Uplifting Character
Add the lead motif or chord progression, then shape its brightness, register and movement. Uplifting harmony comes from major or suspended chords, a bright top end and controlled resonance, so open the filter and lift the octave for the chorus-feeling sections rather than adding more layers.
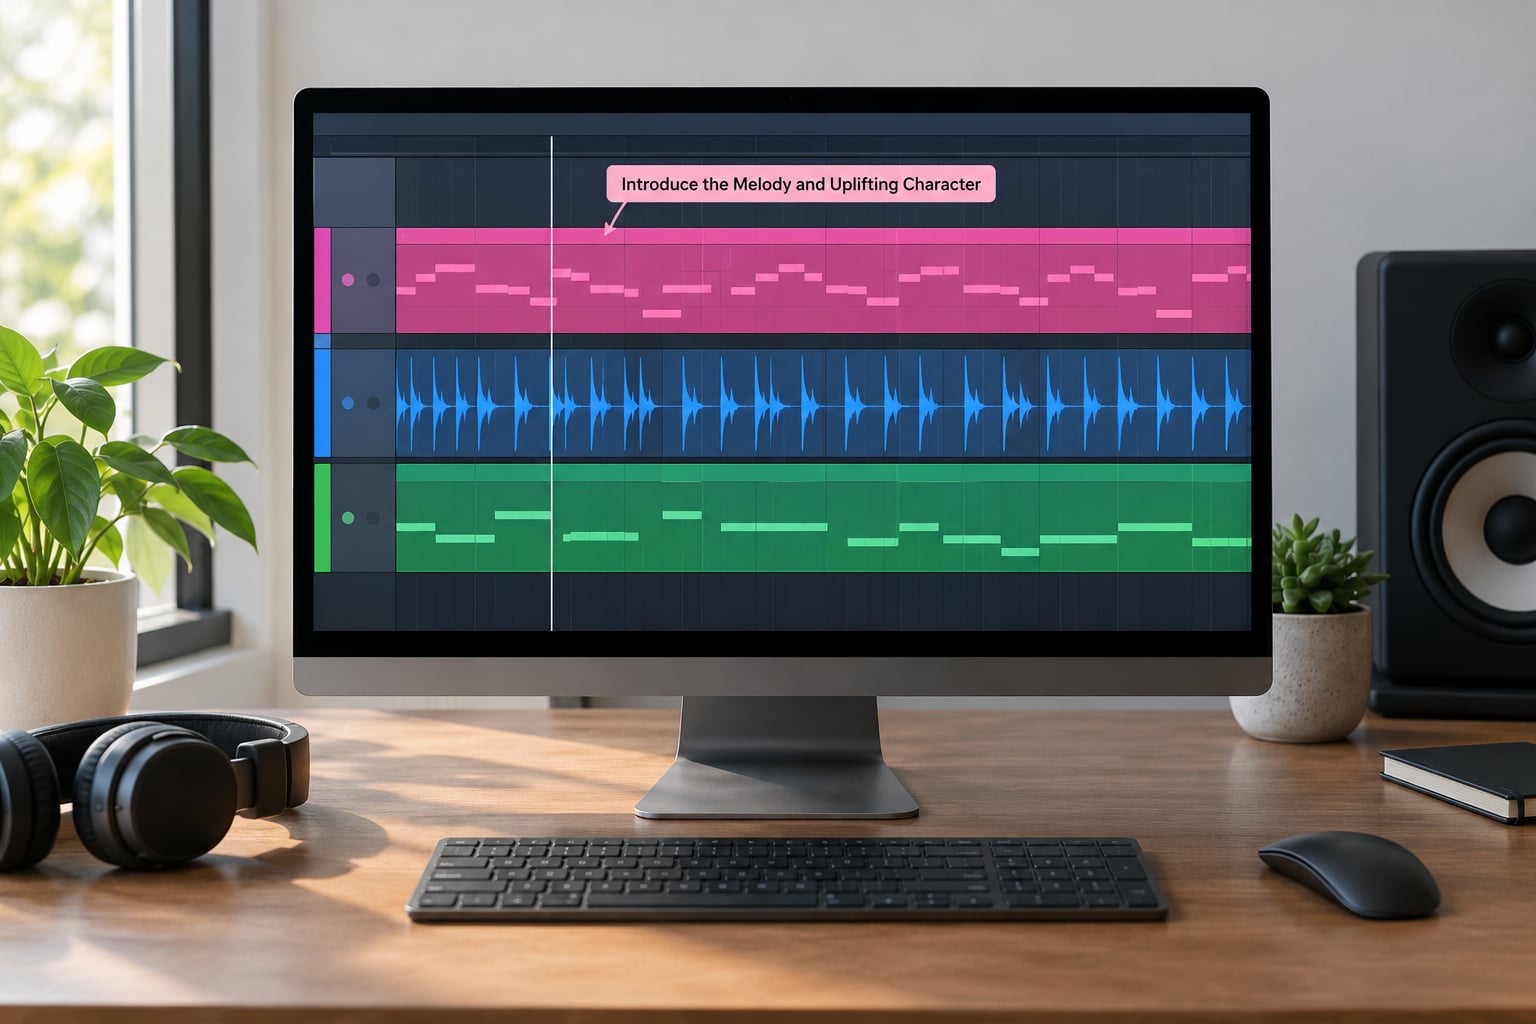
Rhythmic variation matters as much as note choice. A restrained first statement sits well with a short motif over the arpeggio; a fuller melodic statement adds the supersaw lead an octave up with slower note lengths and slightly higher velocity. That contrast in note length is what makes the fuller version feel bigger without more layers.
Keep the motif short enough to remember. Three to eight notes is enough, and it pays off when you can return to it in a different key or register later.
5. Build Tension and Remove Energy for Contrast
Risers, snare rolls, reversed sounds, filter sweeps and repeated automation all create anticipation. Pick two, not five. The pre-drop build is sixteen bars in the table above, and its job is to narrow attention rather than add volume.
A breakdown should feel lighter and more spacious without becoming empty. Kick out, hats out, bass out; pad, arp and the lead motif remain. If you cannot hear the change in density when you close your eyes, you did not strip enough back.
Test tension by jumping to the drop from two bars before, then again from the very start of the build. If the jump from the start feels abrupt rather than gradual, your riser is too short or too loud relative to the breakdown.
6. Create the Climactic Drop: the Peak of the Uplifting Trance Track Structure
Drums, bass and the main motif enter together on the downbeat of bar one of the drop, then supporting texture and sound-design accents follow. Nothing should arrive alone at the top: an impact hit with no full-band entrance underneath it sounds like a mistake, not a climax.
Impact here comes from arrangement and contrast, not from turning up the master. Three checks worth running: the drop still makes sense on phone speakers, the lead melody is still legible after the sidechain ducking, and the low end does not distort on the first four bars.
Save your loudest layer, your most complex modulation and your most distorted bass patch for this moment only. If it is already loud in the breakdown, there is nowhere left to go.
7. Shape the Release After the Drop
Move from maximum density into a controlled post-drop section by removing selected elements rather than dropping everything at once. Sixteen bars with the kick out and a filtered arpeggio or vocal chop keeps momentum without fatigue.
Short breaks, filtered returns, bass movement and melodic fragments all serve the same goal. The common failure is the track simply ending after drop one, which is exactly what r/edmproduction producers describe when they ask what to do with a loop that is finished but not a song.
With vocals, let a phrase or a filtered vocal repeat under the post-drop drums. Without vocals, a counter-melody an octave up or a plucked arp sequence fills the space instead. The section should feel like a continuation, not a gap.
8. Design a Stronger Final Section
Plan a second breakdown or variation that changes expectations before the final drop. Meaningful differences include a new melodic layer, altered harmony, different percussion, heavier filtering or a deliberately delayed entrance to the main motif.
The failure mode here is copying the first build and drop, then reaching for louder sounds to justify the repetition. If your second build is identical in arrangement and instrumentation, the listener has already heard the payoff.
One reliable approach: keep the drum pattern and bassline but move the lead up a register and swap the harmonic centre of the pad. Same rhythm, different light, which is the point of a second drop.
9. Finish with an Intentional Outro and Full Review
Create a controlled ending with a final loop, an edit, a tail or a sustained texture, then review the whole structure away from the session. Loop the transitions several times; anything that only works once is a transition, not a transition that works.
Check the transitions, the loop length, the contrast between neighbouring sections, arrangement density, automation moves, and whether anything clips. Then compare the finished track against your original brief from step one.
Export a reference-quality version and sit with it for a day before any further work. Most arrangement problems are obvious the next morning and invisible during a six-hour session.
Common Mistakes
Stacking layers with no arrangement plan is the big one. Producers add layers because something feels thin, then end up with a breakdown at the same density as the drop, so the drop lands flat. Fix it by deciding what each section does before you open the plugin window.
Identical section lengths make a track feel like a loop with padding. Sixteen and thirty-two bars are the building blocks, not the design. Vary between them and let one section run long when the idea needs it.
Breakdowns that feel empty are usually breakdowns with nothing but reverb. A clear arpeggio line, a vocal phrase or a filtered motif gives the ear somewhere to go while the energy is low.
Automating every parameter makes a track exhausting to listen to and hard to mix. Pick two or three things to move per section and leave the rest static.
White-noise risers are the most overused sound in the genre, and they have been since around 2010. A snare roll and a filter sweep on the pad usually do the same job and sit better in the mix.
A muddy kick and bass is a sidechain and EQ problem, not a volume problem. High-pass the bass, set the sidechain release so it does not distort, and check the low end on a small speaker.
Announcing the drop too late is the same mistake as leaving the breakdown too dense. The tension work belongs in the sixteen bars before the drop, not in the drop itself.
Mastering before the arrangement works is the most expensive habit. Nobody fixes a weak energy arc with compression, and reference material makes the problem obvious quickly.
The loudest objection to any of this is that prescriptive recipes destroy genres, and there is a real argument for it in the comment threads on the most-linked structure tutorials. The middle path is straightforward: treat the nine stages above as a checklist for what your track needs, not as a template to fill. Recreate a reference track bar by bar so you learn what each layer does, then write your second track from the arrangement rather than the recipe.
A few habits help more than any single tip. Loop the section transitions, take listening breaks of at least a day between sessions, and save your strongest idea for the main drop instead of the intro.
Frequently Asked Questions
What BPM is best for an uplifting trance track?
Most released uplifting trance sits between 132 and 140 BPM, with 138 a solid centre for the classic style. The tempo matters less than the pulse it creates: pick a speed where your offbeat hats and 16th-note basslines feel natural without rushing. If your drums are programmed, start at 138 and nudge by one or two BPM until the groove sits right, then keep that number for the whole track.
How long should an uplifting trance intro be?
Thirty-two bars at 138 BPM is about fifty-six seconds and works well as a default intro for a club release. Producers who want more mixing room for DJs run to sixty-four bars, roughly one minute fifty seconds. Keep the section a whole number of 16-bar phrases so the boundaries stay DJ-friendly, and put your first identifiable idea inside it rather than waiting until the build-up.
What should happen during a trance breakdown?
The breakdown strips the track back so the listener wants the kick back. Remove the kick, most percussion and the bass, then keep a pad, an arpeggio and the lead motif or a vocal phrase. The section should feel spacious, not empty: give the ear one clear melodic line and let the reverb and delay do the rest. Density before the drop is what makes the drop land.
Do uplifting trance tracks need vocals?
No. Plenty of released uplifting trance is entirely instrumental, and the melody carries the emotional peak on its own. Vocals change the arrangement rather than being required, because a phrase needs space around it and the breakdown usually restructures around the words. If you have vocals, plan where they sit in the breakdown and the post-drop section so the instrumental parts do not compete.
How do I structure a shorter uplifting trance edit?
When you structure an uplifting trance track for a festival edit, cut the second breakdown and shorten drop two rather than trimming every section evenly. A workable shape is 32-bar intro, 32-bar build, 32-bar breakdown, 16-bar pre-drop, 48-bar drop, then a 16-bar outro, which lands near four minutes at 138 BPM. Keep every section on 16- or 32-bar boundaries so DJs can still mix it.
Conclusion
Uplifting trance runs on a repeatable skeleton: intro, build-up, breakdown, pre-drop build, drop, second breakdown, second drop, outro, all built from 16-bar and 32-bar phrases.
Start today by locking your eight-bar core loop, then drawing that energy arc on the timeline before you add anything else. Check the contrast at the end of every section, and resist the urge to fill the quiet parts.