The fastest way to organize your sample library is to give every file one permanent home, a shallow folder tree built around what the sound does, a filename that carries its key and tempo, and a second copy somewhere you do not work. Set that up in an afternoon and hunting for a sound stops being a ten-minute detour.
Most library mess is drift, not bad taste. You download a pack, drag five sounds out of it into a folder called new stuff, and six months later that folder is 4,000 files deep and unfindable. Fixing it once, properly, beats rebuilding it every year.
This guide walks through the whole workflow: auditing what you already own, building the folder tree, naming files, tagging by production task, wiring the library into your DAW, testing it under pressure, and keeping it alive with backups. It works the same whether you make techno, film scores or beats, because the parts that matter are about files, not genres.
Table of Contents
- What You Need
- Step-by-Step: How to Organize Your Sample Library in Seven Stages
- 1. Audit and inventory what you already have
- 2. Create one master sample-library structure
- 3. Normalize filenames and add useful metadata
- 4. Tag by how you create music
- 5. Connect collections to your DAW by indexing the master folder
- 6. Test the system with a real production drill
- 7. Back up, maintain and improve the library
- Check Your Folder Structure and Smart Collections
- Check Metadata in a DAW Browser
- Common Mistakes That Ruin a Sample Library
- Frequently Asked Questions
- Should I organize samples with folders, tags, or both?
- Can I keep my sample library on an external SSD?
- What happens to samples that are already inside my DAW projects?
- Are smart collections worth using in a small sample library?
- How often should I reorganize my samples?
- Start With One Clean Master Folder
What You Need
You need four things, and three of them are free. First, a dedicated drive for samples that is not your system drive and not the drive you browse for other files.
An internal SSD is fastest, and a decent external SSD over USB 3.2 is genuinely close behind for sample browsing. What matters more than raw speed is that the path never changes, because every project you have ever made points at it.
Second, one plain master folder on that drive. Not a drive root, not a folder buried inside your music folder. Something like /Samples that you can type from memory in six months.
Third, a backup location: a second drive you do not work from, or a cloud sync folder if you also work on a laptop away from the studio. One backup is not a backup.
Fourth, your DAW’s browser. Ableton Live 12, FL Studio 2025, Logic Pro 11.1, Cubase 14, Studio One 7, Bitwig Studio 5 and Reason 14 all have some way to point at folders on disk and read metadata from them. Menu names and indexing behaviour differ between them and between operating systems, so treat the steps as directions rather than exact clicks.
Step-by-Step: How to Organize Your Sample Library in Seven Stages
1. Audit and inventory what you already have
Count first, sort second. Open your sample locations and get a real number: how many files, how many gigabytes, how many folders deeper than three levels.
On macOS, select a folder and press Option-click the folder count in the Finder window status bar. On Windows, right-click a folder, choose Properties, and look at the Files and Folders figures. Write the totals down somewhere boring and stable, like a text file in your master folder.
Duplicates are the single biggest source of clutter, and they are easy to spot once you know the three signals. File size and byte count first, then duration, then the waveform itself. Two identical kicks in five different packs differ in filename and metadata but not in shape.
If your tools offer it, go further. Audio fingerprinting or checksum comparison catches near-duplicates where a pack was lightly re-encoded, which size and duration alone will miss. Most DAWs can show a waveform preview, so twenty seconds of listening in a narrow column is often faster than any hash tool.
Do not delete anything yet. Build a staging folder, drag the duplicates and the packs you have not opened in a year into it, and confirm the master structure exists before you remove anything from your live library. A file you can still hear beats a file you assume you will never need.
You will know stage one worked when the staging folder holds everything you were unsure about and the total file count in your live library has dropped without a single project breaking.
2. Create one master sample-library structure
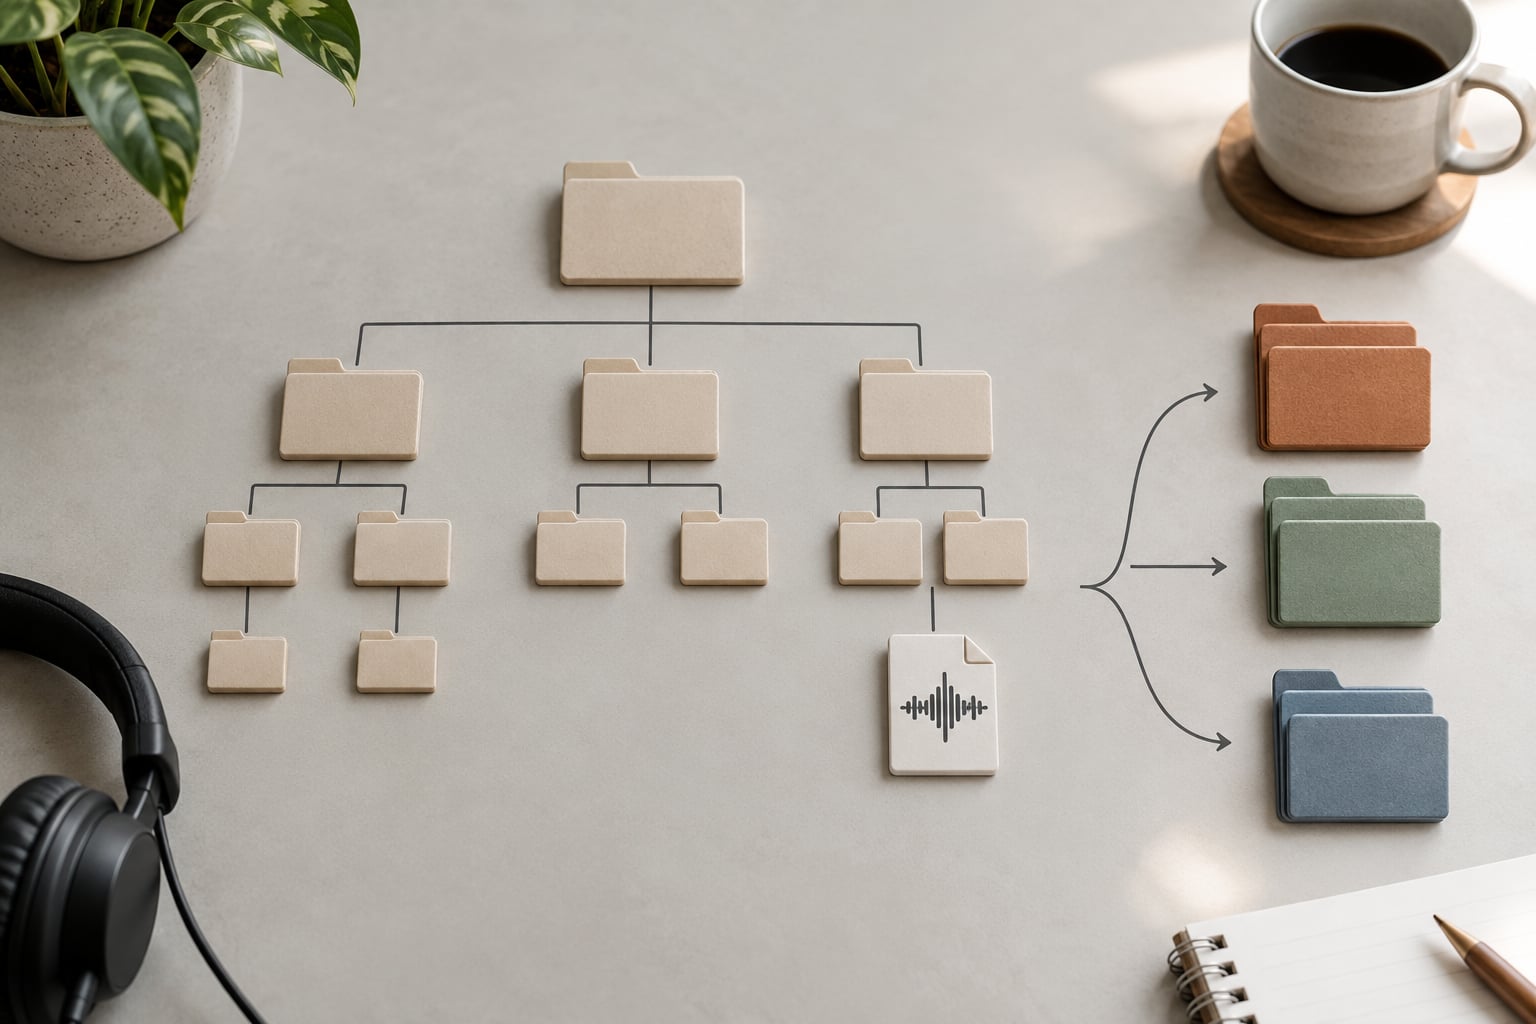
Organize by sonic role first, and only by genre second. Roles are what you reach for mid-session; genres are what the pack was sold to you as.
Keep the tree shallow. Two or three levels is the target, four is the ceiling, and a folder holding more than roughly 200 files is a failure state you should fix. Deep trees cost you a click on every retrieval, and 1,000 files in one folder turns browsing into scrolling.
Samples/
├── _INBOX/            new downloads land here, nothing else does
├── Drums/
│   ├── Kicks/
│   ├── Snares/
│   ├── Claps/
│   ├── Hats/
│   └── Percussion/
├── Bass/
│   ├── Sub/
│   ├── Reese/
│   └── Movement/
├── Synths/
│   ├── Leads/
│   ├── Pads/
│   ├── Plucks/
│   └── Atmospheres/
├── Vocals/
│   ├── Chops/
│   └── Full Phrases/
├── FX/
│   ├── Riser Impact/
│   ├── Sweeps/
│   └── Ambience/
├── Loops/
│   ├── House/
│   └── Trance/
├── Construction Kits/
├── Field Recordings/
├── _Favorites/        the sounds you actually reach for
└── _Spares/           quarantined leftovers, not deleted, just parked
That is the whole template. The three underscore folders do more work than the other ten. New packs arrive in _INBOX only, so you always know where the unprocessed stuff is. _Favorites holds maybe five to ten sounds per category, and when a project needs a kick you open that folder and you are done. _Spares is where anything ambiguous goes instead of getting a seventh level of nesting.
For a trance and house workflow, Drums/Kicks gets split by character rather than by brand, because you choose a kick by feel, not by who made it. Something like Kicks/Sub Heavy, Kicks/Click Punchy and Kicks/Soft Round beats Kicks/PackA_07 every time.
Do not try to encode genre, instrument, key, mood and tempo as nested folders at once. That is five dimensions multiplied into a thousand near-empty directories. Folders hold the role; the filename and tags hold the rest.
3. Normalize filenames and add useful metadata
Vendor filenames are noise. Audio_47_FINAL_v3_rebake.wav tells you nothing at 1am, and sorting by name puts every pack’s kick in a different place.
Use one pattern for the files you care about: Source_Type_Key_BPM_Version, underscore-separated, lowercase, no spaces. Fill only the fields that apply.
Here is what that looks like on real vendor names:
Audio_47_FINAL_v3.wavbecomeskick_punchy_f_128_03.wav. You gained type, tone, root note, tempo and take number.loop_trap_music_2.wavbecomesloop_trap_min_f_128.wav. Character and tempo replace the vendor’s vague “music”.Ambient Texture 07.wavbecomesatmos_wash_min_90.wav. The folder already said atmosphere, so the filename says what it is doing.sy-0001.nkfbecomespreset_lead_wide_f.nkf. A serial number tells you nothing six months later; content type does.My Track 12 (final FINAL).alsbecomesproject_rhythm_vocal_f_128_v3.als. Source, key, tempo and version, all readable while scrolling.
Renaming in bulk is worth the ten minutes. Every operating system has a batch rename tool that can find and replace a pattern across a selected folder, and there are free utilities that apply the whole scheme from a template. Preview on ten files before you commit to ten thousand.
Two cautions. First, never rename files while your DAW is indexing that folder, because the scan reads a half-written name and the entry can stick around wrong until you refresh it. Close the DAW or point it elsewhere first.
Second, renaming changes nothing about the audio, so it is safe for samples, but presets and project files carry embedded references. Renaming a preset is usually harmless; renaming a project file or moving a Kontakt library out of its own folder can break links. Make a copy before touching those.
The check: open any ten files in your browser and confirm name, key, BPM and file type all match. If a row still shows the old name, you renamed something the scan had already cached.
4. Tag by how you create music
Folders answer “where does this live”. Tags answer “what do I need right now”, and the second question is the one that actually costs you time during a session.
Tag by production task, not by cataloguing theory. Useful tags for club and trance work include uplifting trance lead, punchy house drums, bass movement, transition and ambient texture. Those are sounds you will ask for in a sentence. genre: electronic is not.
The fields worth keeping are short and specific: role, genre, energy level, key, BPM, loop length in bars, instrument, and your own rating from one to five. You do not need all of them on every file. A kick needs role, tone and rating; a loop needs key, BPM, bars and energy.
Most DAWs will read BPM and key automatically from the file’s embedded metadata, which saves you typing on every loop. Check whether your browser actually surfaces those columns before you hand-tag thousands of files, because typing metadata that the browser never displays is a wasted evening.
Ratings beat deletion for anything borderline. A star or a rating column gives you the Gearspace answer in a form that works: tag your ten favourites per sound type and let the rest exist until storage forces the question.
5. Connect collections to your DAW by indexing the master folder
Point the browser at the master folder, let it scan, and use collections for the tags. The exact menu names below are for current versions and change between releases, so check your own DAW’s documentation if the path has moved.
Ableton Live 12. Use the Browser’s Add Folder control to add a location, and add folders under Preferences > Paths so Live scans them into the User Library. Enable recursive scanning if you have subfolders you want visible. Press Refresh in the Browser after big changes rather than restarting Live.
FL Studio 2025. Extra search folders live under the Options menu, and the browser’s Reread structure action forces a rescan when new files do not appear. The Starred tab and browser tags cover the favourites and task layers.
Logic Pro 11.1. Manage sample locations from File > Sounds Library Management, then read them through the Environment’s Sounds node. The Sampler instrument reads metadata and can build a search from it directly.
Cubase 14. MediaBay is the index. Add folders in the MediaBay setup dialog, mark them as an active archive, and let the detector read metadata so columns stay populated.
Studio One 7. Drag or add folders into the Browser and build virtual folders from them. Studio One leans on folder structure more than metadata, so this stage matters more here.
Bitwig Studio 5. There is no global index. You add sample directories to a project, and Bitwig’s Package system can embed or reference a folder tree. That makes Bitwig the one DAW where the folder structure has to be right before you open it.
Reason 14. No permanent library index either. Reason works from disk folders plus device routing, so the master folder path matters more, not less.
Whichever DAW you use, the verification is the same: open the browser, search for a file you know exists in a deeply nested folder, and confirm it appears with its key and tempo populated. If the search returns nothing, the folder is not indexed rather than mis-named.
6. Test the system with a real production drill
A structure that looks tidy on paper can still be slow in practice. Test it the fastest way to organize your sample library: make something real for twenty minutes and watch where you stall.
Start a 120 BPM house sketch, or an uplifting trance idea if that is your usual tempo. Then retrieve four sounds without opening a file browser window or scrolling a folder: a kick, a bass sound, a lead, and one transition or riser.
Time yourself honestly. Under ten seconds each means the library is working. Thirty seconds means something is in the wrong place or mis-tagged, and you just found it before it wastes an evening.
When retrieval is slow, the cause is usually one of four things. The sound sits in a folder named after the pack rather than the role. The category is too broad, so you get 800 results anyway. Nothing is tagged, so a text search misses it. Or the same sound exists in three folders and you cannot tell which one the last project used.
Fix only what the drill exposed. A system rebuilt from scratch every month never gets used, and you will end up browsing files again out of frustration.
7. Back up, maintain and improve the library
Keep at least two copies, and know which kind of backup you are running. A mirror copies files and keeps the version you edit. A sync service propagates changes everywhere and can propagate deletion too, which is why a synced library wants versioning turned on.
The rule that has saved the most libraries: never move files out of the master folder. Moving breaks the path stored inside every project that references them, and each break means hunting through old sessions for the sound you cannot find. Copy in, and delete from the old place only once the new place is indexed and you have opened a project that uses those files.
Verify the backup rather than assuming it. Open a few files from the archive, including one long ambience file and one preset. A backup that has never been opened is a hope, not a copy.
Then set a fifteen-minute monthly reset. Empty the downloads folder into _INBOX, process what is in there, rate the new sounds, move anything you did not rate twice out to _Spares, and delete the staging folder contents once you are sure.
Re-index only when something is genuinely missing from the browser. Full rescans of a large library take a long time, and doing them on a whim teaches you to avoid the refresh menu.
When you move to a new computer, copy the master folder to the same path on the new machine before you install anything that references samples. Open one old project per DAW you use and confirm nothing is reported missing. That single test tells you whether the move worked.
Check Your Folder Structure and Smart Collections
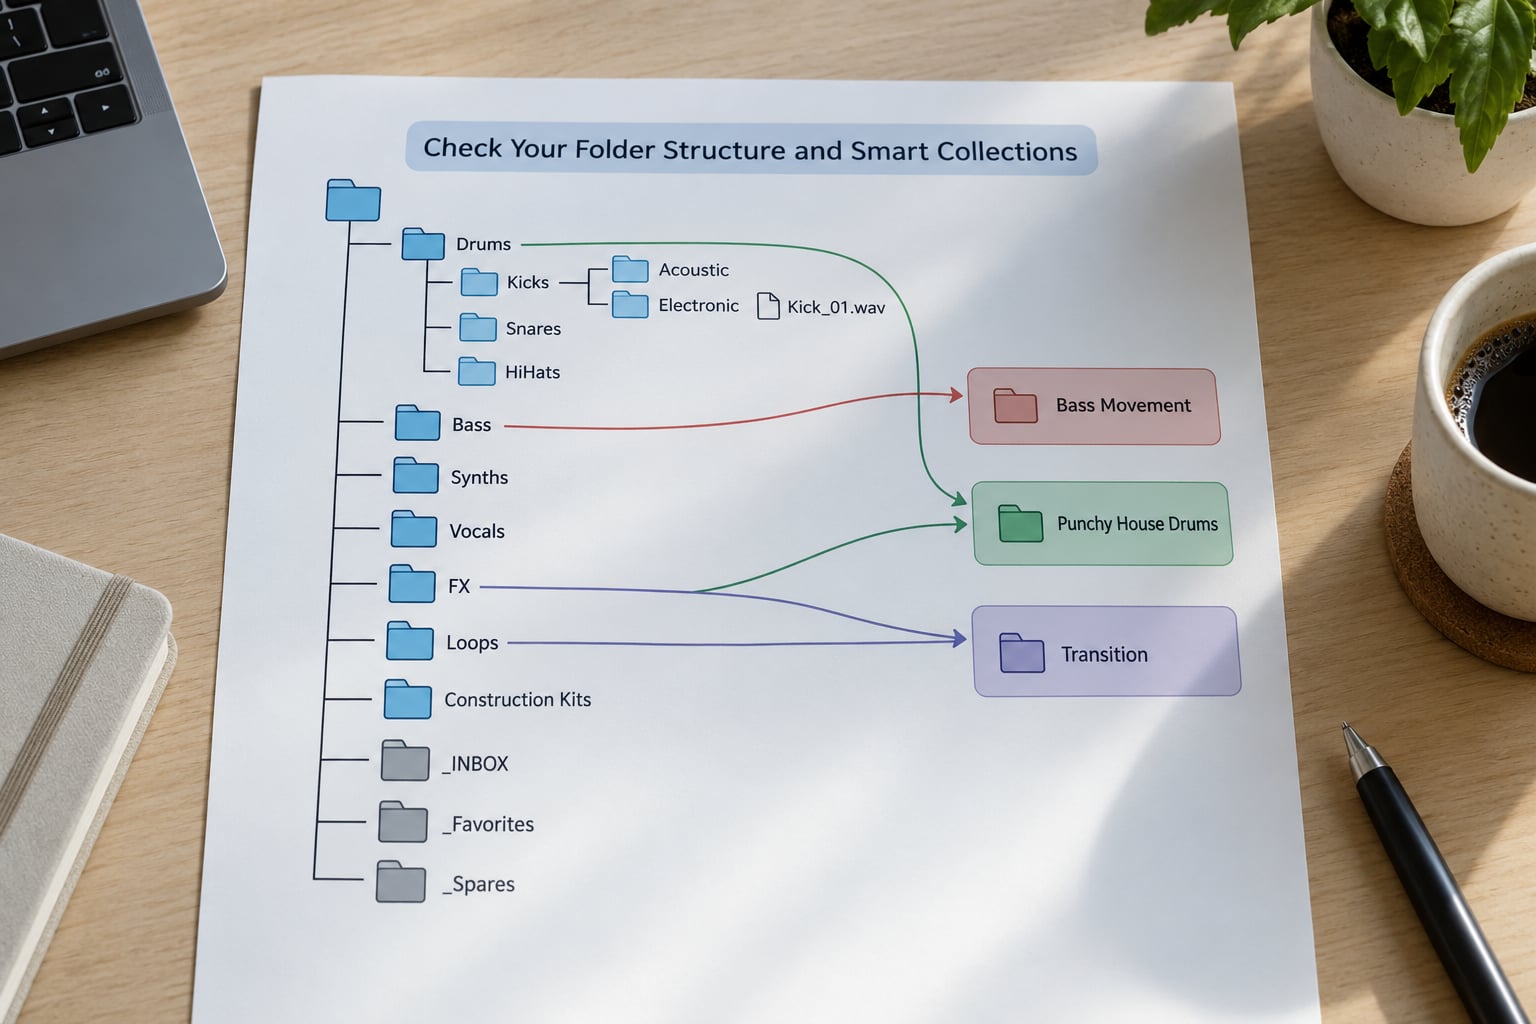
A healthy library has seven or eight top-level folders, never more than three levels below them, and three underscore folders doing the housekeeping. If your tree has a branch like Samples/Packs/House/Drums/128bpm/Deep/Version 3/final, that is one folder too deep and it is why you avoid the tree.
One full path should be readable end to end, like Samples/Drums/Kicks/kick_punchy_f_128_03.wav. Every segment tells you something: role, category, tone, root note, tempo, take. If a segment is just a number, replace it with a word.
Collections are the other half. A collection named Bass Movement should be able to pull from Synths, Bass and Loops at once, because folders cannot do that without duplicating files. If your collection can only see one folder, it is just a shortcut wearing a collection’s name.
Check it like this: pick any sound you used last week, find it twice, once through the folder tree and once through a collection. If the two paths disagree about where the file lives, you have a copy problem, not an organization problem.
Check Metadata in a DAW Browser
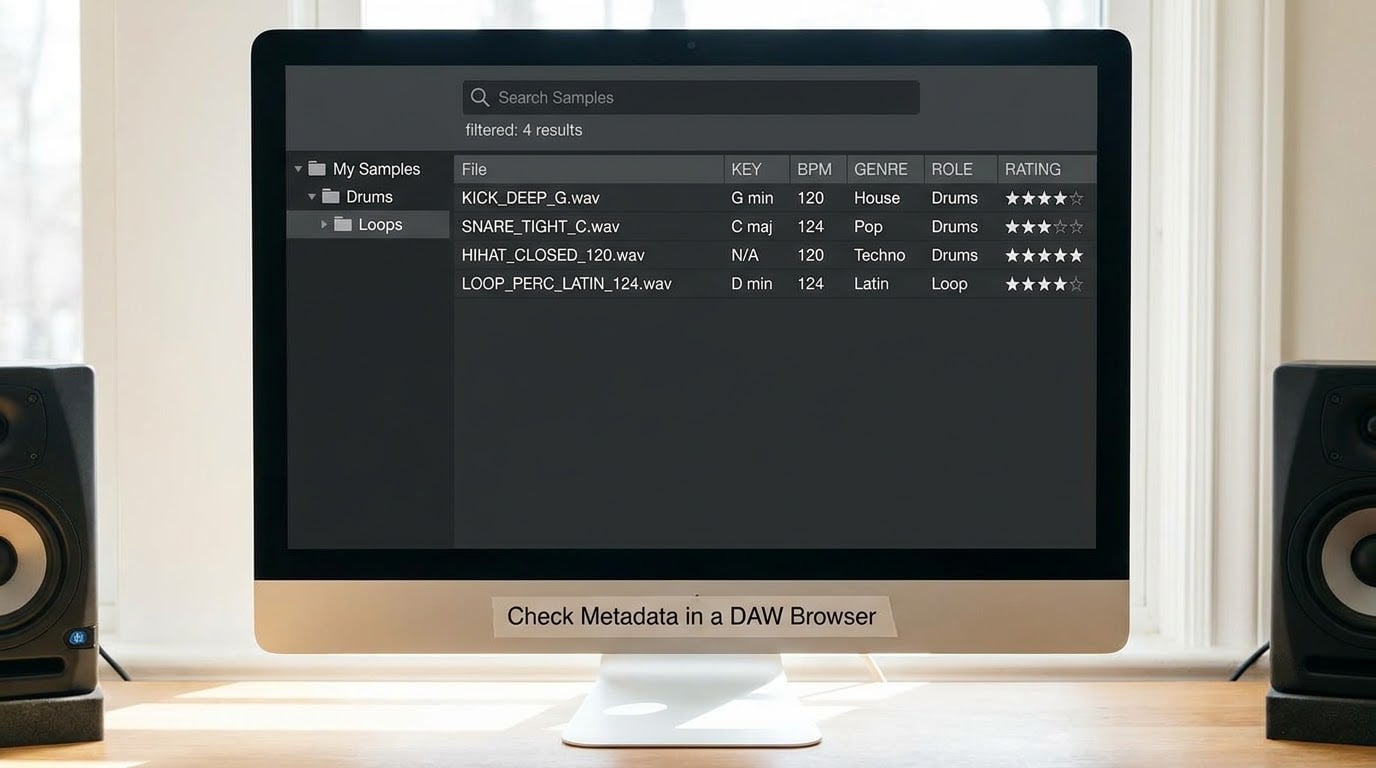
A correctly indexed library looks boring: readable filenames, a populated key column, a populated BPM column, a role column and a star rating you set yourself.
If the key and tempo columns are empty for your loops, the browser is reading the file but not its metadata, or your loop was exported without tags. Exporting without embedded BPM and key is common in packs released years ago.
If names are truncated or unreadable, the problem is upstream in step three, not in the browser. The browser can only display what the filename says.
If your rating column is empty but you have rated files somewhere else, the ratings live in the tool you rated them in. Rating systems are rarely portable, which is another argument for keeping the favourites folder short and making it the thing you open first.
The quick check is a single search. Type trance, narrow to key F minor, sort by BPM, and see whether the results are the ten sounds you actually use. If you get 400, your tags are adjectives rather than filters.
Common Mistakes That Ruin a Sample Library
Going too deep. Every extra level is a click on every retrieval, and nesting usually appears as a side effect of packing rather than a decision. Cap it at four levels and flatten anything deeper.
Keeping duplicates in several places. The same kick in three folders is how projects end up pointing at different copies over the years. Use a collection to make it appear in three places instead.
Relying on filenames alone. Names cannot express energy, role or mood, and search engines index them literally. Add tags for anything you would describe in an adjective.
Tagging every possible attribute. A form with fifteen required fields gets abandoned on day two. Keep the fields you will actually filter by, and accept that a kick does not need a bar count.
Indexing an entire drive. Pointing the browser at a drive root rather than the master folder pulls in system files, installers and unrelated audio, and slows every scan.
Renaming while the DAW is scanning. The index caches the half-written name. Close the DAW or switch it away from that folder before a batch rename.
Deleting the only copy of a preset or project. Samples are replaceable in a way that your own presets and sessions are not. Archive those separately from the sample library.
Never testing the backup. Restore three random files onto a scratch folder once a quarter. It takes two minutes and it is the difference between a backup and a hope.
Three habits keep all of this from coming back. Process _INBOX weekly rather than letting it become the new Downloads folder. Rate every new sound once, so nothing sits unjudged for a year. And re-read the drill from stage six whenever you notice yourself browsing files manually, because that is the earliest sign the structure has drifted.
Frequently Asked Questions
Should I organize samples with folders, tags, or both?
Both, but for different jobs. Folders decide where a file physically lives and should only cover role, like Drums, Bass or Vocals. Tags decide how you find it, so things like key, BPM, energy and mood. A file that is a subtle but useful transition only needs one home on disk; a collection can surface it under three different searches without copying it anywhere.
Can I keep my sample library on an external SSD?
Yes, as long as the drive is connected before you open the DAW and the path never changes. USB 3.2 external SSDs browse and load fast enough for everyday work. Two things break projects: unplugging the drive mid-session, and renaming or re-lettering it. Keep a second copy of the master folder somewhere you do not work from.
What happens to samples that are already inside my DAW projects?
Most DAWs copy or record audio into the project folder, so those files are embedded and independent of your library. Moving your sample library does not break them. What breaks is the project that references an external file by path. Copy the master folder to the identical path on the new machine first, then open one old project per DAW to confirm nothing is reported missing.
Are smart collections worth using in a small sample library?
Below roughly 2,000 files, a good folder tree alone is usually enough. Collections start paying off once the same sound needs to surface in more than one context, or once a tag like 128 BPM or ambient texture spans several folders. If you never scroll a folder during a session, you do not need them yet, and adding a layer you ignore is worse than having none.
How often should I reorganize my samples?
A fifteen-minute monthly reset is enough for most people: empty the inbox, rate the new sounds, park anything unjudged in the spares folder. A full restructure is worth doing only when retrieval actually slows down or when you add a large batch of packs at once. Constant reorganizing is the main reason systems get abandoned halfway through the first month.
Start With One Clean Master Folder
Do not migrate everything this weekend. Build the master folder structure first, move one pack you used in the last month into it, index that folder in your DAW, and run the four-sound retrieval drill on it.
When that one pack works, the system works, because the same rule applies to the next four thousand files. That is how to organize your sample library in a way that survives contact with a real workflow rather than a tidy afternoon.