To import MIDI packs into a project, extract the pack, create a MIDI track, then drag the .mid file from your file browser onto that track — or use your DAW’s import menu — and load an instrument so the notes make sound. A MIDI pack is just a folder of .mid files: note, velocity and tempo data, with no audio inside. Whether your project tempo survives the import depends on how you open the file, and that single choice causes most of the frustration. This guide is written for current desktop versions on Windows and macOS, updated for 2026.
The rule of thumb most experienced producers use: drag it in to keep your session exactly as it is, open it as a project only when you want the file’s own tempo map to take over. Everything below follows that logic.
Table of Contents
- What You Need
- Step-by-Step: How to Import MIDI Packs Into a Project
- 1. Extract and Inspect the MIDI Pack
- 2. Check the Pack’s Tempo, Key, and Format
- 3. Open the Correct Import Tool in Your DAW
- 4. Import MIDI Packs Into the Right Project Location
- 5. Place and Align the MIDI Clips
- 6. Audition, Organize, and Save the Imported Pack
- Common Mistakes and Quick Fixes
- Missing Files After the Project Is Reopened
- MIDI Clips Are Silent or Play the Wrong Notes
- The Imported Clips Do Not Fit the Project
- The DAW Cannot See or Open the Pack
- Quick Tips for a Cleaner MIDI Pack Workflow
- Frequently Asked Questions
- Can I import an entire MIDI pack at once?
- Should I change the tempo of an imported MIDI clip?
- How do I make imported MIDI clips play the right notes?
- Can I use the same MIDI pack in more than one DAW?
- Why does my imported MIDI appear at a different key or tempo?
- Conclusion: Import One Test Folder First
What You Need
Four things, and you probably have three of them already.
First, the extracted MIDI pack. Downloaded packs almost always arrive as a .zip or .rar archive, and a DAW cannot see inside one. Second, a MIDI track in your project — most DAWs create one for you, but not all of them, so make it before you start. Third, an instrument to play the notes, either a built-in one or a sampler with your sound library loaded. Fourth, a rough idea of the pack’s tempo, key and format, which takes about ten seconds to check and saves you an hour later.
Worth being precise about what a MIDI pack is, because nobody defines the term clearly. It is a bundle of Standard MIDI Files, usually one file per instrument or per pattern, sometimes shipped with a tempo map, a key signature, a chord chart, sample content and a licence PDF. The .mid files hold no audio whatsoever. That is the difference between a MIDI pack and an audio sample pack or a construction kit: sample packs give you .wav or .aiff audio that plays back at any tempo, and construction kits add pre-routed effects and MIDI templates on top. MIDI packs give you notes only, which means your own instrument decides what they sound like.
On the file extension: .mid and .MIDI are the same format. The difference is capitalisation, and it is purely cosmetic — DAWs handle both on Windows and macOS.
Step-by-Step: How to Import MIDI Packs Into a Project
1. Extract and Inspect the MIDI Pack
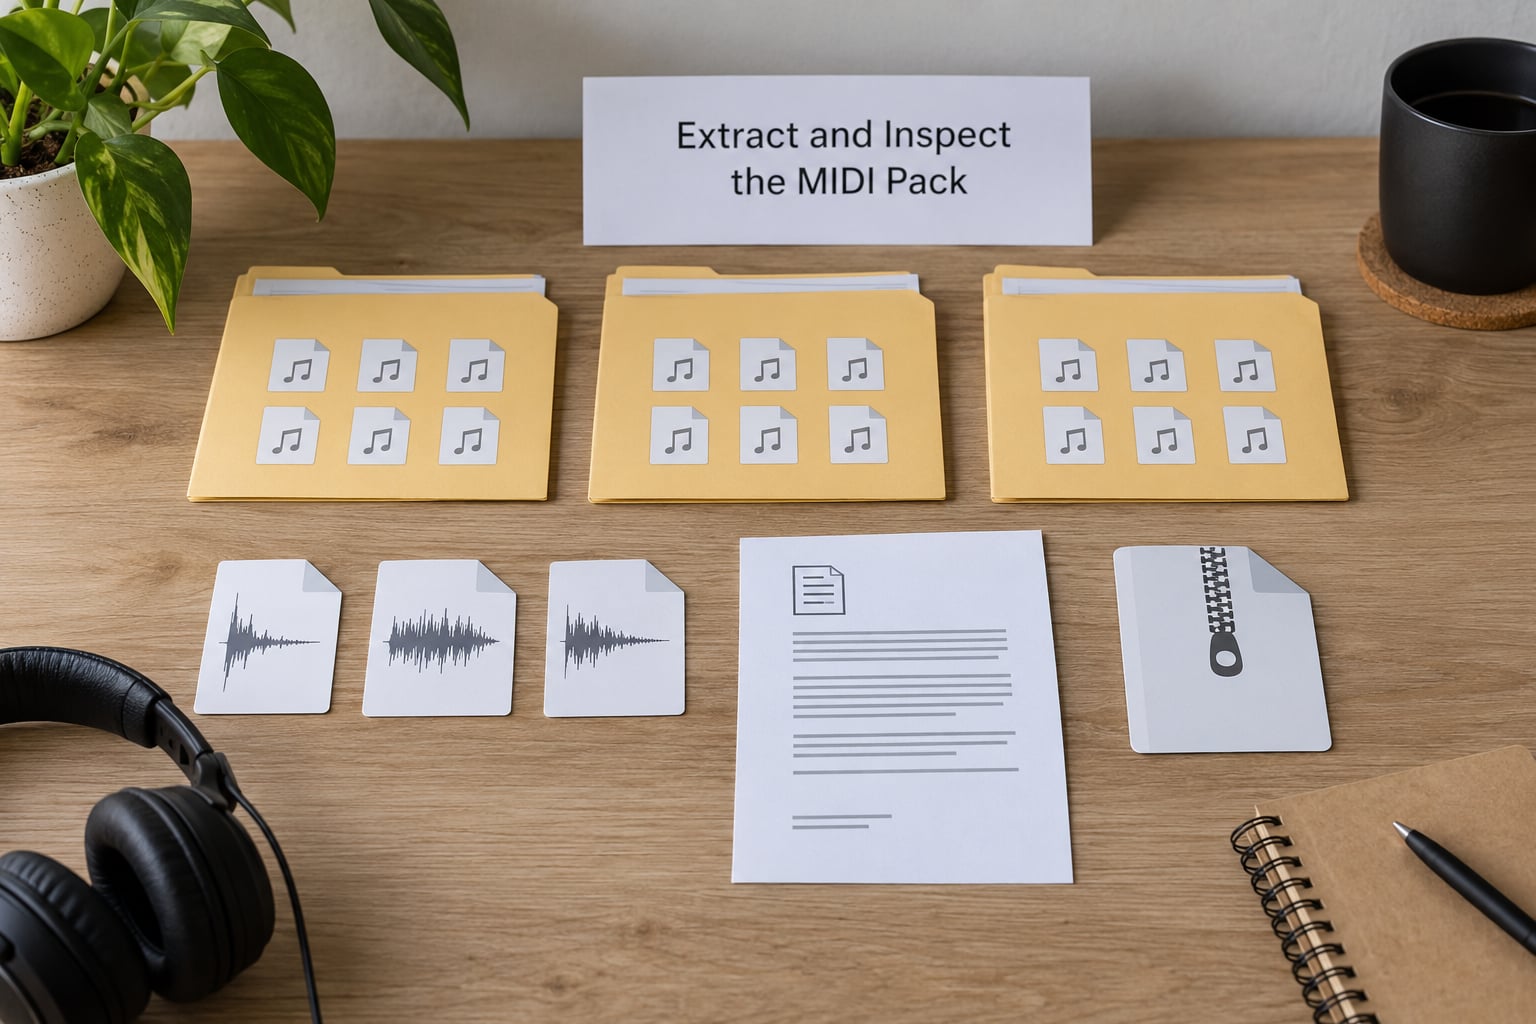
Extract the archive into its own folder before you touch your DAW. Right-click the .zip on Windows, or double-click it on macOS, and choose Extract All or Extract Here. Never open the pack straight from inside the archive: the DAW’s file browser may show the archive as a single unreadable item, and worse, some browsers let you copy files out of an open archive and lose the folder structure.
If your computer opens the archive instead of extracting it, that means a preview window grabbed the double-click. Close it, right-click the file, and pick your extract option instead. On macOS, if you get an “unidentified developer” or security prompt, choose Extract anyway rather than moving the archive to the trash.
Once extracted, walk the folder and note what is inside: which subfolders hold .mid files, whether there is a readme or licence document, whether there are audio files, and whether there are preset or project files. Keep the readme — pack vendors put the BPM, the key and the intended tempo in there, and it is usually the only place that information exists. Do not delete, rename or move files inside the pack folder yet.
To check that it worked, open the folder on its own and confirm you can see individual .mid files. You are done when the folder view shows files you could drag, not a single archive icon.
2. Check the Pack’s Tempo, Key, and Format
Open one .mid file in your DAW’s MIDI editor and look at three things: the tempo, the key, and the loop length. Most editors show all three somewhere in the transport or ruler area. If you cannot see a tempo reading, playing the clip and watching the beat counter move will tell you roughly where it sits.
Tempo is the one that catches people. Standard MIDI files carry their own tempo map, but how that map is treated depends entirely on the import method. Dragging a file into your session usually reads timing relative to your project tempo, while opening the file as its own project adopts the embedded tempo instead. If your project is at 128 BPM and the pack is at 140, the same notes will feel different at either speed, so decide which one you want before importing.
Key works similarly. A MIDI file stores pitch, and the key signature it declares is a suggestion for display and transposition. When your project is in F minor and the file is in C, the notes sound exactly as written but sit a whole step off your chord chart. Transpose after import, not before, so you can hear what the move does.
On format, the detail worth knowing is type 0 versus type 1 MIDI. A type 0 file stores one merged stream of notes on a single channel. A type 1 file stores one stream per channel, which is why type 1 packs can be split into separate tracks and type 0 packs cannot. You rarely choose the type yourself; it depends on the tool that exported the file. The related setting is PPQ, ticks per quarter note, usually 480 or 960 — a higher value means finer resolution when you quantize.
You are ready when you can say, out loud, what tempo the pack is in and whether it is a single-stream or multi-stream file.
3. Open the Correct Import Tool in Your DAW
Every DAW has a file browser and a MIDI import menu, and they are in different places. These are the current desktop paths. Menu names shift slightly between major versions, and Windows and macOS differ only in modifier keys, so if a label reads differently in your version, look for the nearest equivalent.
Ableton Live — Drag the .mid from your system file browser straight onto a MIDI track in Session View or onto the Session grid. Hold Ctrl (Windows) or Cmd (macOS) while dropping to split a multi-channel type 1 file into one track per MIDI channel. In Live 12 and later you can also use File > Import MIDI File.
FL Studio — File > Import > MIDI File. An Import MIDI dialog appears with options to create new channels for each channel, use the selected channel, or open the file as a pattern. Choose the option that creates channels for every channel in the file if the pack is multi-track. You can also drag the file from the browser into the Playlist or Channel Rack.
Logic Pro — File > Import > MIDI File. In the dialog, choose to import as a new software instrument track or into the selected track, and set the quantize option to none if you do not want the timing altered. The imported region appears in the Tracks area; drag it onto the track you want. File > Import > Audio to Audio > MIDI File converts it to audio instead.
Cubase — File > Import > Import MIDI File. Place your cursor in the timeline where the file should start playing, browse to the file, and click Open. When the prompt about extracting programs to a remote destination appears, click No. For multi-track packs, open the Import MIDI Options dialog first and tick Separate MIDI Track per channel so each part lands on its own track.
Studio One — Drag the .mid from the Studio One browser into the session, or use File > Import. Double-clicking the file opens it as a song, which adopts the embedded tempo map. If the file has tempo information inside it, drag it onto the tempo bar at the top of the session to apply that tempo map to your current project.
Bitwig Studio — Drag the .mid from the system file browser onto an empty track in the timeline. The file loads as a MIDI clip on that track. If the track has no instrument loaded yet, the clip will sit there silently until you add one.
Reason — Drag the .mid from the system browser onto a sequencer track in the arrangement. Double-clicking the clip opens the sequencer editor for that track.
Reaper — Insert > Media File, or drag the .mid from the Explorer into the arrange view. Reaper creates a MIDI item on a new track if the track under your cursor is not already a MIDI track, which is the behaviour people coming from Mixcraft or Guitar Pro miss, since they expect one click to create a track per instrument.
Pro Tools — File > Import > MIDI, then choose to import as a MIDI clip into the Edit window, or as an imported MIDI session that creates a track per instrument. You can also drag the file into a MIDI Editor window directly.
Maschine — Drag the .mid into the Song mode timeline, or use the file browser inside Maschine. In Standalone mode, opening a .mid from the File menu loads it as a project.
After this step you should see a new track and a MIDI clip sitting on it, and nothing else in your session should have changed. If your project tempo jumped, stop here and read step 5.
4. Import MIDI Packs Into the Right Project Location
Where the file lands is a choice with three answers: onto the track you just made, into a brand new project, or pasted into an existing pattern or channel.
For a single clip, the right location is a MIDI track with an instrument already loaded. Drop the file there and it is done. For a multi-track pack, import it so each MIDI channel becomes its own track where the DAW allows it — FL Studio’s channel-creation option, Cubase’s separate-track import setting, Logic’s per-part import, Pro Tools’ session import, or Ctrl/Cmd-drag in Ableton all do this. A pack with drums, bass, chords and melody should end up as four tracks, not one track with four parts stacked on it.
To import a whole folder at once, open your DAW’s file browser panel, navigate to the extracted pack folder, select all the .mid files, and drag them in together. Ableton, Logic, Cubase and Reaper will place each file on its own track. Most other DAWs import the first file and ignore the rest, so in FL Studio and Studio One you are better off importing the channel-rich single file the pack provides.
To keep your file organisation intact, import into a folder you create first rather than dumping clips on the default arrangement. In Cubase, create a folder track, make it the selected folder, and imported files are grouped inside it. In Ableton, use a Scene or a colour-coded set so the clips are findable later.
Watch for duplicates. If a file lands on the wrong track and you drag it again to move it, you now have two copies, and the stale one still references the same file. Keep the pack’s own filenames rather than renaming mid-import, because duplicate filenames in the same folder will replace each other on some systems and disappear entirely.
5. Place and Align the MIDI Clips
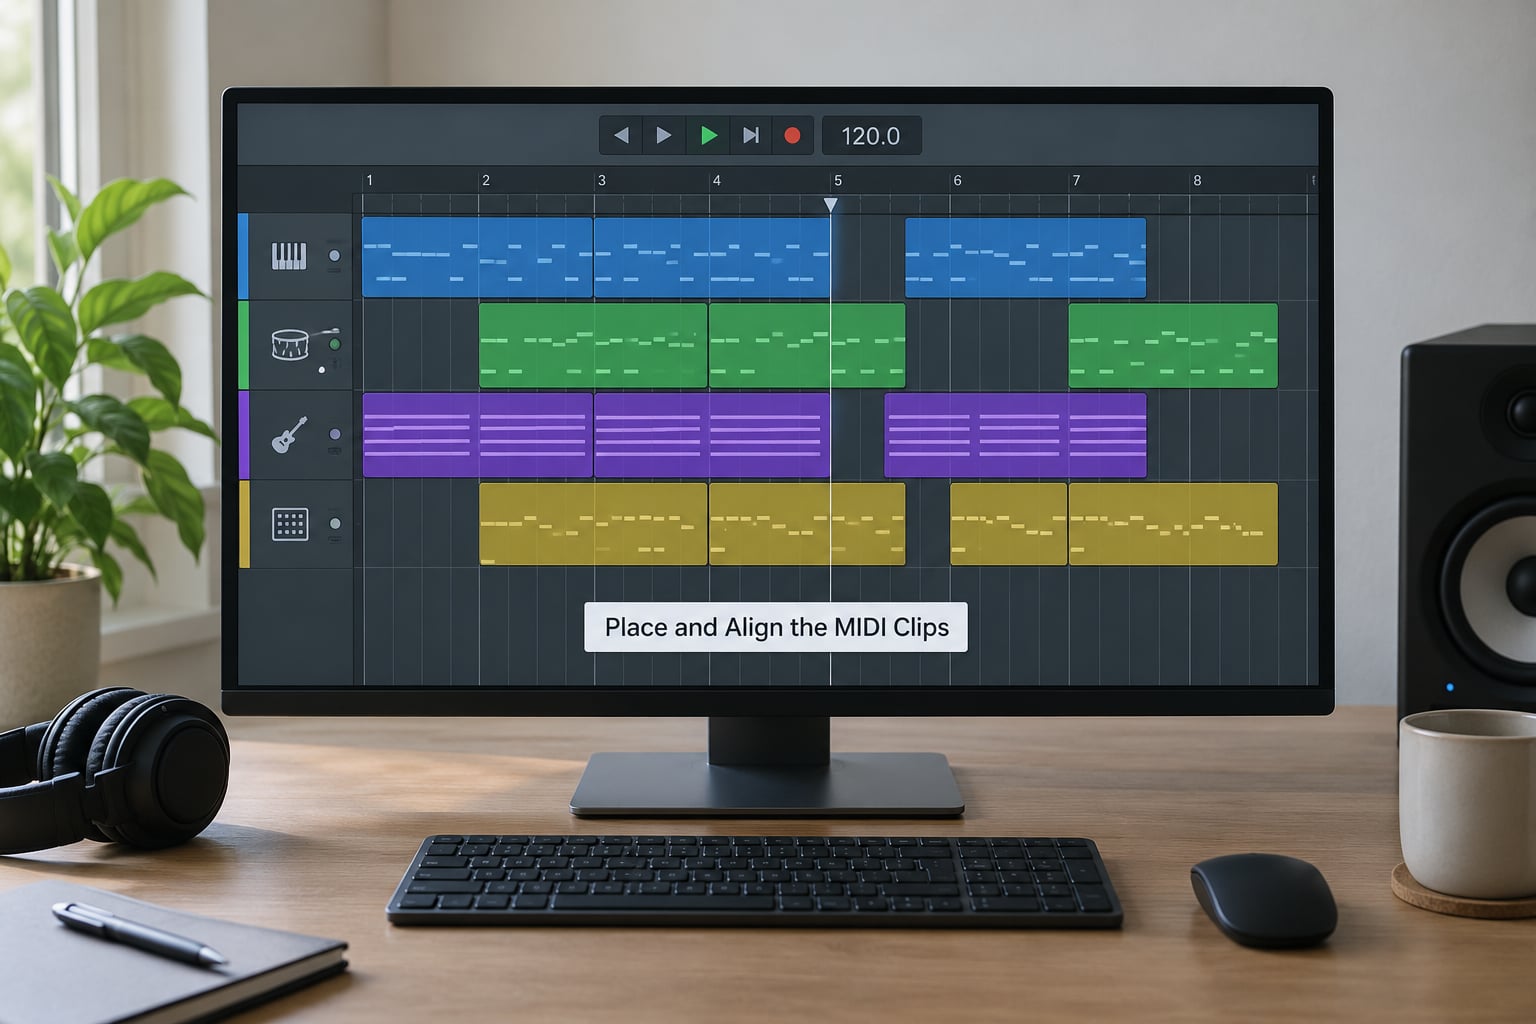
Move the imported clip to where it should start, turn on snapping, and let the grid do the alignment. Snap settings vary by DAW, but the concept is identical: quantise to bar or beat lines, not to an arbitrary percentage, unless the pack is deliberately loose.
If the imported notes feel early or late against your drums, quantise the clip lightly. Select it, apply a quantise at 50 or 60 percent strength, and listen before and after. A full 100 percent quantise will flatten any human feel baked into the pack, which is usually the wrong move on a beat tape and the right move on a piano part that needs to sit tight.
Check loop length next. A pack pattern written as 16 bars lands as 16 bars; a one-bar drum loop repeated across your four-on-the-floor will not. Use the clip’s loop markers, or copy the clip across your arrangement with repeat or loop mode rather than stretching it.
To verify alignment quickly, mute everything except the imported clip and a kick, play eight bars, and listen for drift. If the pattern pulls ahead by the end of bar eight, its loop length does not match your bar count. If it sits tight, you are done.
When the tempo still bothers you, you have two honest options. Keep your project tempo and let the notes play at your speed, which is right when you are matching an existing session or a radio edit. Or adopt the file’s tempo map, which is right when the pack’s grooves were written for their own tempo and you want them to sound as the producer intended. On the Gearspace PreSonus board, producers describe the drag-in versus open-as-project distinction exactly this way, and it is the single most useful thing to understand before you import anything.
6. Audition, Organize, and Save the Imported Pack
Play every imported clip before you build anything on top of it. Solo each track and listen for silent clips, missing notes and wrong instruments. Rename anything with an unclear filename the moment you find it, while you still remember what it was.
Sort the clips into categories as you go: drums, bass, chords, leads. In Cubase, colour-code track folders and name them. In Ableton, use collections and a consistent colour scheme. In FL Studio, use the browser’s Folders area and add your imported patterns to it so the Channel Rack can see them.
Now save, and save a copy under a new name before you start editing. The original pack stays untouched on disk, which means you can always re-import cleanly if your project turns into a mess. That habit has saved me more than once.
Finally, close the project and reopen it. If every clip is still there and plays, your file paths are solid. If clips have vanished or show as offline, you have moved the pack folder out from under the project, and the fix is in the next section.
Common Mistakes and Quick Fixes
Missing Files After the Project Is Reopened
Symptom: the session opens with empty slots where your MIDI clips used to be, or a dialog asks you to locate missing files. Cause: you moved, renamed or deleted the extracted pack folder after importing, and the project is pointing at the old location.
Fix: use your DAW’s file management tools rather than hunting through Finder or Explorer. Cubase has Pool and Project Setup > Locate Missing Files; Studio One has an offline media pane; Reaper has Project > Item: Locate missing media; Logic has the same idea under File > Recover; Ableton has Locate Missing File in the context menu. Point them at the extracted folder and relink in one pass. If you cannot find the folder, re-download the pack, extract it to the same path, and reopen the project.
MIDI Clips Are Silent or Play the Wrong Notes
Symptom: the clip is visible, notes are there, and nothing comes out. Cause is usually one of four things: no instrument is loaded on the MIDI track, the track’s output is muted or the monitor is off, the MIDI channel does not match the channel the clip was written on, or the file contains program change data your instrument ignores.
Fix, in order: load an instrument on the track, check the track volume and mute, then check the clip’s MIDI channel in the clip’s properties. To test the data itself, load a piano or any General MIDI sound on the channel the file uses — MIDI files from packs commonly sit on channel 1 or the channel matching their instrument track. If notes appear only as tiny slivers, your imported clip is velocity-light or the file is effectively empty, which happens with exports from hardware sequencers and some MPC workflows.
For drum patterns that trigger the wrong kit or skip notes, the cause is usually a mismatch between the pack’s GM or GS program changes and the kit loaded in your sampler. Map the drum notes yourself on the note-to-sample page of your drum instrument rather than trusting the program change.
The Imported Clips Do Not Fit the Project
Symptom: the imported pattern sits at the wrong pitch, drifts against your drums, or the whole project changed tempo the moment you imported.
Fix tempo first. If your project tempo changed unexpectedly, you opened the file as a project rather than importing it, and the file’s tempo map replaced yours. Change the tempo back, or undo the import and drag the file in instead. If the clip itself is timing against your grid, quantise it lightly as described in step 5. If it is in the wrong key, duplicate the clip before you transpose it, then transpose the copy while the original stays as a reference. That way a bad experiment costs you nothing.
The DAW Cannot See or Open the Pack
Symptom: the file browser shows an empty folder, the file does not appear in the list, or the DAW refuses to open it.
Fix: extract the archive fully, and make sure the DAW is browsing the extracted folder rather than the archive. Nested folders are the usual culprit — open the archive once, then follow the nested folder to the actual .mid files. On Windows, switch File Explorer to show file extensions so you can confirm the file really ends in .mid and is not a disguised PDF or an image with a MIDI name. If the file still will not open, it may be a type 1 file with corrupt header data; re-download it before suspecting your DAW.
Quick Tips for a Cleaner MIDI Pack Workflow
Import one folder at a time rather than the whole pack. A test folder tells you the pack’s tempo, key and file type in about two minutes, and that knowledge saves a messy afternoon.
Keep the extracted pack in one place, with a folder structure you do not have to relearn each time — for example one folder per instrument, and a separate notes file where you record each pattern’s BPM and key as you import it.
Write BPM and key down as you go. A spreadsheet column, a text file next to the pack, or the project notes all work. Six months later, this is the difference between knowing why a loop sounds the way it does and guessing.
Never rename files inside the original pack folder. Duplicate the folder if you need working filenames, and leave the source clean so re-imports behave the same way.
Check your project tempo before a large import, and check whether you want to keep it. That one confirmation prevents the most common session-destroying surprise in this whole workflow.
Frequently Asked Questions
Can I import an entire MIDI pack at once?
Usually yes, if the DAW file browser lets you multi-select. Open your DAW’s browser panel, navigate to the extracted pack folder, select every .mid file, and drag them in together — Ableton, Logic, Cubase and Reaper will place each file on its own track. FL Studio and Studio One usually import only the first file, so with those, import the single channel-rich file the pack provides, or import a folder at a time. Extract the pack first; no DAW can see inside a zip file.
Should I change the tempo of an imported MIDI clip?
Only when the pack was written at a different tempo and you want it to sit at yours. Most DAWs play imported MIDI at your project tempo by default, so nothing changes unless you ask. If the file’s own tempo map matters, open the file as a project rather than dragging it into your session, or drag it onto the tempo bar in Studio One. Test in a duplicate of your project before you let a tempo change rewrite the whole arrangement.
How do I make imported MIDI clips play the right notes?
Load an instrument on the MIDI track first — that solves most silence. Then check the track is unmuted and the output is routed, and confirm the clip’s MIDI channel matches the channel the instrument is listening on. Pack files usually sit on channel 1 or the channel matching their instrument. If notes look like thin slivers, the velocities are very low; raise them in the MIDI editor. To check the data itself, assign a piano sound on that channel and play the clip.
Can I use the same MIDI pack in more than one DAW?
Yes, and this is one of the main reasons to buy note-based packs rather than audio loops. A .mid file is a standard format, so the same pack opens in Ableton, Logic, FL Studio, Cubase and Reaper. Keep one extracted copy of the pack in a shared location such as a cloud drive, and each DAW can browse the same files. Expect small differences: program change data may be ignored by some instruments, and each DAW quantises slightly differently on import.
Why does my imported MIDI appear at a different key or tempo?
Tempo changes usually mean you opened the file as its own project, which applies the tempo map stored inside the MIDI file instead of keeping your project’s tempo. Drag the file into your session to keep your own tempo, or undo and re-import. A different key happens because MIDI stores actual pitches, so the file plays the notes it was written with regardless of your project’s key signature. Duplicate the clip, then transpose the copy by the interval you need and compare.
Conclusion: Import One Test Folder First
Extract the pack, check its tempo and key, and import one small folder before you touch the rest. Drag it onto a MIDI track with an instrument loaded, listen, and confirm your project tempo has not moved. Once that first folder behaves, the rest of the pack is just repetition, and you will have a folder structure you can reuse for every MIDI pack that follows.