A mix bus chain is a short, fixed series of processors sitting on the single stereo output that every track in your session sums into, and learning how to set up a mix bus chain properly comes down to four slots in a known order: corrective EQ, gentle bus compression for glue, optional saturation for density, and an optional limiter at the end. For trance, house, and progressive electronic music that means roughly 1 to 2 dB of gain reduction, a high-pass filter around 25 to 35 Hz, and plenty of headroom left for mastering. You can build the whole thing in about twenty minutes, and once it is saved as a template you stop rebuilding it every session.
The part that trips people up is not which plugins to buy. It is where each one goes in the signal path, and how much of it you should leave switched off. Get that right and the chain quietly pulls a rough mix together. Get it wrong and you hand a mastering engineer a flat, lifeless two-track that has nothing left to work with.
Throughout this guide I am writing for electronic producers mixing their own music, but the chain itself is genre-agnostic. The only EDM-specific part is how much headroom you keep, and why a mastering engineer wants a little more of it than an acoustic mix would need.
Table of Contents
- What You Need
- Step-by-Step
- 1. Prepare the rough mix before processing the bus
- 2. Route the mix into a mix bus chain
- 3. Start with corrective EQ
- 4. Add compression for control
- 5. Add saturation or harmonic processing
- 6. Use stereo and space processing carefully
- 7. Set an optional final limiter and export safely
- Common Mistakes
- Frequently Asked Questions
- What is the best plug-in order for a mix bus chain?
- Should I use compression on a mix bus or only on individual tracks?
- What is parallel compression and when should I use it?
- How do I check whether my mix bus is mono compatible?
- Do I need a limiter on the mix bus if I am mastering the track later?
- Conclusion
What You Need
Before you touch a single plugin, you need a mix that stands on its own. If the balance is wrong, no bus processor will rescue it — they only make whatever is already there more defined.
- A finished rough mix. Levels balanced, panning committed, automation roughly settled. This is sometimes called the static mix, and it is the honest starting point.
- Committed faders and pans. If you are still riding faders while you build the chain, every setting you dial in becomes a guess.
- Labelled tracks and colour-coded buses. A drum bus, a melodic bus, an FX return. Sixty seconds of naming saves you an hour of hunting later.
- Clean headroom. The mix should hit the bus with peaks around -6 dBFS, leaving the bus processor room to work.
- A small processing set. One EQ, one compressor, one saturator or exciter, one limiter. That is the whole kit, and it is enough.
A mastering chain is optional. If you are sending the track to an engineer, you do not need a limiter at all, and many professionals deliberately leave several dB of headroom instead.
One honest note before we start: plug-in names, menus, and track types differ between DAWs, and they change between versions. The signal flow below is universal; the clicks are not identical everywhere, so I name the DAW and version where a menu path is useful.
Step-by-Step
Build the chain in this order and the processors will work together instead of fighting. Audio flows top to bottom: EQ shapes what the compressor hears, compression evens out what the saturator colours, and the limiter is last because it is the only stage allowed to change the peak ceiling.
| Slot | Job | Starting settings |
|---|---|---|
| 1. Corrective EQ | Fix problems the whole mix shares | High-pass 25-35 Hz, one broad cut, at most +0.5 dB of lift above 8 kHz |
| 2. Bus compressor | Even out level and bind the mix together | 2:1 to 4:1 ratio, 10-30 ms attack, auto or medium release, 1-2 dB gain reduction, sidechain high-pass 90-140 Hz |
| 3. Saturation | Add density and harmonic colour | Tape or tube, low drive, 10-30% wet; exciter or top band only |
| 4. Limiter (optional) | Catch peaks and set the ceiling | Threshold under the loudest peaks, 1-3 ms lookahead, ceiling -1.0 dBTP, 3-6 dB of reduction |
1. Prepare the rough mix before processing the bus
Gain stage first, threshold second. This is the single most repeated piece of advice in mixing forums, and it is the one most tutorials skip: set the level hitting the bus before you set any compressor threshold, or your threshold number means nothing.
Pull your master or mix fader down until peaks sit around -6 dBFS, then raise it so the average level lands where you can judge the balance comfortably. Turn the bus processing off entirely at this point and do a real listening pass on the rough mix alone.
How do you know the mix is ready? Bypass the whole chain and it should still sound like a song, not a collection of stems. If elements disappear or the balance collapses, go back to track and submix levels first.
2. Route the mix into a mix bus chain
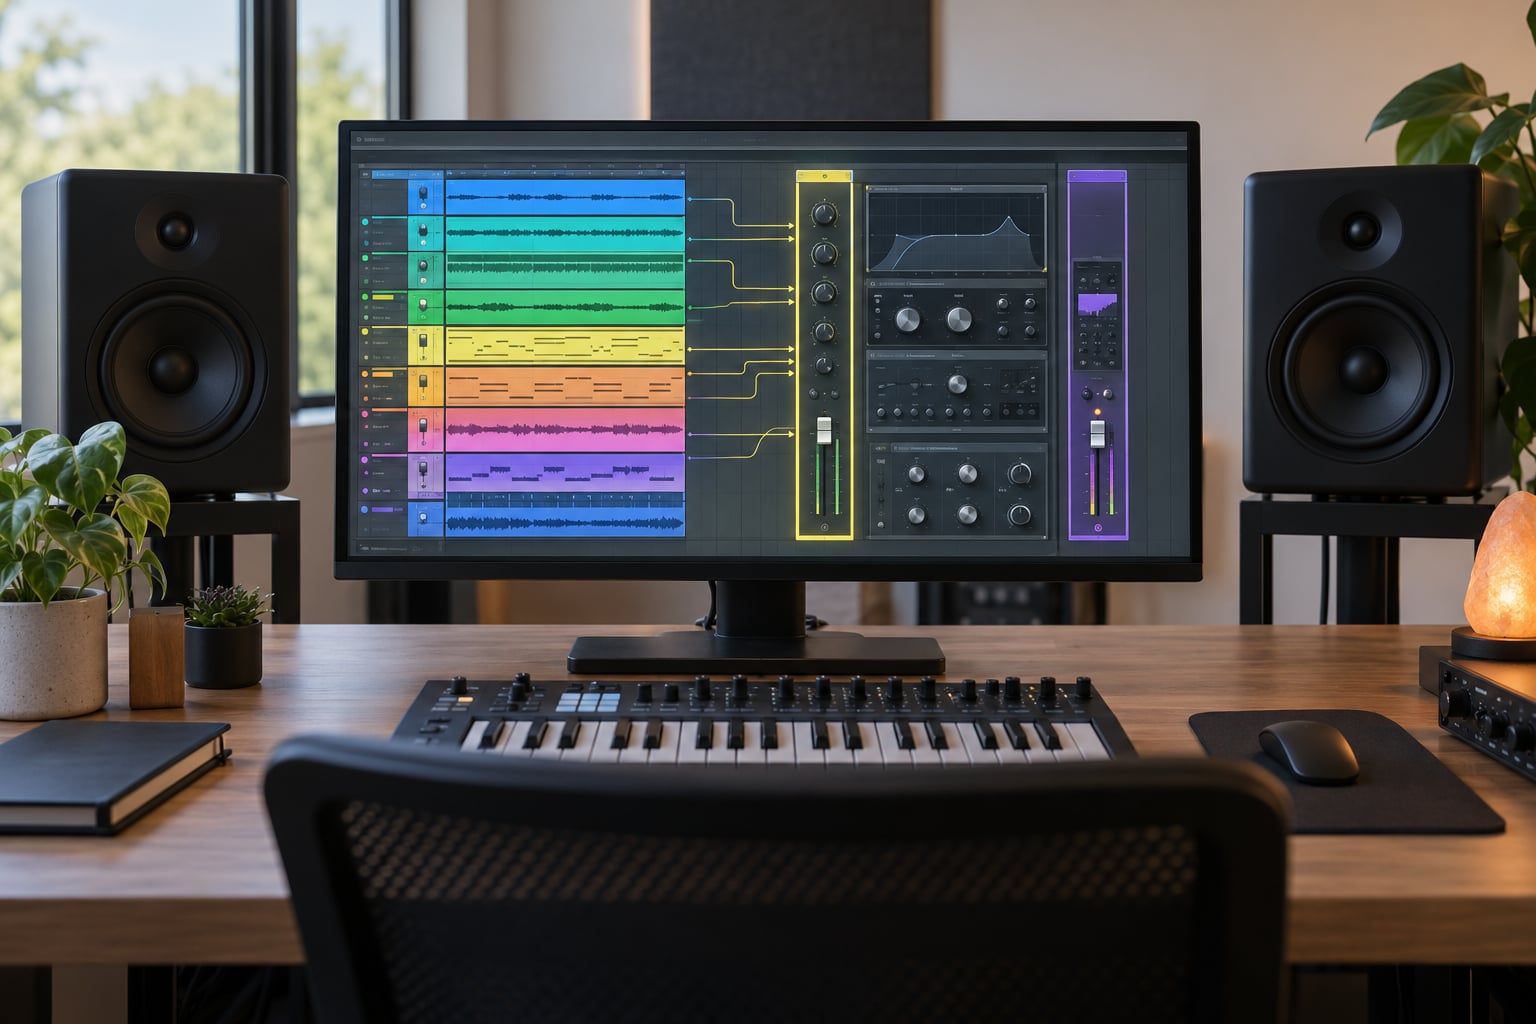
Route every track, every submix, and every effect return into one stereo bus, and keep the bus separate from your actual master output. That separation is what lets you print a clean, unprocessed feed later.
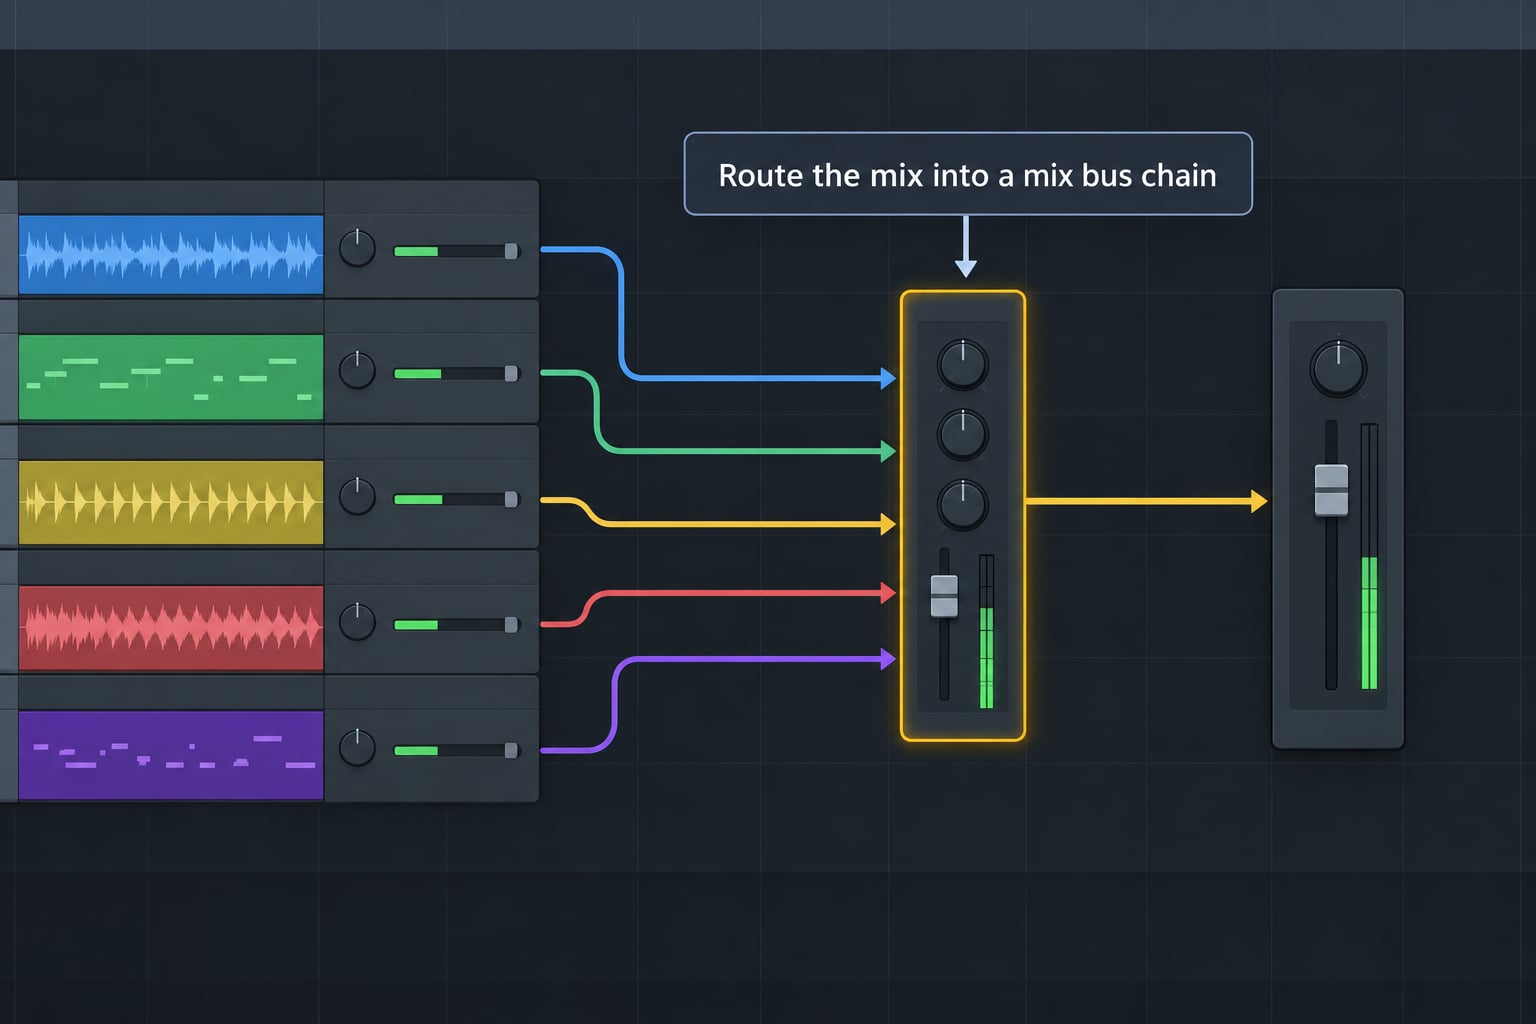
Here is how to do that in the three DAWs most EDM producers use:
- Ableton Live 12: create a new audio track, rename it Mix Bus, then select your other tracks and set their Output to Master off and that audio track to Ext. in for the master, or use a dedicated Mix device in Session View with a send. The Mixer view shows every track routing at a glance.
- FL Studio 2026: add a Mixer track, name it Mix Bus, then right-click each playlist channel and assign it to that Mixer in the Track settings panel. Mixer inserts are your bus chain.
- Logic Pro 11: add an Audio instrument or a Channel Strip named Mix Bus, open the Channel Strip, and use the Audio FX slots for your chain. In the Environment or on the main output, change each track’s output to Mix Bus instead of Stereo Out.
Two routing details that matter for electronic music. If any element is mono, check the bus in mono — sidechain pads, mono bass, and narrow effects are the usual offenders. And if you use sends for reverb or delay, feed the return into the bus, not the other way around.
3. Start with corrective EQ
The mix bus EQ should only fix things every track shares. Mud that comes from one bassline belongs on that bassline, not on the bus.
For EDM, the high-pass filter is the one setting I would not skip. Set it between 25 and 35 Hz with a gentle slope to clear inaudible sub energy from pads and reverb returns, and use a linear-phase EQ if you have one, because a steep phase shift down low can hollow out your kick and sub.
After that, cut rather than boost. Taking 2 dB out of a boxy 300-500 Hz region costs less headroom and sounds cleaner than adding 2 dB to the bottom, and it avoids the phase smearing that big low-end boosts create.
Treat any high shelf above 8 kHz as a seasoning step, not a fix, and keep it under half a decibel. Solo the bus, sweep the band, and listen for the frequency where the mix stops sounding like a mix and starts sounding like a bright synth.
4. Add compression for control
Bus compression is not mastering. It is glue — small, steady gain reduction that makes elements sit together, plus some density. If you can hear it working, you have gone too far.
Start at a 2:1 to 4:1 ratio with a 10 to 30 ms attack so the kick and snare still punch through, and use auto or a medium release. SSL-style bus compressors often sit around 4:1, 30 ms attack, and a short release for roughly 4 dB of reduction with a 90 to 140 Hz sidechain high-pass, which is a fine starting point for trance and progressive house.
Set your target before you set your threshold: 1 to 2 dB of steady gain reduction, never more than about 3 dB on peaks. Then match the output so the bypassed and compressed versions play at the same loudness, because a louder version always sounds better than it is.
For weight without losing punch, try a parallel or upward compression send — duplicate the bus, compress the duplicate heavily, and blend it underneath. Roughly a 4:1 ratio with 125 to 300 ms of attack adds body while the original transient stays intact. This is the one bus compressor trick that genuinely helps long-form progressive mixes.
5. Add saturation or harmonic processing
Saturation adds harmonics, and harmonics read as density. On a mix that already feels a bit empty in the mids, a small amount of tape or tube colour tightens everything up without touching your levels.
Start low: 10 to 30% wet, or drive the input only until the gain reduction doubles slightly. If you are using a multiband saturator, restrict it to one band — the top band gives an electronic mix sparkle, and that is usually the safest place to begin.
Some of the character belongs on a send instead. If a specific synth pad or lead needs to sound thicker, put the saturator on that channel or on a parallel send. Bus saturation affects every element at once, so it flattens character differences as readily as it enhances them.
Excessive drive gives itself away in one place: harshness. If the top end turns brittle or the low mids get lumpy, you are past the useful point. Drive the plugin less, or move it onto a send.
6. Use stereo and space processing carefully
Stereo width tools are tempting because the result looks impressive on a wide screen. They are also the most common cause of a blurry, collapsed mix, especially on club systems and phone speakers.
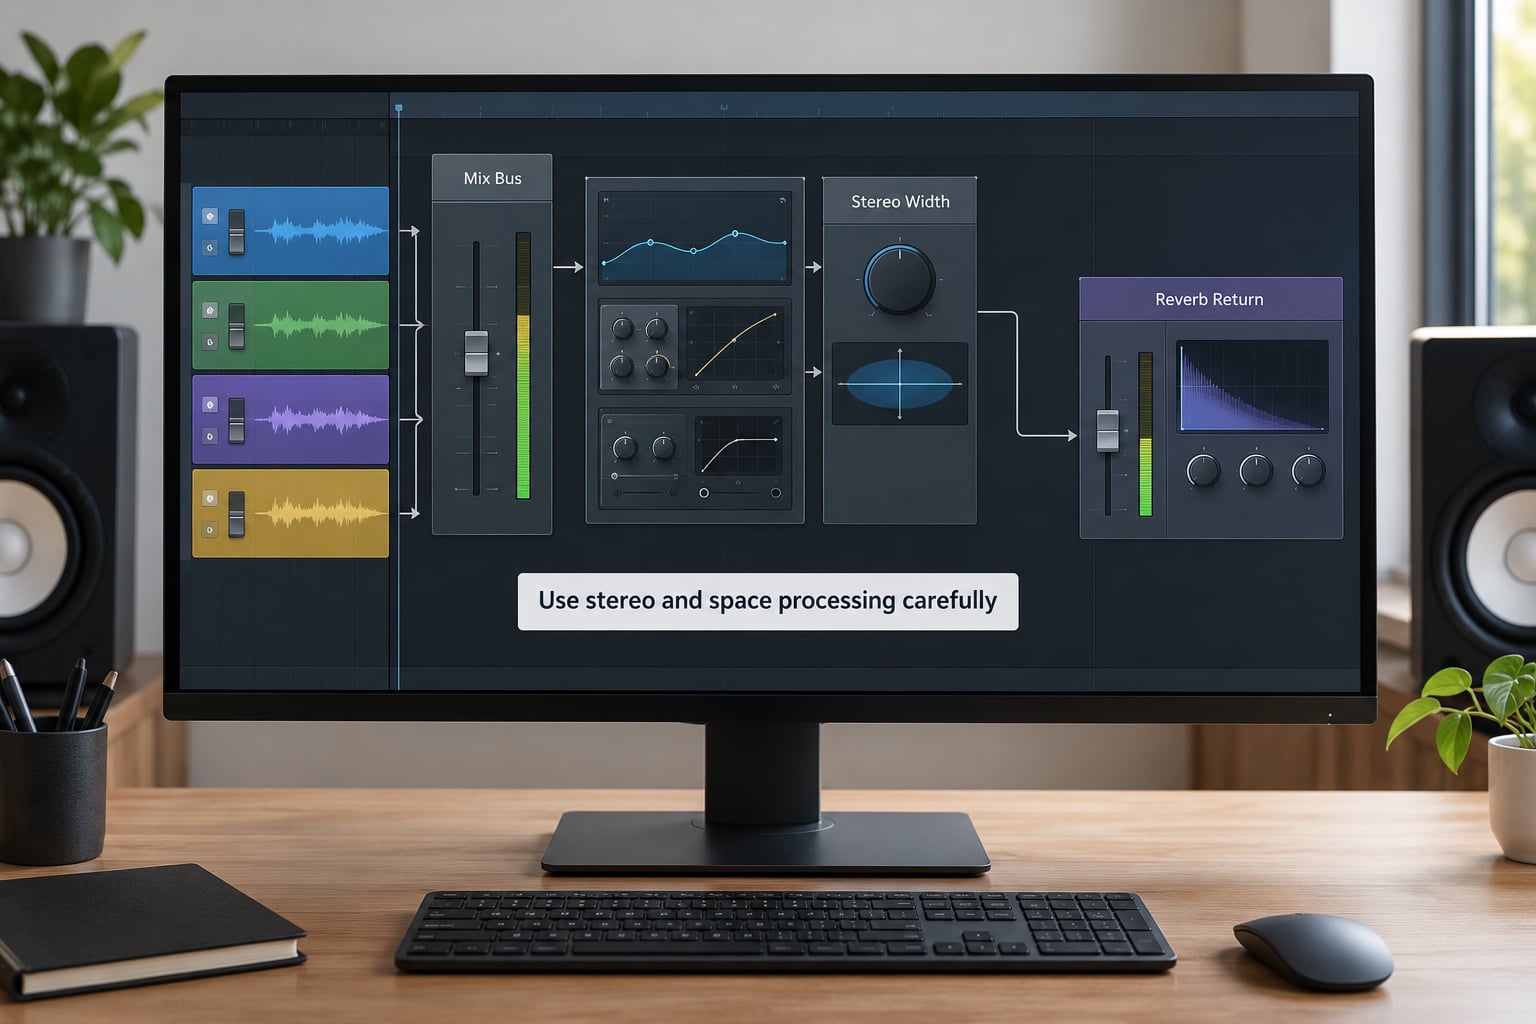
Widen by trimming sides from the mid channel, not by boosting both channels, and check the result in mono afterwards. Keep any width plugin gentle, and place it after compression so the compressor reacts to the signal you are actually hearing.
Reverb and delay should sit on returns feeding the bus, not inserted across the whole mix bus. A reverb across the full mix pushes everything backwards and smears the stereo image. If you want a small amount of air on the bus, take it from a return, high-pass it around 200 to 300 Hz, and keep it under 10% wet — 5% is usually plenty.
Mid/side EQ is worth having in slot one for surgical work. Cut resonance in the mid channel, and tame any side content that only exists above 10 kHz, which is a common source of mono collapse.
7. Set an optional final limiter and export safely
The limiter is optional, and skipping it is a completely reasonable choice if someone else is mastering your track.
If you do use one, set the ceiling first: -1.0 dBTP is a safe target that survives the encoding platforms add later. Then set the threshold just below your loudest peaks, start with 1 to 3 ms of lookahead so the gain reduction is clean rather than pumping, and let it take 3 to 6 dB.
Reference your mix against a commercial track in the same genre at matched loudness. If the limiter is doing more than about 6 dB, you are mastering from a mix that was already too loud, and no limiter will fix that.
For export, print two files. One has the full bus chain engaged so the mastering engineer can hear your intent, and one is close to straight from the rough mix. The second one gives them a genuine A/B and makes it much easier to say no to a mix that is too processed.
Common Mistakes
Processing before the EQ. The compressor reacts to whatever is in the signal, including rumble and a boxy low-mid region, and it will lock that in. Put the corrective EQ first and let the compressor hear a cleaner signal.
Too much compression. Forum reports of a muddy or phasey result almost always trace back to a second compressor or heavy gain reduction. Cut back until you land at 1 to 2 dB, then stop.
Boosting the wrong frequencies. If the low end needs more weight, cut a little of the 200-400 Hz area first. It is the classic move for a reason: the space is already there.
Treating width as arrangement. No width plugin makes a thin mix interesting. Fix the arrangement and its density, and get the drum and bass relationship right first, then use width as a finishing touch.
Routing effects backwards. Reverb and delay returns belong feeding the mix bus, not taking from it. Sending the bus into a reverb makes the entire mix sit further away in a way that is hard to correct later.
Mastering from an already loud mix. If the mix is hitting the ceiling and the limiter is working overtime, undo the limiting and let an engineer handle it. Delivering a squashed two-track is the complaint engineers repeat most often.
A few quick tips, drawn from what works consistently in practice. Set the chain once, then leave it alone rather than rebuilding it every session. Keep a copy of your dry print so you can always go back. If you self-master, treat the mix bus chain as the mix stage and keep mastering tools separate, because mixing decisions and loudness decisions pull in opposite directions.
Frequently Asked Questions
What is the best plug-in order for a mix bus chain?
Corrective EQ first, then bus compression, then optional saturation or harmonic processing, and the limiter last. The order follows the signal: EQ shapes what the compressor reacts to, compression evens out what saturation colours, and only the limiter is allowed to change the peak ceiling. Put a limiter anywhere earlier and every later stage fights it.
Should I use compression on a mix bus or only on individual tracks?
Both, for different jobs. Individual tracks and submixes handle level control and catch problems while they are still cheap to fix. The mix bus handles glue: small, even gain reduction that makes the finished elements behave as one. If your bus compressor is taking more than about 2 dB, the work belongs back on the tracks.
What is parallel compression and when should I use it?
Parallel compression means compressing a copy of the signal and blending it underneath the original, so you add density without pulling down the original transients. On a mix bus it suits progressive house and trance, where the kick and snare need to stay punchy but the sustained pads and arps need weight. Blend it in gently and check the result in mono.
How do I check whether my mix bus is mono compatible?
Look for a collapse in level or a hollow, thin quality. The quickest test is a mid/side or M/S decoder set to mid only: if the mix loses body or width-related energy, elements are hiding in the sides. On the bus, a meter plugin in mid mode plus a mono fold-down on your reference system catches it. Fix the offending tracks, not the bus.
Do I need a limiter on the mix bus if I am mastering the track later?
No. If a mastering engineer is handling the final stage, leave the limiter off and keep some headroom, around -6 dBFS peaks. A limiter on the mix bus removes the dynamics an engineer needs for loudness and impact work. Print a second, unprocessed file alongside your processed one so they can compare and push back without a level-matched argument.
Conclusion
The default chain that works for most electronic mixes is short: a high-pass around 30 Hz and a gentle corrective cut, a 2:1 to 4:1 bus compressor taking 1 to 2 dB of gain reduction, a little tape or tube colour if the mix feels thin, and a limiter only if you are mastering it yourself.
Start with the first step today. Finish your rough mix, route it into one clean bus, and add one processor at a time, bypassing each one to hear exactly what it is doing. Save the result as a template and you will never rebuild it from scratch again.