A ping pong delay is a delay effect where every repeat bounces to the opposite channel, so echoes alternate left, right, left, right instead of sitting in one place. To create one in your DAW, set a delay time tied to the project tempo, pan the delay repeats hard left and hard right, feed the repeats back into themselves, and keep the wet level low enough that the dry sound still leads. This article is about the music production effect, not the table tennis game. The whole thing takes about ten minutes once you know which knob does what.
Below is a six-step workflow that works in any DAW, with the exact menu paths for Ableton Live, Logic Pro, FL Studio and Cubase. Start from the top and follow it in order.
Table of Contents
- What You Need
- Step-by-Step: How to Create Ping Pong Delay Effects
- 1. Choose a Sound and Set the Dry-Wet Balance
- 2. Sync the Delay to the Project Tempo
- 3. Set Up a Ping Pong Delay in Your DAW
- 4. Shape the Repeats and Control the Feedback
- 5. Place the Repeats Musically
- 6. Automate, Mix, and Print the Effect
- Common Mistakes
- Frequently Asked Questions
- What is a ping pong delay effect?
- Can I make a ping pong delay with any delay plugin?
- Should ping pong delay be hard-panned or stereo?
- What delay time works best for EDM?
- Why does my ping pong delay disappear in mono?
- Conclusion: Start with a Simple Quarter-Note Delay
What You Need
The short answer: any DAW, any delay plug-in, a source sound, and headphones or stereo speakers. That’s genuinely all it takes, and the effect ships with every major DAW.
You need a source signal first. A clap, snare, closed hat, vocal stab or synth pluck works well because each one has a clear attack, and the delay locks onto that attack. A sustained pad or reverb tail makes a poor starting point because there is no transient to bounce.
You also need somewhere to route the effect. Either insert the delay on the source channel itself, or create a separate return channel and send into it. The return route is cleaner because it lets you set the wet level with a fader rather than a mix knob.
The exact menu paths below are written for Ableton Live 11 and 12, Logic Pro 10.2 and later, FL Studio version 24 and later, and Cubase 13 and 14. Naming differs between them, but the signal flow is identical everywhere.
Optional but useful: a reference track with a known ping pong sound, and a second delay so you can compare settings. Headphones matter here, because on a mono monitor or a single-bounced file you cannot hear the alternation at all.
Step-by-Step: How to Create Ping Pong Delay Effects
Here is how to create ping pong delay effects that sit musically in an electronic track: pick a transient-heavy sound, sync the delay to tempo, route it through a return with the repeats panned opposite, then shape feedback and filtering before you place the effect in the arrangement.
1. Choose a Sound and Set the Dry-Wet Balance
Start with a short, transient-heavy source. Claps, snares, closed hats, vocal stabs and plucks all give the delay a clean edge to repeat, and the attack is what the ear locks onto when the repeats bounce across the stereo field.
Keep the original signal prominent. Start the wet level around 20 to 30 percent if you’re using a mix knob, or pull the return fader down until the echoes sit behind the dry sound rather than in front of it. If you cannot immediately hear the dry transient, the wet level is too high.
One thing to check first: if your source is perfectly mono, some plug-ins have nothing to alternate between and the effect can collapse or sound one-sided. Duplicating the source to two channels, or using a stereo source, fixes it.
2. Sync the Delay to the Project Tempo
Turn on tempo sync and pick a note value rather than a millisecond value. At 128 BPM a quarter note is roughly 469 milliseconds and a sixteenth is about 117, and those two numbers sound like completely different effects.
Straight, dotted-eighth and sixteenth choices cover most electronic music. Straight sixteenths give fast, busy motion. Dotted eighths stretch the tail out and leave space between hits, which sits better under a busy kick pattern.
Use triplets for material that swings or sits in a half-time feel, and use unsynced milliseconds only when the source is rubato or a played recording with no fixed grid. A vocal take played freely will fight a synced delay.
3. Set Up a Ping Pong Delay in Your DAW
The core of the effect is routing: the left repeat feeds the right, and the right repeat feeds the left, so repeats alternate sides indefinitely.
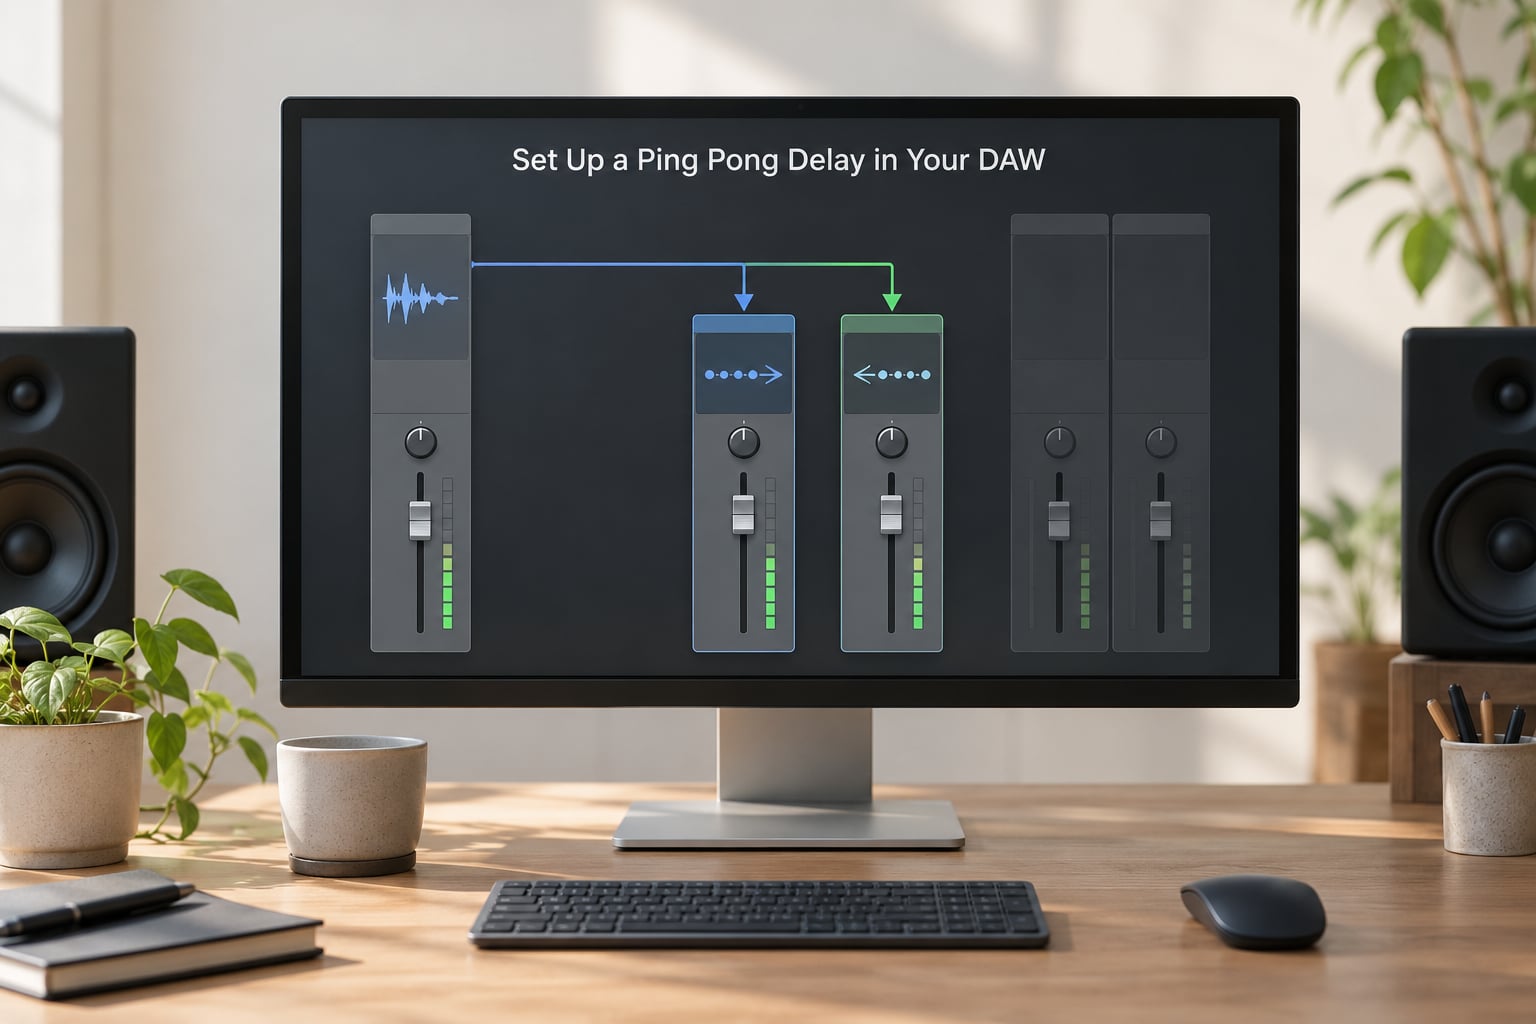
In Ableton Live, create a return track with Ctrl+Return, drop an Audio Effect Rack on it, and add a Ping Pong Delay from Delay and Looper in the browser. Turn sync to Tempo, choose the division from the right-hand knob, and set Feedback around 40 percent. The Feedback Filters section at the bottom controls tone, not amount.
In Logic Pro, open an Audio track’s Channel Strip or a Mix channel, insert Stereo Delay, and click the Ping Pong button in the Sync section. Set Sync to Tempo, then pick the division from the Time menu. The Ping Pong button assigns left and right taps on alternating cycles, so the alternation is locked to tempo.
In FL Studio, open the Mixer, pick a channel, then Channel Settings to add Fruity Delay 3. Set Time to a synced note value and switch Mode to Ping Pong, which alternates left and right echoes. FL Studio’s inverted-stereo modes are built for automation, so they respond well to automated sends.
In Cubase, add Delay to a channel from the Delay category, open it and turn Sync on, then choose the note value from the Time Mode and Time Base controls. Cubase’s Delay pairs naturally with a stereo input if you want the two sides to feel balanced.
Whichever DAW you’re in, route the source into the return as a send rather than duplicating the source to two delay tracks. Once the repeats alternate, pan the delay return hard left and hard right. That hard placement is what makes the movement read as panning rather than as a static stereo image.
4. Shape the Repeats and Control the Feedback
Feedback is how much of each repeat is routed back in to make further repeats, and it is the parameter that decides whether the effect is controlled or not.
Start moderate, around 30 to 50 percent. Darker results come from lowering feedback, because fewer repeats means less buildup in the low mids. Longer tails need more feedback, and anything past roughly 70 percent on a synced quarter-note delay will run away into a smear.
Add a lowpass filter on the repeats. Rolling the filter down to somewhere around 2 to 4 kHz keeps each successive repeat darker, which prevents a bright infinite repeat from masking the dry sound. Most tempo-synced ping pong effects will not survive long without this.
If your plug-in offers analog or tape modelling, switch it on last. Repitch and tape modes change how the repeats behave under feedback, so set your tone and filter first, then decide if the character is worth it.
5. Place the Repeats Musically
The setting is only half the job. Where you put the effect in the arrangement decides whether it supports the groove or fights it.
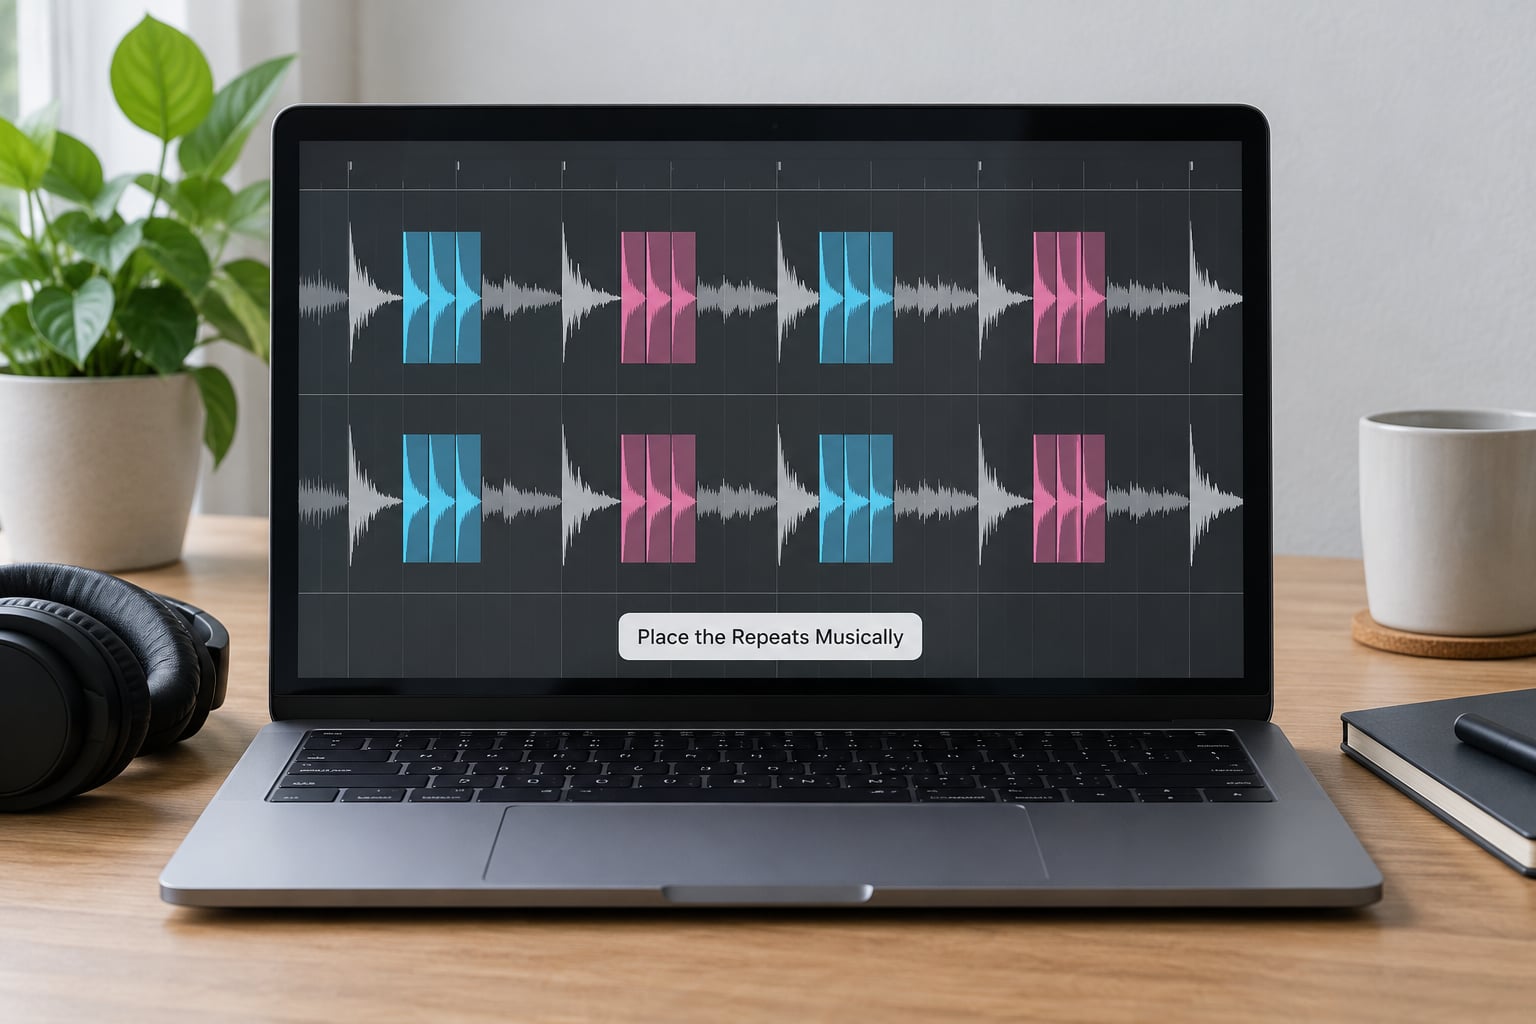
Off-beat hats are the classic placement. A sixteenth ping pong on a closed hat gives constant motion behind the kick without adding low end. Claps and snare answers work well too, because the repeat lands where the next accent would fall.
Vocal phrases take longer values. A dotted-eighth ping pong on a lead vocal gives a drifting width that fills the gap before a drop. Rising transitions are where this effect earns its place: automate the send up through a build and the repeats widen out as the filter opens.
Two tricks change the feel without changing the settings. Changing the note value between sections changes the perceived rhythm of the whole part. Automating feedback from low to high across a phrase makes the effect build and then release when it drops back down.
6. Automate, Mix, and Print the Effect
Automate the send or the wet level before you automate anything else. A filter sweep on the source does almost nothing if there is nothing being sent, and a delay throw at the end of an eight-bar phrase is one of the cheapest transitions you can build.
Check the result in mono. Most low end lives in the centre, so if the delay is hollowing out the bottom of the mix, pull the delay’s low cut up or use the highpass on the return channel instead of removing the effect.
Match the level to the reference. Raise the return if the repeats disappear, lower it if they fight the transient. Most of the judgement here is done by comparison, not by reading numbers.
When the track is finished, bounce or print the return track with the effect so the tails render in full. Tail spillover across a scene change is the one problem you cannot fix after rendering.
Common Mistakes
Five problems account for most failed ping pong delays, and each one has a specific cause rather than a general “turn it down” answer.
The effect sounds centred instead of wide. Your delay is running in insert mode on a mono source, so there is only one channel of repeats. Put it on a return, pan the return hard left and hard right, and duplicate a mono source to both channels.
The dry sound gets washed out. The wet level is too high or the delay sits in front of the source. Drop to 20 percent wet, raise the dry fader, and check the filter is not wide open on the repeats.
The repeats sound chaotic rather than musical. The note value is too short for the tempo. An eighth at moderate tempos collides with the groove and masks the original hits. Move to a sixteenth or a dotted eighth.
The effect disappears in a busy mix. Too many sources are feeding the same delay, so the transients mask each other. Pick one source, and raise the return so the effect sits above the rest rather than below it.
The timing drifts. Sync is off, or the plug-in is in free-running mode after a tempo change. Switch sync back to Tempo and confirm the division is a note value, not milliseconds.
A few habits keep the effect honest. Check in mono before you bounce. Reference against a track that already uses the effect. Keep gain staging tidy so the return sits where you think it does. And treat the delay as part of the arrangement, not something you paste on every sound at the end.
Frequently Asked Questions
What is a ping pong delay effect?
A ping pong delay is a delay effect where each repeat alternates between the left and right channels, so echoes bounce back and forth across the stereo field instead of repeating in place. It is built from two delay buffers with identical delay times, where the output of each buffer feeds the input of the other. Producers use it to widen mono sources and add front-to-back depth without a dense reverb tail.
Can I make a ping pong delay with any delay plugin?
Almost any stereo delay can do it. Look for a ping-pong or auto-pan mode, which alternates repeats between channels automatically. If your plugin lacks that mode, place two copies on two return channels, pan one hard left and the other hard right, and route each return into the other channel’s input. The cross-feedback between the two buffers is what creates the bouncing pattern.
Should ping pong delay be hard-panned or stereo?
Hard-pan the delay return, not the source. The alternation only reads as movement when each repeat sits fully on one side of the stereo field. A centred delay produces a wider but static image, which sounds like a stereo widener rather than a ping pong. Leave the dry source in the centre so it stays anchored while the repeats move around it.
What delay time works best for EDM?
Sixteenth notes for busy hats and percussion, dotted eighths for claps and vocal phrases, quarter notes for sparse ambient passages. At 128 BPM a sixteenth is about 117 milliseconds and a quarter is about 469 milliseconds. Keep tempo sync on so the repeats stay locked to the grid when you change the project tempo later.
Why does my ping pong delay disappear in mono?
It usually does not disappear, it collapses. Mono playback sums the left and right channels together, and a perfectly alternating delay partially cancels itself at that point. If the effect fades out entirely, check that your source is not identical on both channels, and check for phase cancellation in your output path. A highpass on the return can also thin it out more than you expect.
Once the routing is right, the rest is taste. Keep a note of the note value and wet level that worked on a given source, because you will use the same numbers on the next track.
Conclusion: Start with a Simple Quarter-Note Delay
Start with a quarter note, feedback near 40 percent, the return panned hard left and hard right, and wet around 20 percent. Solo the source, send it into the delay return, and raise the return until you clearly hear it alternate. That is the whole effect in four settings.
Then move slowly. Automate the send into a build, add a lowpass so the repeats darken, try a dotted eighth on a vocal phrase, and compare each change against a reference track. The effect rewards restraint more than it rewards settings.