Most producers answer this question the wrong way. They open a MIDI clip, add a seventh, stack another instrument underneath, and then wonder why the arrangement feels cluttered instead of huge. The honest answer is that size is not a note count. It comes from two axes: how far the notes spread across the stereo field, and how far they spread across the frequency range. Both can be widened using the exact notes you already have.
This guide walks through the seven-stage workflow I use in Ableton Live 12 to take a thin three-note stab and turn it into a full-sounding chord, with no new pitches written. Menu paths are shown for Live 12, but every move translates to any DAW. The whole thing takes about 20 minutes on a chord you already dislike, and almost none of it survives contact with a bad voicing, which is where we start.
If you want the shortcut version: spread the notes out in pitch, double one voice rather than all of them, give each layer its own band of the spectrum, and keep the low end out of the stereo field entirely.
Table of Contents
- What You Need
- Step-by-Step: How to Make Chords Sound Bigger Without More Notes
- 1. Choose a chord that leaves room to expand
- 2. Move selected notes into different registers to make chords sound bigger without more notes
- 3. Double voices by function, not by copying every note
- 4. Spread the chord across the stereo field
- 5. Give each layer its own frequency job
- 6. Add controlled movement and soft saturation
- 7. Check size against clarity and focus
- Common Mistakes
- Doubling every note in the chord
- Widening the bass
- Hard-panning the whole chord
- Over-detuning the unison stack
- Letting low-mid buildup swallow everything
- Drowning the chord in reverb
- Judging the chord on its own
- Frequently Asked Questions
- How do I make chords sound bigger without adding more notes?
- Should I widen the bass note in my chords?
- How wide should a chord be in a trance or house mix?
- Do octave layers still count as adding more notes?
- How do I keep wide chords working in mono?
- Should I use reverb or delay to make chords sound bigger?
- Conclusion
What You Need
You do not need new gear, and you do not need new notes. You need a working arrangement and a few minutes of rearranging.
- A chord or progression you already have. A four-note loop such as Am–F–C–G gives you plenty to work with. Three notes is fine too.
- A supporting bassline or arpeggio. Size judgements only mean something against the rest of the arrangement, and this is the layer that tells you whether the chord is winning or hiding.
- A synth or sampler that can play octaves and unison. Any subtractive synth, a sampler running a stacked saw patch, or a piano roll with duplicate notes on different channels will work.
- A DAW with per-note control. Live 12, FL Studio and Logic all let you select individual notes and change their pitch or pan. That is the whole toolset for this job.
- Headphones plus one pair of monitors. You want both. Mono checks only sound honest on one of them, and a phone speaker is the quickest way to catch a fake stereo image.
One honest warning before we start. Forum threads from r/musicproduction and r/edmproduction keep landing on the same frustration: hours spent tweaking a pad preset, and the chord still sounds wrong. That is almost never the patch. It is the voicing, the register, or the fact that the chord was judged in isolation. A KVR Audio thread makes the same point from the other side — most instruments sound bad on their own, and the punch in a track usually comes from bass and drums.
Step-by-Step: How to Make Chords Sound Bigger Without More Notes
Work in this order. Each stage assumes the previous one is done, because each one changes what the next stage can achieve. Jumping to stage 4 with a close-positioned root-note pile is the single most common reason this technique fails in practice.
If you are not sure where the problem sits, start from what you hear:
- Thin, small, disappears behind the kick? The notes are stacked in a close voicing inside one register. Go back to stages 1 and 2.
- Wide but hollow? Unison detune is too wide, or every voice is panned too hard. Look at stages 3 and 4.
- Big but muddy, with an unstable low end? Too many voices below 200 Hz plus low-mid buildup. Fix it in stage 5.
- Wide and clear but static and lifeless? No movement, no saturation, everything compressed too hard. Stage 6.
- Covering the lead melody or the vocal? The size is fine, the level is wrong. Stage 7.
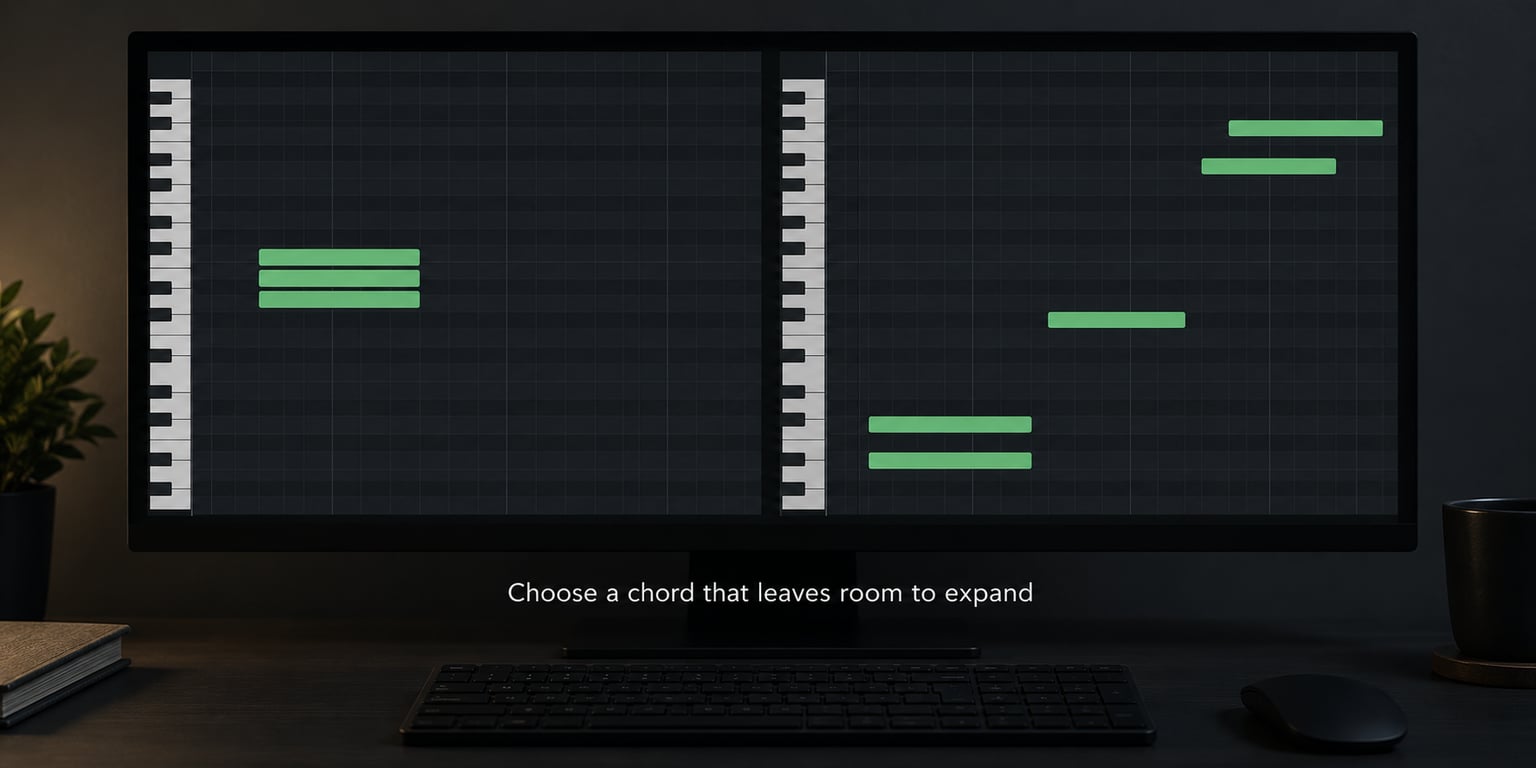
1. Choose a chord that leaves room to expand
Start with a simple sustained voicing. Am–F–C–G in root position works, but root position on a four-note loop means your lowest note changes on every bar, which fights the bassline. Put the root in the bass and play the chord above it as a triad: A–C–E, F–A–C, C–E–G, G–B–D.
The rule worth memorising comes from a KVR Audio thread and it is the most repeated piece of practical voicing advice in that whole discussion: for a sustained, fat sound, let a fourth or a fifth be the narrowest interval between any two voices. Played as Am7 in root position you get A–C–E–G, with a minor third and a major third crammed at the bottom. That cluster is where the smallness lives.
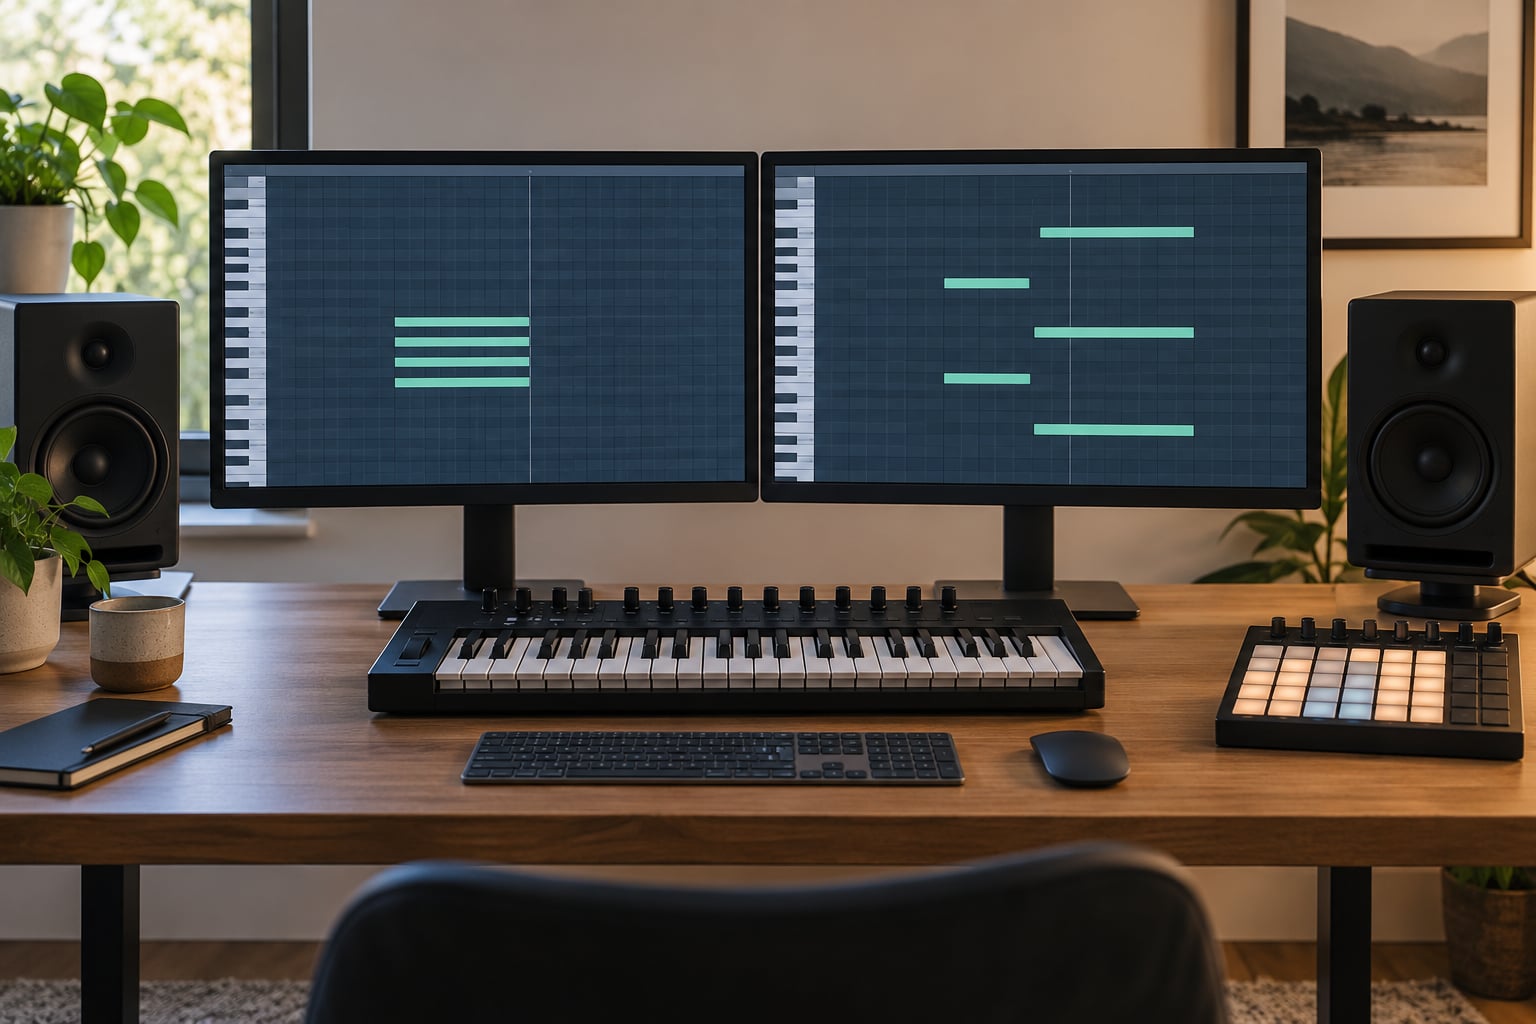
Move the same four notes to an open voicing: A–C–E–G becomes G–C–E–A from the bottom up. The pitch set is identical. Nothing was added, and it now occupies nearly twice the range, so it reads as a bigger chord.
Be careful about the opposite failure. If the narrowest gap is a fourth but you have pushed the outer notes a tenth or more apart, the chord stops sounding like one object. It sounds like three separate notes drifting, and the harmony detaches from the bass underneath it. Fourths and fifths spread, tenths and beyond disconnect.
Use seventh chords selectively rather than everywhere. A seventh in the top voice gives a pad a suspended, unresolved quality that a triad cannot, but it also eats air. Try it on one or two bars of a progression and listen before committing.
2. Move selected notes into different registers to make chords sound bigger without more notes
This is the single biggest win in the whole workflow, and it is free. Redistribution works because perceived size tracks the distance between notes in pitch, not the count of notes.
Put the root in the bass region or let the bassline own it. Place the third or fifth in the midrange where it will carry definition and a sense of chord quality. Then move your highest note up an octave to create a clear melodic top line above everything else in the arrangement.
In Live 12, select the top note and drag it up an octave with the arrow keys, or hold Shift while dragging to copy it to a second track. The result is the same four pitches laid out over a much wider pitch range, with a clear foreground line and a background body.
Watch for two side effects. First, the octave-up note can become shrill on small speakers, so give it its own high-pass around 400 Hz and let it live above the pad rather than fighting it. Second, moving notes up leaves a hole in the low-mid, which sometimes reads as thin. Fill that hole with a bass note from the existing chord rather than reaching for a new instrument.
3. Double voices by function, not by copying every note
Copying every note of the chord into a second layer is the standard move, and it is the reason so many stacks collapse into mud. Double by function instead: pick the third, which is what tells the ear what chord this is, and one sustained upper voice, which is what makes it feel like a held sound.
Leave the bass alone. Two copies of the lowest note fighting each other is the fastest route to an unstable low end.
Now make the doubled layer do something the original cannot. Pan it slightly opposite the first, filter it into a different band, or detune it by a small amount. In Live 12 you can either route the second track through a Utility device and set Pan to around 40% left while the original sits at 40% right, or use Audio Effects > Auto Pan for a slow-moving image.
A useful trick from synth tutorials: keep one layer slightly mono and let the other carry the width. When you check the sum in mono, the wide layer folds inward and fills the centre rather than disappearing, so the chord keeps its body on systems that collapse the image. That is mono-compatible width, and it is more useful than hard panning every voice.
On detune, the practical range is narrower than most presets suggest. Anything between 5 and 15 cents reads as thickness. Above roughly 20 cents on multiple voices you get audible beating and a thin, hollow-sounding result that Ableton forum threads keep describing as phasing. The cause is phase cancellation: detuned voices drift in and out of alignment, and where they cancel, the chord loses level and clarity. Keep the spread modest, and keep voices at different pan positions so they are not cancelling in the same place.
4. Spread the chord across the stereo field
Width is horizontal spread. Keep the bass note centred, keep everything below about 200 Hz centred, and pan only the upper voices.
Opposite-direction panning on the top two voices does most of the work. In Live 12, either set Pan on individual MIDI notes in the piano roll, or put the chord through Audio Effects > Pan with the mode set to split and drag the division to create a stereo spread. For a two-voice chord, Utility on each voice gives you exact control.
The warning: do not hard-pan notes across the full range. If the lowest note sits hard left and the highest sits hard right, the chord stops functioning as one harmonic object, and the low end jumps when the mono sum folds. Wide means 30 to 70 for most material, with the bass in the middle.
Everything under 200 Hz should be mono. That includes the root of the chord, and it includes any unison voices you have added down low. A quick way to check: hit the mono button on your master, or use a Utility device with Split, and listen on a phone speaker. If the size collapses entirely, the width was never real.
5. Give each layer its own frequency job
Now the part that decides whether your big chord sounds big or sounds like a smear. Every layer gets a band, and the bands do not overlap much.
High-pass the low layer at 120 to 180 Hz so it stops competing with the bass. Take a restrained notch out of the low-mid on the upper layer — around 250 to 400 Hz, roughly 2 to 4 dB — where sustained stacks pile up. Mid-side EQ makes this straightforward: cut the mid band around 300 Hz and leave the side band alone, so the centre thins without losing width.
Give the doubled voice a high shelf instead. A couple of dB above 6 kHz adds the air that listeners read as size, and it costs nothing in the low end. Side-band content is doing the width work here, so a gentle boost on the side channel around 2 to 5 kHz makes a narrow layer read wide.
A gentle compressor on the chord bus, with a fast attack around 2 to 10 ms and a slower release around 50 to 150 ms, evens out the level so the doubling does not choke the original. Put it after the reverb in the chain, not before, so the reverb tail gets compressed too and the whole thing sits as one body.
Leave gaps. If every layer reaches every frequency, you get low-mid buildup, which the ear reads as small and unclear no matter how much level you add. Three narrow bands with space between them sound bigger than three full-range copies.
6. Add controlled movement and soft saturation
A static voicing stays static. Movement and saturation make the same chord feel larger without a single new note.
Open a filter slowly across the chord, or bring the filter envelope down over a few seconds. Change the release time on the amp envelope by a few milliseconds between layers so they do not end together. Slow the LFO rate on a chorus or a phaser to roughly 0.2 to 0.5 Hz, which is the range that reads as movement rather than wobble.
Saturation is the other one. A soft clipper or tape saturation on the chord bus, driven gently, adds upper harmonics to every existing note, so the chord occupies more of the spectrum without new pitches. Keep the drive low enough that the fundamental still reads as clear. If it turns the chord buzzy, you have gone too far.
Reverb size matters more than reverb amount. A longer decay makes the chord occupy more time and therefore more space. Use a plate or hall rather than a tight room, pre-delay it so the transient stays dry, and keep the wet level low enough that the chord still has an edge.
Do the before-and-after test properly: print or bounce the original, then the processed version, and level-match them. If the size increase came from level rather than texture, you will hear it immediately, and that is a useful thing to catch before the mix bus.
7. Check size against clarity and focus
Size is a comparison. A huge chord that hides the lead melody is not big, it is just loud and unhelpful. What most producers actually want is bigger without compromising the rest of the mix.
Run three checks. First, turn the monitor down until it is barely audible. If the chord is the first thing you still hear, it is too prominent in the mids. Second, check in mono, as described above. Third, solo the kick and bass with the chord and listen for low-end pumping or wobble, which means the bass note and the chord root are fighting.
If the lead disappears, take back width before you take back level. Pull the top voice from 70 to 55 percent pan and listen again, or lower the shelf boost on the doubled layer. If the kick becomes unstable, high-pass the chord harder, from 120 Hz up to 200 or 250.
Then decide what to give back. Fewer octave layers, less detune, narrower pan, or lighter low-end weight. Take away from the lowest-value element first, which is usually the layer doing the least melodic work.
Common Mistakes
Every one of these is reversible in about a minute, and every one of them is common enough to be worth naming.
Doubling every note in the chord
Two full copies of a chord double the low-mid energy and halve the clarity. Double the third and one upper voice instead, and keep the root single.
Widening the bass
Below about 200 Hz, stereo information is mostly useless and frequently harmful. Keep the low end centred and the chord root with it. You will still hear the full width on small speakers.
Hard-panning the whole chord
Every voice at extreme left and right turns one chord into two disconnected notes. Pan the upper voices in opposite directions by a moderate amount, and leave the bottom alone.
Over-detuning the unison stack
Past roughly 20 cents on several voices you get beating and phase cancellation, and the chord turns thin and hollow. Stay between 5 and 15 cents. Quick test: if the sound narrows when you close your eyes, you have gone too far.
Letting low-mid buildup swallow everything
Sustained chord stacks always accumulate energy around 200 to 500 Hz. A restrained cut there, or a mid-side EQ that thins only the centre, buys more apparent size than any amount of added level. Start with 2 to 4 dB.
Drowning the chord in reverb
A wet reverb tail longer than the chord itself erases the note and leaves a wash. Pre-delay it, keep the wet level modest, and increase the decay rather than the wet mix.
Judging the chord on its own
A chord played solo will sound thin in almost every context. Judge it against the bassline, the kick, and the rest of the arrangement, at the volume you will actually be listening at. That is the same point the KVR contributors make, and it is the fastest way to stop chasing a preset that was never the problem.
Frequently Asked Questions
How do I make chords sound bigger without adding more notes?
Spread the notes you already have across a wider pitch range using open voicings, move the top note up an octave, and double only the third and one upper voice instead of the whole chord. Then give each layer its own frequency band, keep everything under 200 Hz centred, and add slow filter movement or gentle saturation. Perceived size comes from pitch range, stereo spread and frequency range, none of which require new notes.
Should I widen the bass note in my chords?
No. Keep everything below about 200 Hz centred in the stereo field, including the root of the chord. Low frequencies have almost no usable stereo information and wide low end destabilises the mono sum, which is why club systems can make a wide low chord sound like it is wobbling or hollow. Widen the upper voices instead; your speakers will fold them in without touching the low end.
How wide should a chord be in a trance or house mix?
Enough that the chord reads as a single wide object, not so much that it splits into separate notes. For most trance and house material, pan the upper voices somewhere between 30 and 70 percent in opposite directions and leave the root centred. Check the result in mono, because anything that disappears when you fold the image was not real width. If the top voice gets shrill, pull the pan back before cutting level.
Do octave layers still count as adding more notes?
Technically yes, since an octave layer repeats a pitch, but it is doubling rather than new harmony, which is exactly what this method is about. An octave-up copy of an existing note adds no new chord tone, so the chord’s harmonic content is unchanged. That is also why it is safer than adding a seventh or a second instrument: you are redistributing what you already have rather than writing something new.
How do I keep wide chords working in mono?
Keep the low end mono, keep the number of voices that fight each other low, and let one layer carry most of the width while the other stays more centred. When the image folds in mono, the wide layer moves inward and fills the centre instead of vanishing, which keeps the chord’s body intact. High-passing the wide layer above about 200 Hz and avoiding detune wider than 15 cents also helps a lot.
Should I use reverb or delay to make chords sound bigger?
Both help, but through size of space rather than level. A longer reverb decay makes the chord occupy more time, and a single slap or dotted delay on selected voices adds depth without touching the direct signal. Pre-delay the reverb so the attack stays dry, keep the wet level modest, and place the compressor after the reverb so the tail is controlled too. Wide reverb plus wide panning is a fast route to a washy mix.
Conclusion
The whole point is that a chord can be large without being complicated. The notes stay exactly where they were; what changes is where they sit in pitch, where they sit in the stereo field, and which part of the spectrum each layer owns.
Start with the voicing. Let a fourth or fifth be your narrowest interval, lift the top note an octave, double only the third and one upper voice, keep everything under 200 Hz centred, cut a couple of dB around 300 Hz, and then check the result in mono and at low volume. Those five moves take about fifteen minutes and they account for most of the difference between a thin chord and a full one.