To build a mixing template in Ableton Live, you save a Live Set that already has your groups, buses, return effects and master chain wired up, then open that set instead of a blank project every time you mix. The whole build takes about 45 to 90 minutes once. What you get is a console that already knows where the drums, bass, melodic layers and vocals go, so every track you mix starts from the same routing and the same gain staging.
That matters most when you are working in electronic music, where a release means mixing one track after another for weeks and small routing differences start to make finished songs sound like they came from different studios. It also matters when you mix stems somebody else sent you, because you inherit whatever levels and processing they left behind.
I keep separate templates for sketching and for mixing. The mixing one has no drum racks loaded, just tracks, groups and processing, so it opens fast and gives me the whole CPU to the actual audio. The steps below are written for Ableton Live 12 and Live 11; Live 10 users should skip the Meld and Roar mentions and use Saturator in their place, since those devices do not exist there.
Table of Contents
- What You Need
- Step-by-Step: How to Build a Mixing Template in Ableton Live
- 1. Create a clean template Set
- 2. Build the track layout
- 3. Set up audio and MIDI routing
- 4. Create mix buses
- 5. Add utility processors and gain staging
- 6. Configure the master chain
- 7. Save, test, and refine your mixing template in Ableton Live
- Common Mistakes
- Frequently Asked Questions
- What should an Ableton Live mixing template include?
- Should I build a mixing template in Session View or Arrangement View?
- How do I stop tracks from clipping in an Ableton Live template?
- Should every instrument have EQ and compression in a mixing template?
- Do I need a separate drum or vocal bus in Ableton Live?
- How do I use one mixing template for different electronic music genres?
What You Need
You need far less than people expect. Most of the work is routing decisions, and those you make in Session View with no audio playing at all.
- A blank Live Set. Create it from File > New Live Set. Start empty rather than editing a song you like, so nothing from that song sneaks in.
- An audio interface with at least two outputs if you want to compare your mix to a reference track without lowering the volume every time. Mono is fine if you are mixing on headphones.
- Monitors you have calibrated, or decent headphones. Mixing template decisions are wasted if the monitoring chain is lying to you.
- A folder of reference tracks in the genres you release in. Roughly three per genre, in the same key and tempo range as your own material.
- Ableton’s built-in devices only. Utility, EQ Eight, Compressor, Glue Compressor, Saturator, Roar, Limiter, EQ Four and the stock effects cover everything a mixing template needs.
- Somewhere to write notes. A text file next to the template listing every starting setting you chose, because six months later you will not remember why the Glue Compressor threshold is where it is.
One deliberate choice: stock devices only. Producer forums like r/ableton and forum.ableton.com keep circling the same problem. A template built with third-party plugins opens with a wall of grey device headers on someone else’s machine, and the missing plugin message becomes the first twenty minutes of every session. If you want your favourite plugin in the chain, build a second template that you only open on your own studio machine.
Step-by-Step: How to Build a Mixing Template in Ableton Live
1. Create a clean template Set
A mixing template is a Live Set saved with its devices, routing and view settings intact, ready to open as the starting point for a mix. Create yours from a brand new Set and decide the tempo and key before anything else, because those two numbers set the expectations of every clip you drop in later.
Go to File > New Live Set, then set the tempo in the transport bar and pick a key signature from the key selector to the left of it. For trance and melodic electronic music, 123 to 126 BPM in F minor or A minor covers a lot of ground. Those are common defaults in the community for a reason, but treat them as defaults, not rules.
Next, clean up the browser so your samples are one click away. In the Browser’s Collections area, create collections named for your template, then drop your drum one-shots, loops and textures into them. People who maintain templates over years credit this more than any device choice, because a template that takes three minutes to navigate is a template you stop trusting.
How do you know this step worked? Close the Set and reopen it. Nothing loads unexpectedly, no audio from a previous session appears, and the tempo and key are still where you left them. Do this now, before you add complexity that will hide the same problem later.
2. Build the track layout
Give every channel a name you will recognise at a glance and a colour that means something, then keep the whole set in one group so you can select it all and act on it together.
A practical layout for electronic music looks like this, and it is deliberately boring:
- 4 audio tracks for the drum kit: kick, snare and clap, percussion, hi-hats
- 1 audio track for bass
- 3 to 4 MIDI tracks for pads, plucks, leads and texture
- 2 audio tracks for vocals, one lead and one background
- 3 return tracks: reverb, delay, and one for chorus or a stereo widener
- 1 reference track
- 4 groups: drums, bass, melodic, vocals and FX
- 1 mix bus feeding the Master track
Name them so they sort the way you mix them. “Drums Kick”, “Drums Perc”, “Bass Sub”, “Vox Lead” beat “Track 1” every time. Set colours by section, drums one colour, bass another, melodic a third, so a wall of twenty channels still reads as four blocks.
To move a bunch of tracks together, drag a selection in Session View, or use the Group command to wrap them in a folder on the track header. Grouping is purely organisational in Live; it changes nothing about the signal until you route it.
3. Set up audio and MIDI routing
Every channel in your mixing template should have a defined input and output, and only one of them should reach the Master track. Everything else goes through groups and buses.
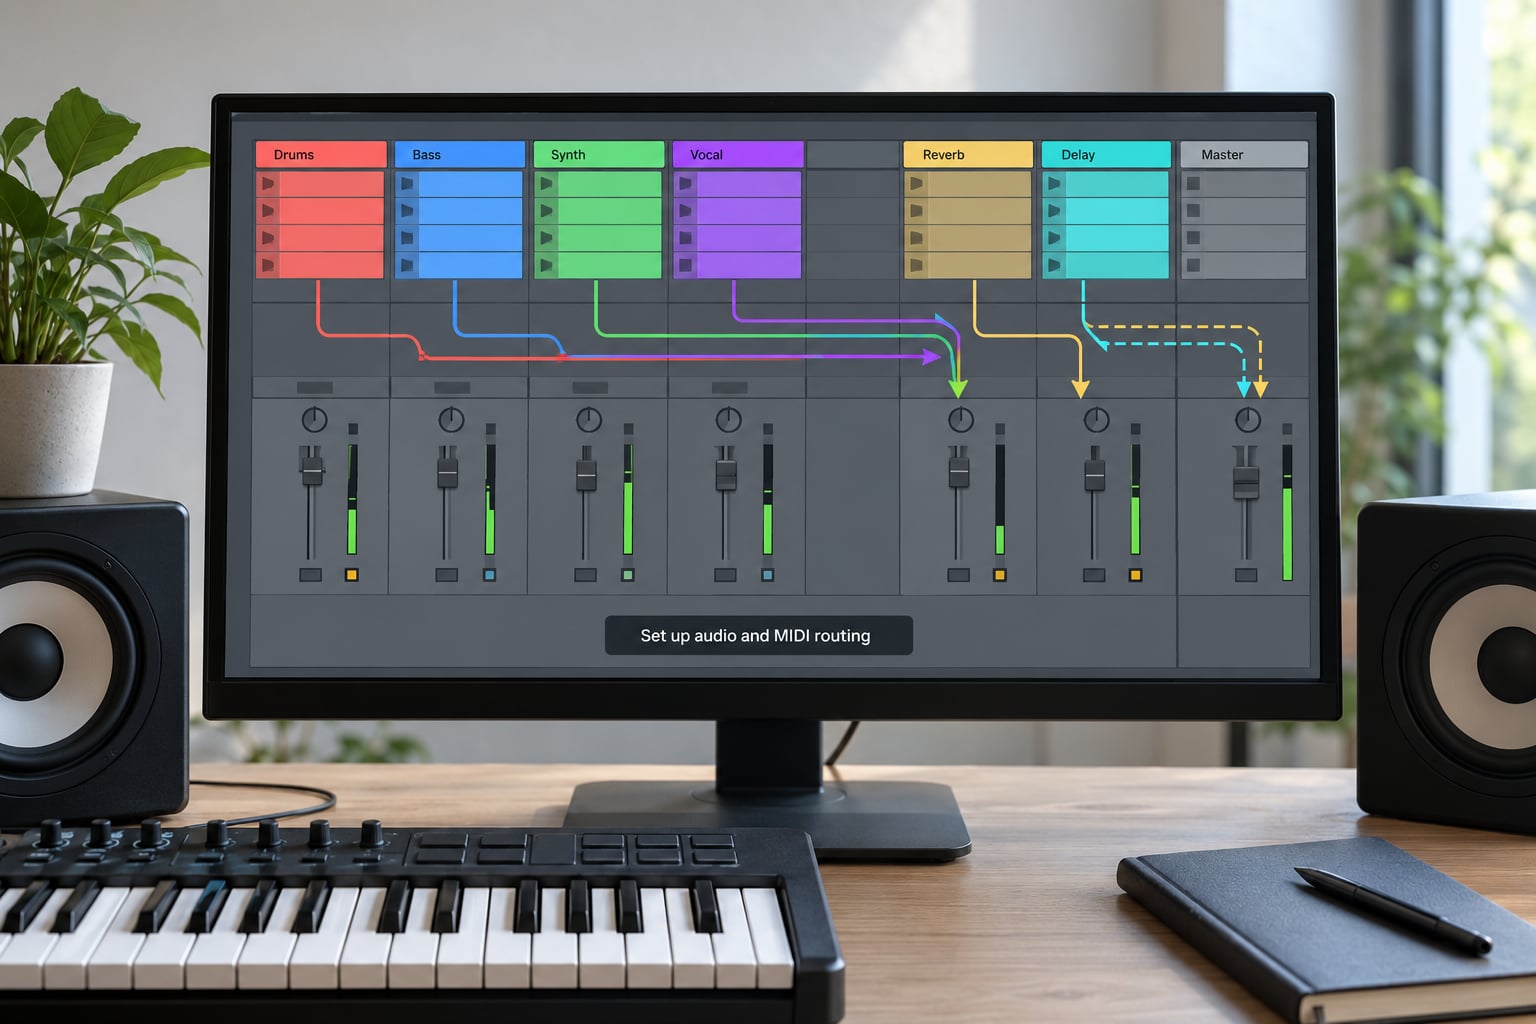
For each audio track, open the Input Routing section on the track (the small arrow in the top-left of the track panel) and turn on Input, In, Auto Monitor, and the monitor buttons for the outputs you want it to feed. With a two-output interface, drums might feed 1/2, bass feeds 1/2, and anything you need to reference separately feeds 3/4.
For MIDI tracks in a mixing template, you are not loading instruments, so the instrument rack stays empty or holds a single stock device. Your mix job starts when audio arrives, and that audio arrives on audio tracks. Keep one or two MIDI tracks with Wavetable or Drift loaded for the odd thing you want to add while mixing, and leave the rest clean.
Set each track’s output using the routing selector under the mixer section. A plain audio track should default to Master, and you will override that by routing it into a group instead. Check the little routing cable at the bottom of every track to confirm it lands where you think it does. A misrouted track that quietly plays straight to Master is the single most common reason a new template sounds wrong on the first session.
4. Create mix buses
Groups are where the actual mixing decisions live. Each group collects a section of the mix, gives you one fader and one device chain for it, and then feeds the next stage.
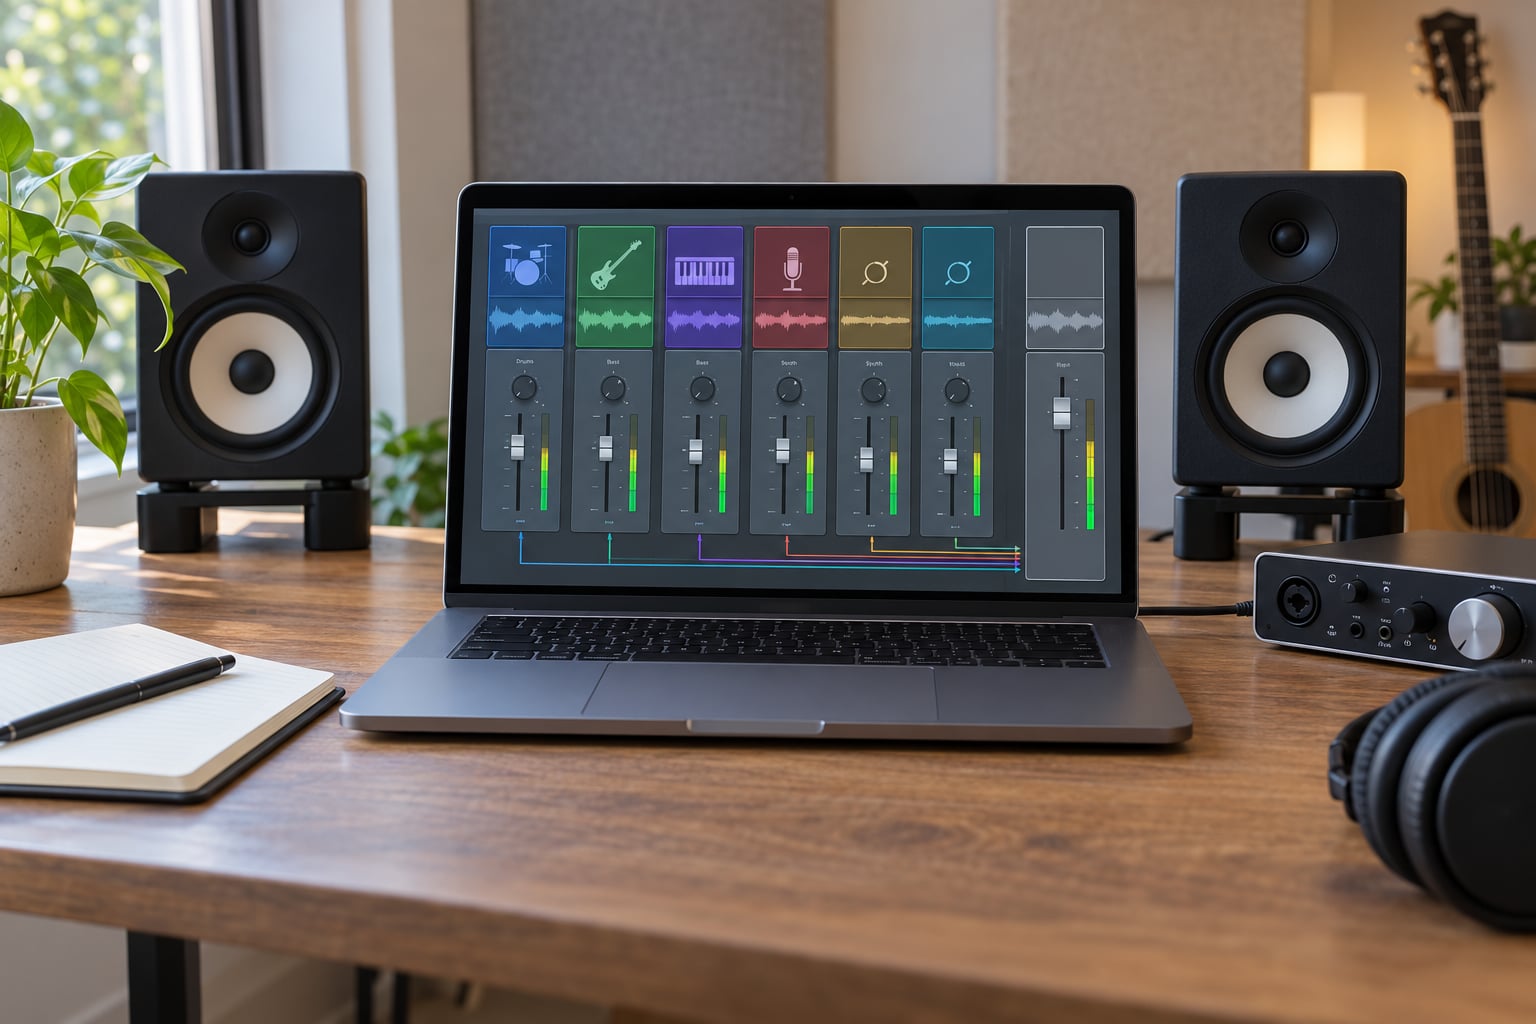
Press Ctrl+G on the selected tracks in Session View to make a Group. Inside the group, create subgroups for Kick, Snare and other drum channels, so you end up with something close to six groups feeding three busses feeding one mix bus. A practical architecture for electronic music looks like this: drums, bass and melodic each feed their own group; FX pulls from the sends; vocals get their own group; and every group routes into a single mix bus that feeds the Master track.
Why the extra bus layer at all? Because it gives you one place to balance the whole song. Solo each group and set its fader by ear, then bring all groups up together on the mix bus. That is much faster than riding fifteen channel faders at once, and it is the habit most mixing engineers describe as the reason a template pays for itself.
To check a bus is doing real work, solo its group, play a bar, and listen. If a group does nothing audible on its own, it probably does not need to exist yet. Keep the count low. Five or six groups is plenty for most electronic releases, and every group you add costs you fader space you will wish you had back at 2am.
5. Add utility processors and gain staging
Start every channel with the same safe chain so you never fight a level surprise later. Utility first, then EQ Eight, then Compressor, and only then whatever colour you actually want.
On Utility, use Gain to set a working level and Phase to fix any polarity problems you inherited. For loops pulled from sample packs or import services, producers on r/abletonlive often pull loop tracks down to around -8 dB so the fader sits near unity and the pan law does not push anything into clipping when you widen the image. That is a starting point, not a rule; adjust it so each channel peaks where you want it in the meters.
On EQ Eight, use the high-pass filter on anything that should not have energy below roughly 30 to 40 Hz, except your kick and bass channels. Set the steepness to the lowest value that still clears the rumble, so you are not chopping useful bass energy on a melodic pad. Leave the three mid and high bands completely flat. You are establishing a neutral starting point here, not mixing.
On Compressor, use it as a safety limiter on peaks rather than as a sound. Set the threshold so the gain reduction only touches the loudest transients, somewhere under 2 to 3 dB, with a fast attack and a release that does not pump. If a channel needs heavy compression to sound right, that is a mixing decision made later, in the song, not in the template.
How do you know gain staging worked? Play audio on every track one at a time and watch the master meter. Nothing should hit the red clipping indicator, and pulling a channel fader to zero should not make the master quieter. If it does, a track is still feeding Master directly instead of going through a group.
6. Configure the master chain
The mix bus gets a short, restrained chain, and the Master track gets an even shorter one. Your template should leave room for the mix, not pre-decide it.
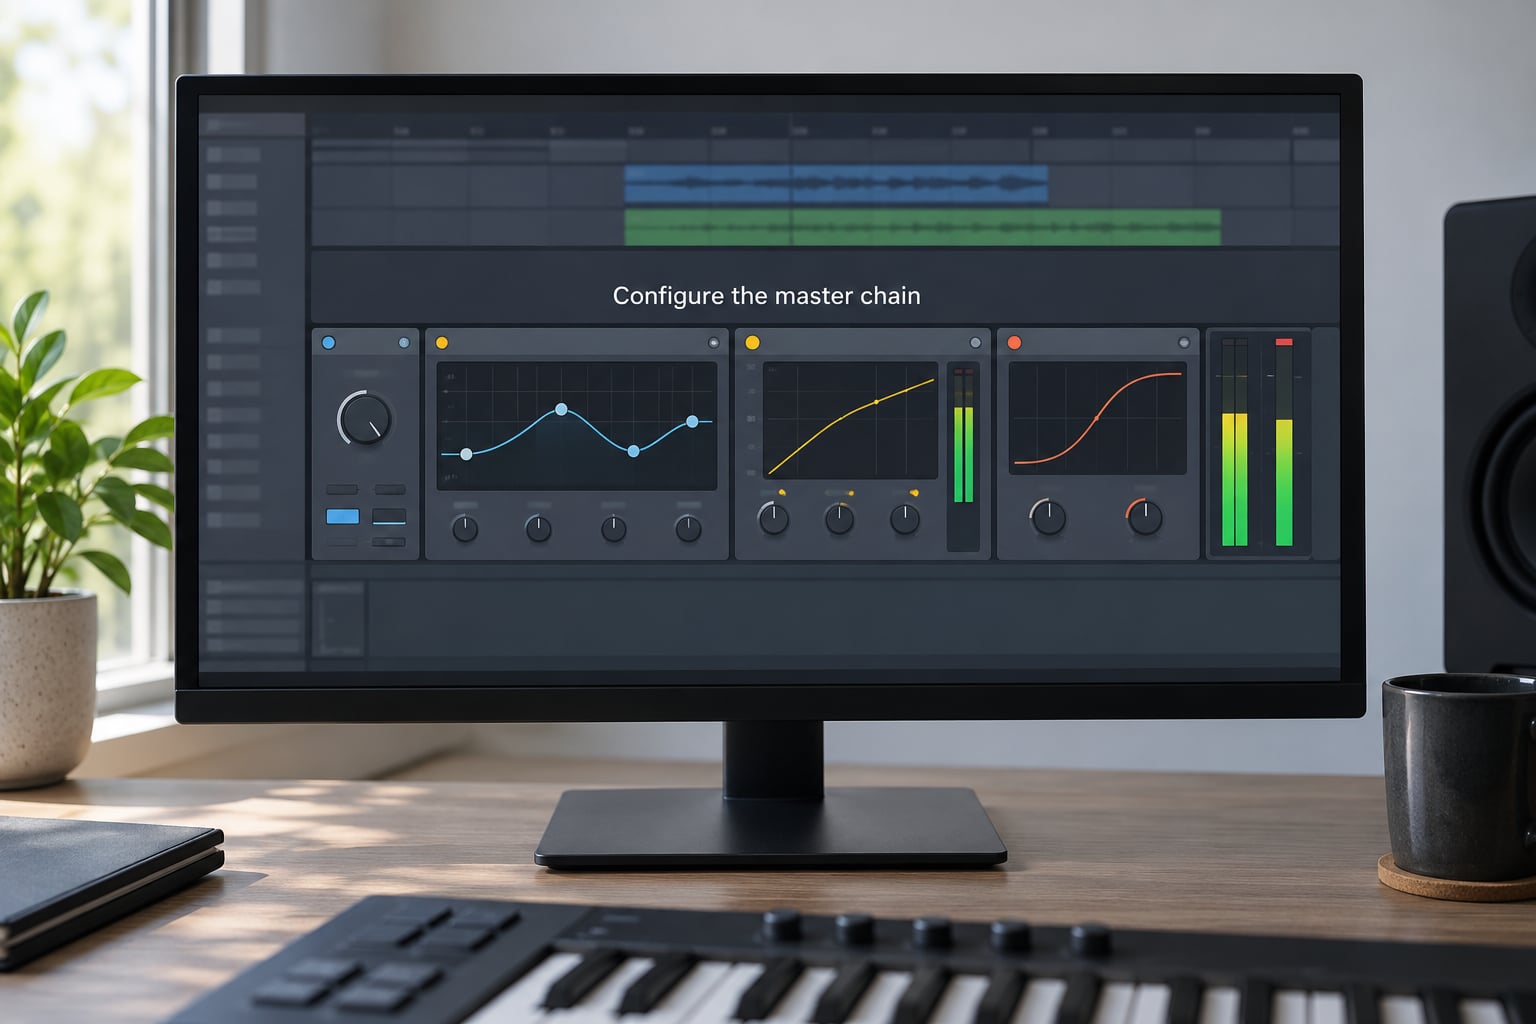
On the mix bus, three devices is plenty. Utility with a small amount of gain trim, EQ Eight with a broad, gentle low cut if your room has a rumble problem, and a Glue Compressor set light with a slow attack so it glues without squashing. Set the Glue threshold so it reduces roughly 1 to 2 dB on the loudest hits, no more.
Add saturation here or on the Master if you want it. Roar in Live 12 gives you analog-style colour with a mix control, and Saturator in earlier versions does the same job. Keep the mix low; saturation is a seasoning, and a template that arrives pre-saturated leaves nowhere to go when a track needs to be clean.
On the Master track, keep it to EQ Eight and Limiter, with the limiter ceiling around -1.5 dB so you leave headroom for mastering. Add a Utility with mid/side split EQ if you want to check mono compatibility during mixing, which is a habit that has saved more dance mixes than anything else on this list. You should still be able to bypass every master device and hear no change in character, just level.
7. Save, test, and refine your mixing template in Ableton Live
Saving takes three clicks: File > Save Live Set as Template, then choose Copy so Live writes a copy into the User Library > Templates folder instead of moving your working Set. Then File > Save as Default Template if you want that Set to load every time Ableton opens.
Stock devices means your template travels. If you later add a third-party plugin to any chain, keep a stock-only copy as the master version and treat the plugin version as a studio-only variant, otherwise you will hand a collaborator a Set full of missing device headers.
Now test it properly. Take three finished stems from your own archive and mix them from scratch using only this template. Note every setting you have to change on all three, and every setting you wish the template had made for you. Those notes are the next version. You want a different template per genre family too. A trance release and a dub techno release have different bus structures, and running both through one set means bending it every session.
Finally, version your work. Save dated copies, never overwrite a template that is already working on a release. When your template improves, bump the version number inside the Set so you can tell which one a project was built from.
Common Mistakes
Processing every channel the same way. Kick, pad and noise do not want identical chains. Fix: keep the template neutral, with high-pass and light compression as the common thread, and leave tone and character for the actual mix.
Tracks bypassing the groups. If a new audio track defaults to Master output, its fader will not touch the mix bus balance. Fix: after adding a track, check its output selector and route it to the right group every time.
Hidden gain compensation. Boosting a track 10 dB so it reads louder in the mix makes everything after it quieter than you think. Fix: set levels with Utility first, before any EQ or compression, and leave the channel fader near unity.
Phase problems from duplicated layers. A doubled vocal or a stacked hi-hat can cancel out when summed. Fix: use the Phase button on Utility to flip polarity, and if that fixes it, keep the fix and move on.
Clipping at the master output. It usually comes from parallel processing, where a send returns louder than it left. Fix: pull the return level down until the meters clear, and check the master output meter before you commit anything.
Treating the template as a finished mix. Templates with every decision pre-made remove the fun and lock you into one sound. Fix: keep the template structural. Routing, gain staging and safety processing belong in it; creative choices do not.
Frequently Asked Questions
What should an Ableton Live mixing template include?
A useful mixing template includes named and coloured audio tracks for drums, bass, melodic parts and vocals, four or five groups, one mix bus, return tracks for reverb and delay, a reference track, and neutral starting chains of Utility, EQ Eight and Compressor on each channel. Keep it to Ableton’s built-in devices so it opens correctly on any installation. What belongs in it is structure and routing, not creative mixing decisions.
Should I build a mixing template in Session View or Arrangement View?
Build it in Session View. Session View shows every track at once, which makes routing and group organisation obvious and fast, and it loads faster than Arrangement View. Once you open the template for a real mix, switch to Arrangement View and import your stems as a new MIDI track, then build the song. Keeping the template itself in Session View keeps it clean and quick to open.
How do I stop tracks from clipping in an Ableton Live template?
Most clipping in a template comes from tracks feeding Master directly or from sends returning louder than they left. Route every track into a group so nothing hits Master but the mix bus, and keep the master output meter under the red indicator during a full-volume playback pass. If a parallel send is pushing the master up, pull the return fader down until the meter clears with several dB to spare.
Should every instrument have EQ and compression in a mixing template?
Yes for neutral, safety-focused processing, and no for anything characterful. Put Utility, EQ Eight and Compressor on each channel set to do almost nothing: a high-pass around 30 to 40 Hz where it belongs, and compression that catches peaks with roughly 2 to 3 dB of gain reduction. Leave the tone and heavier compression for the song itself, otherwise the template starts every mix with a decision already made.
Do I need a separate drum or vocal bus in Ableton Live?
In most cases yes. Separate drum and vocal buses let you process a whole section with one chain, one automation lane and one fader instead of many. They also make it easy to try a bus compressor or EQ on the drums and hear it against the full mix, then undo it. Keep the number of buses modest, though. Six groups feeding three busses feeding one mix bus covers most electronic music without turning the mixer into a maze.
How do I use one mixing template for different electronic music genres?
Keep the shared architecture and vary the parts that actually differ. Routing, gain staging, reference track and master chain usually transfer fine between trance, house and techno. What changes is bus structure, return effect character, and how much processing the genre expects. The practical move is to save two or three dated variants of the template, one per style you release in, instead of bending one template on every project.
Start with the smallest version that works: four audio channels, two groups, one mix bus, Utility and EQ Eight at neutral settings, and nothing else. Mix one finished stem through it end to end, note what fought you, and add exactly that to the next version. A mixing template that grows from real problems beats one assembled from advice up front, and it takes an afternoon either way.