Audio crackling and dropouts are almost always a timing problem: your interface or driver fails to refill the audio buffer in time, so the stream stutters and you hear pops, clicks, static bursts or a half-second of silence. Learning how to fix audio crackling and dropouts is mostly a matter of testing in the right order, from the audio buffer setting upward to drivers, cables and the operating system. Most cases are solved in under ten minutes once you isolate where the fault lives.
The mistake almost everyone makes is changing five settings at once and then declaring the problem fixed, when in fact one of those settings simply hid the glitch for that session. Change one variable per test, confirm the result, then move on. That habit is the whole method here.
Table of Contents
- What You Need
- Step-by-Step: How to Fix Audio Crackling and Dropouts
- 1. Determine Whether the Problem Is Recording or Playback
- 2. Check Connections, Inputs, and Sample Clipping
- 3. Change Buffer and Block-Size Settings
- 4. Reduce CPU Load and Disable Plugins Temporarily
- 5. Test the Audio Interface and Native Driver
- 6. Isolate the Operating System and Computer
- Common Mistakes
- Common Mistakes: Quick Fixes That Prevent the Problem Returning
- Frequently Asked Questions
- What is the difference between audio crackling, clicks, pops, and dropouts?
- Does increasing the sample rate fix audio crackling and dropouts?
- What buffer size should I use for glitch-free music production?
- How do I know whether my audio interface or my DAW is causing the problem?
- Why does audio only crackle when I record but not during playback?
- Conclusion
What You Need
You need less than most people expect. The list is short because each item answers one diagnostic question.
- Your audio interface and its manufacturer driver, already installed.
- Headphones or nearfield speakers for monitoring, plus a second pair if you own one. Swapping headphones is the fastest way to rule out the human ear and the cable attached to it.
- Your DAW project, saved, plus one empty project for a clean test.
- A backup location so you can test a fresh OS profile or a fresh driver install without losing work.
- Optional but very useful: a second audio interface or the computer’s onboard audio, a spare USB cable, and a system monitor (Activity Monitor on macOS, Task Manager on Windows) open during tests.
Before anything else, name the symptom accurately, because a click and a repeated dropout have different causes.
| Symptom | What it usually means | Run this test first |
|---|---|---|
| Single sharp click, once | Stray click, not a stream fault | Mute and unmute the track; ignore it |
| Pop at the start of playback only | Latency offset at playback start | Step 3, buffer size |
| Continuous crackle or static | CPU overload on one core, or a bad cable | Step 2 and Step 4 |
| Brief silence, then audio returns | Buffer underrun | Step 3, raise the buffer |
| Repeated dropouts every few seconds | Driver, USB bus contention, or DPC spikes | Step 5 and Step 6 |
| Problem appears only after an hour or two | Heat, power management, or core throttling | Step 6, power plan |
| Distorted or crackly takes, clean playback | Input clipping during recording | Step 2, gain staging |
Step-by-Step: How to Fix Audio Crackling and Dropouts
1. Determine Whether the Problem Is Recording or Playback
The fault is not always where you think it is. Play a file in your DAW, then play the exact same file in a media player outside the DAW, then play it through the operating system mixer alone. That three-way comparison tells you more than any other single test.
Next, record a 60-second test while monitoring the input, with nothing else running in the session. If the crackle is in the monitoring path but absent from the recorded file, you have a monitoring or driver problem you can ignore until later. If the crackle is printed into the file, the fault sits in the recording chain itself and every take is affected.
You know the stage worked when you can say which of the two categories you are in. Everything after this depends on that answer.
2. Check Connections, Inputs, and Sample Clipping
Re-seat every cable, then move the interface to a different port. A USB cable that is merely adequate for data can fail intermittently with an audio interface, and the fault looks exactly like a software glitch. Producer forum threads keep returning to this because swapping the cable fixes more cases than people expect.
Watch the input meters while recording. Peaks that reach 0 dBFS clip, and clipping is often mistaken for crackle because the distortion scatters across the waveform. Pull the interface gain down until normal peaks sit around -12 dBFS, and leave the DAW fader where it is. On the output side, a fader pushed into the red only distorts that channel, so a distorted master bus points at gain staging, not at the interface.
Verification is immediate: clean meters with no red means clipping is no longer a candidate.
3. Change Buffer and Block-Size Settings
Buffer size is the single most repeated fix across audio production forums, because it is also the first real cause on the list. A small buffer means low latency and no margin for error; a large buffer means headroom and a laggy feel.
Here is how buffer size trades off at 48 kHz. Round-trip monitoring latency is roughly double the buffer time because the signal passes through an input and an output buffer.
| Buffer (samples) | Buffer time at 48 kHz | Round-trip monitoring | Typical use |
|---|---|---|---|
| 64 | 1.3 ms | About 3 ms | Vocal comping on a fast machine |
| 128 | 2.7 ms | About 5 ms | Tracking guitar and keys |
| 256 | 5.3 ms | About 11 ms | Most multitrack sessions |
| 512 | 10.7 ms | About 21 ms | Heavy software instruments, live bands |
| 1024 | 21.3 ms | About 43 ms | Mixing and mastering |
| 2048 | 42.7 ms | About 85 ms | Mixing on a laptop or old CPU |
Move up one or two steps and replay the same passage. If the crackle disappears at 512 and comes back at 256, the buffer was the constraint, and your fix is a buffer number that survives your heaviest project rather than the smallest one that happens to work today.
One detail that trips people up: total CPU load is not the number that matters. A single overloaded core causes the underrun, so a session reading 30 percent overall can still crackle. Watch per-core usage in the system monitor, not the average.
4. Reduce CPU Load and Disable Plugins Temporarily
Use your DAW’s performance display to find the expensive track. Bypass every third-party effect, close background applications, and then re-enable them one at a time until the crackle returns.
The fastest fix is freezing. In Ableton, Logic, Cubase, Reaper and Studio One you can commit a track to disk, which removes its plugin chain from the live CPU budget while keeping every parameter for later recall. Bouncing to audio is the heavier version of the same idea. Moving shared effects onto a send and a bus, so one reverb instance serves twelve tracks instead of twelve, buys back a surprising amount of headroom.
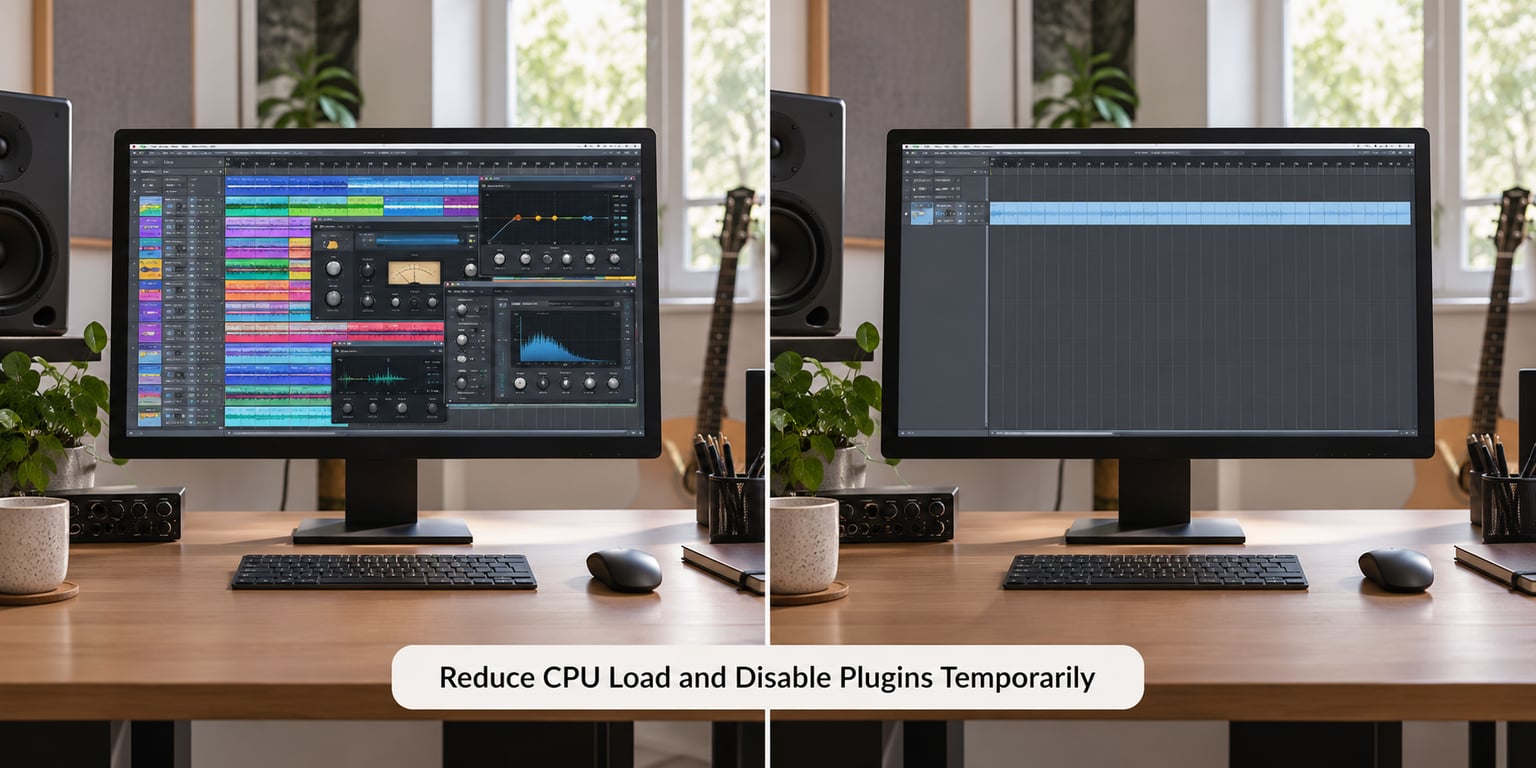
Demo or trial plugin versions are a known source of static and crackle, so test with them bypassed for a full session before you blame anything else. If bypass fixes it at low load too, suspect the plugin rather than the machine. At 96 kHz your CPU cost roughly doubles for the same project, which is why a session that is stable at 48 kHz can fall apart when someone raises the sample rate for a reason nobody remembers.
5. Test the Audio Interface and Native Driver
Open the manufacturer’s control panel and confirm the sample rate the hardware is actually running matches the DAW. On Windows, a mismatch between the shared WDM setting and the interface rate produces popping that looks identical to an underrun, and engineers hit it repeatedly. Match them and the popping stops.
Test with the onboard or built-in audio device next. If the crackle follows the DAW and appears on onboard audio too, the fault is in software or the system. If it stays with the interface no matter which output you choose, you have a hardware or interface-driver problem.
For USB interfaces, plug directly into a rear motherboard port and skip hubs entirely. USB 3.0 bandwidth is shared, so a card reader, a camera or a drive on the same controller can starve the audio stream. A powered hub can help in the other direction when the port cannot supply enough current.
Do a clean driver install: uninstall the interface in Device Manager on Windows, reboot, reinstall the latest driver from the manufacturer rather than a generic Windows Update version, and confirm firmware is current. That single sequence resolves a large share of interface faults.
6. Isolate the Operating System and Computer
Restart first, then test in a brand-new DAW session with one audio file. If a fresh session is clean and your project is not, the problem lives inside the project and you can stop hunting the computer.
On Windows, three settings account for most of what remains. Switch the power plan to High Performance and set the minimum processor state to 100 percent, which stops the CPU dropping into low-power states mid-buffer. Turn off USB selective suspend in the power options, which lets the system nap the bus mid-stream. Disable “Allow this device to turn off this device to save power” on the interface in Device Manager. You can also disable enhancements and exclusive mode on the playback tab of the sound device properties, though these matter far less inside a DAW than they do for game and media playback.
Run LatencyMon for a few minutes while you play audio and watch for spikes in the hundreds or thousands of microseconds. Network adapters are the most common offender, storage and chipset drivers follow, and a reasonable studio machine keeps worst-case DPC time in the low hundreds of microseconds. On macOS the equivalent ground is different: close everything, check Audio MIDI Setup for matching sample rates across devices, and look at energy settings rather than power plans. If a Windows update or driver install immediately precedes the onset, uninstalling it is a legitimate step rather than a desperate one.
When a second machine, a second cable and onboard audio all stay clean while the interface alone fails, stop tuning and replace or repair the interface. That is the point where further software work has stopped paying.
Common Mistakes
Five errors cost more time than the actual fix.
- Ignoring the meters. Clipped input is distortion, not crackle. Verify by pulling gain down and re-recording five seconds.
- Changing several settings at once. You lose the causal link. Verify by making one change per session and noting the result.
- Mismatched sample rates between the operating system, the interface hardware and the DAW. Verify by checking the hardware rate in the interface control panel.
- Blaming a plugin before testing raw. Bypass everything third-party and play. If it is clean, the plugin is guilty.
- Running an unrealistically small buffer. A 64-sample buffer on a busy project is not a flex. Verify by stepping up and confirming stability.
Common Mistakes: Quick Fixes That Prevent the Problem Returning
Once you find the setting that fixed it, write it down and treat it as your known-good configuration. Mine looks like this.
- One sample rate everywhere, 48 kHz unless there is a real reason, matched in the DAW, the interface control panel and the OS mixer.
- 128 to 256 samples for tracking, 512 when a session gets heavy, 1024 for mixing and mastering.
- The manufacturer’s native ASIO or Core Audio driver installed from the device itself, not a generic OS driver.
- Interface on a rear motherboard port with no hub in between.
- High Performance power plan with minimum processor state at 100 percent, and USB selective suspend disabled.
- Freeze or bounce tracks once a project gets dense, instead of holding every plugin live for days.
Two habits prevent most comebacks. Update drivers deliberately rather than on every Windows update, since a fresh chipset or storage driver can introduce a spike the interface never had. And log monitoring glitches separately from faults printed into your takes, because they have different causes and only one of them is costing you takes.
Frequently Asked Questions
What is the difference between audio crackling, clicks, pops, and dropouts?
A click is a single sharp transient, often a stray one-off at playback start. A pop is a short burst of distorted noise at the start or end of playback, usually caused by a latency offset. Crackling is a continuous stream of tiny clicks and static, typically from CPU overload on one core or a faulty cable. A dropout is a brief loss of signal that returns, the classic buffer underrun.
Does increasing the sample rate fix audio crackling and dropouts?
No, and it often makes things worse. Raising the sample rate doubles the data the computer must move, so CPU load rises with it and a session that was borderline can start underrunning. A sample rate mismatch between the OS and the interface does cause popping, but that is fixed by matching the rates, not by raising them. Match the rates once, then leave the rate alone.
What buffer size should I use for glitch-free music production?
Start at 128 for guitar and keys, move to 256 for a busy multitrack session, and use 512 or 1024 when software instruments and effects are carrying the load. Mixing and mastering are fine at 1024. The right number is the largest one your playing still tolerates on the heaviest project you own, not the smallest one that happens to work on an empty session.
How do I know whether my audio interface or my DAW is causing the problem?
Play the same file in three places: the DAW, an outside media player, and the operating system mixer. Then play through the computer’s onboard audio with the DAW closed. If the crackle follows the DAW, it is software. If it stays with the interface regardless of the output, it is hardware or the interface driver. Swapping to a second interface gives you the same answer in two minutes.
Why does audio only crackle when I record but not during playback?
That pattern points at the recording chain rather than the playback path: input gain set too high, a cable fault on the input side, or the interface struggling with the load of writing the file while plugins run. Watch the input meters for peaks touching 0 dBFS and pull the gain down until normal peaks sit near -12 dBFS. If the meter is clean, swap the input cable and port.
Conclusion
Reproduce the glitch first, deliberately, so you have something to test against. Compare recording against playback, look at the meters and the cables, then change one buffer or driver setting at a time and note what happened.
When the crackle finally stops, remember the narrowest test that did it. Often it was the smallest thing in the list: a buffer moved from 256 to 512, gain pulled down six decibels, the interface moved off a front hub port. That one line is your known-good configuration, and it is worth more than any generic settings guide you can search for next time the fault returns.