Clipping shears the tops off your waveform when a signal runs past a hard ceiling, and the peak data that was cut away is gone. Distortion is the wider family of processes that add grit and harmonics, and most of it is something you chose on purpose. Working out how to tell distortion from clipping in your mix takes about ten minutes of checking, and it stops you throwing away a usable mix while chasing a meter light that was never your problem.
The confusing part is that the two sound similar on small speakers. Both add harshness. Only one of them is recoverable, and they need opposite fixes, so identifying which one you have matters more than it seems.
Updated for 2026. Written for home and semi-pro engineers working in any DAW.
Table of Contents
- What You Need
- How to Tell Distortion from Clipping: Step by Step
- Step 1: Listen at a Controlled Level
- Step 2: Check the Waveform Shape
- Step 3: Use Meters and Gain Reduction to Confirm the Cause
- Step 4: Run an A/B Bypass Test
- Step 5: Fix the Problem Without Hiding It
- Common Mistakes
- Frequently Asked Questions
- Is clipping always bad in a mix?
- What is the difference between clipping and distortion?
- Can clipping be fixed after it has been recorded?
- Does compression cause clipping?
- Why does my mix sound distorted only on speakers?
- How much headroom should I leave before the master?
- Conclusion
What You Need
You do not need expensive gear to run this down. You need the ability to see a waveform and to turn plugins off, plus somewhere to check the result that is not the same chain that created the problem.
- A DAW with a waveform display. Every major DAW draws one. What matters is being able to zoom in far enough that a single peak fills the screen.
- Peak meters, and true-peak metering if you have it. Sample peak and true peak are not the same reading, and the gap between them is where a lot of confusion lives.
- A clip indicator you can trust. Pro Tools shows clip indicators on the channel strip, Logic has an overload marker on the main meter, Reaper and Ableton Live flag clips on the track. Know where yours lives before you need it.
- A level-matched bypass, which in practice means a way to solo a plugin or a track without changing the loudness you are judging it at.
- A second playback option. Headphones, a phone, a different pair of speakers. This is how you rule out your monitors.
- A reference track you know well, at a matched level, so loudness does not get confused with tone.
How to Tell Distortion from Clipping: Step by Step
Work through these in order. Each step rules something out, so skipping ahead is what leads people to pull the master fader down for ten minutes and fix nothing.
Step 1: Listen at a Controlled Level
Set playback to a level where the loudest moment of the track is comfortable but not startling. Loud playback adds its own harshness, and that false positive is the single most common reason beginners decide their mix is clipping when the file is technically clean.
Find the exact moment the harshness starts. A note, a word, a drum fill. Then ask two things: is it in one channel or in everything, and does it appear only when the track gets loud or at a steady level throughout.
A problem that grows with level points at gain staging or a plugin input. A problem that is constant regardless of level points somewhere earlier in the chain, or at your monitors.
Step 2: Check the Waveform Shape
This is the most persuasive evidence you can get, and it takes about thirty seconds. Zoom the display until the loudest peak fills the screen and look at its top.
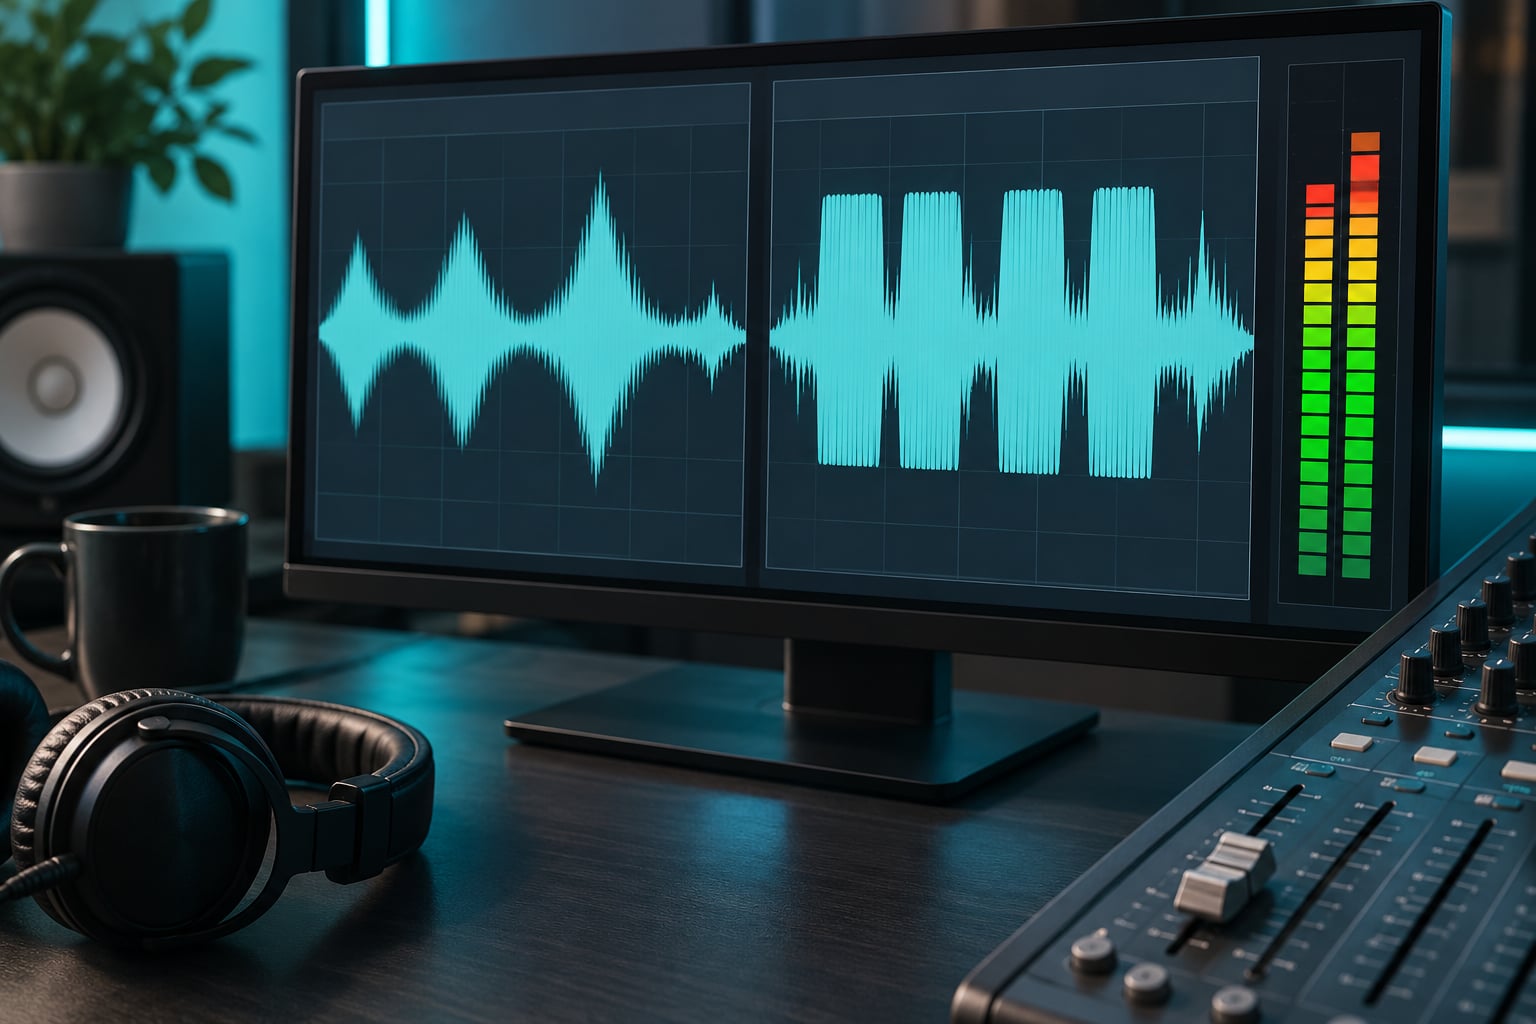
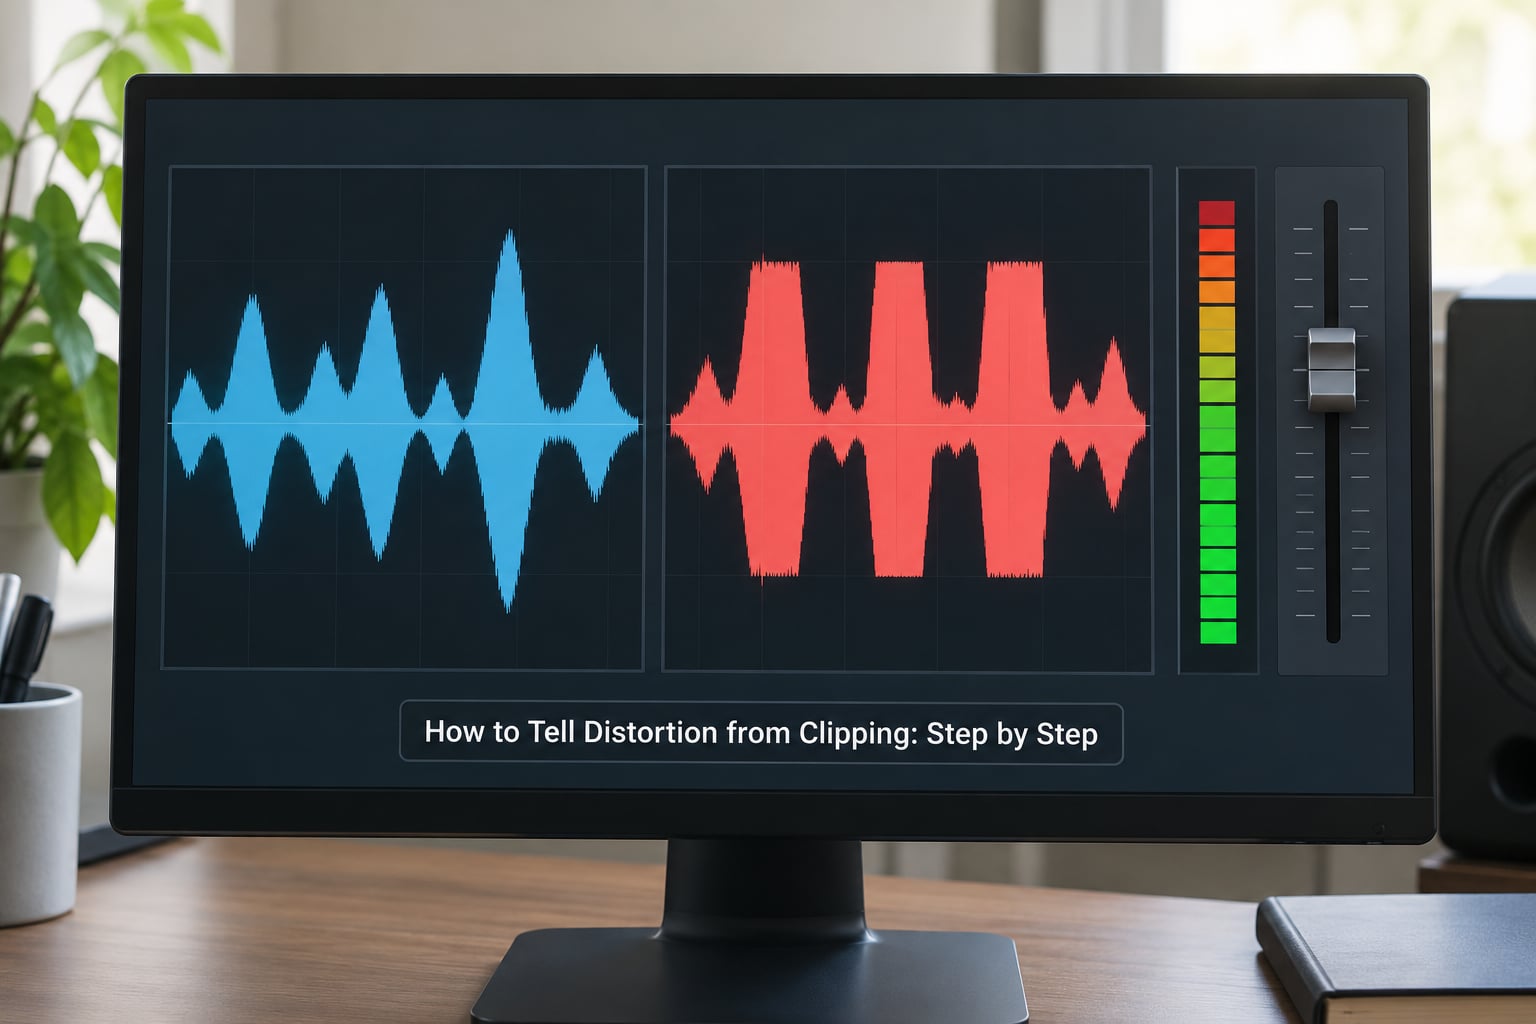
Clipping gives you a flat-topped waveform. The peaks are chopped flat, sometimes with square corners, sometimes with rounded corners if a soft clipper did it, but the giveaway is a straight horizontal top where a smooth curve should be. When you zoom out to see the whole track, clipped peaks form a suspiciously even row of identical maximum heights.
Saturation or distortion looks different. The crest stays smooth and continuous, but the contour thickens and rounds as it approaches the top. Think of a sine wave bending into a shape closer to a square wave without ever hitting a straight line.
If the waveform looks completely clean and still sounds broken, the clipping is not happening where you were looking. Move to step 3.
Step 3: Use Meters and Gain Reduction to Confirm the Cause
Meters tell you where a ceiling is being touched. They do not tell you where a sound became ugly, which is why a clean-looking master fader reading and a nasty-sounding mix can sit side by side without contradiction.
Check four things in this order.
- Sample peak and true peak. A sample peak reads 0 dBFS when a sample sits exactly at full scale. Inter-sample peaks sit between the samples, so a track can read below 0 dBFS on a sample meter and still exceed 0 dBTP when converted to analogue. If your harshness appears on playback but not in the meters, this is worth checking first.
- Clip indicators, latched. Most DAWs latch a clip indicator so a two-millisecond overs is not something you have to catch live. Go back to the top of the session and look at every track’s indicator, not just the master.
- Gain reduction on every compressor and limiter. A channel sitting at 8 dB of steady gain reduction is being pushed hard, and analog-modelled plugins distort on their input before they even compress.
- Limiter output. If the limiter is slamming the ceiling, the shape it creates can be the harshness you are hearing, even though nothing has technically clipped.
There is a good reason meters read below the ceiling and things still break. Most DAWs process in floating point, so a channel can pass above 0 dBFS between the meter and the next stage without damage. It becomes real when the signal hits a fixed-point stage, your interface converter, a plugin with limited headroom, or the bounce. That is why an analog-style EQ or saturator can sound driven at a level that looks safe.
Step 4: Run an A/B Bypass Test
Guessing wastes days. Bypassing takes seconds. The point of this test is to isolate the exact stage responsible, not to make the problem go away.
First, isolate by muting. Start from the master and mute one bus or group at a time, listening after each change, until the harshness disappears. Put that group back, then go one level deeper. Forum consensus on this is consistent: muting groups one at a time is how people actually find the contributor, and it beats staring at meters.
Second, test plugins level-matched. Bypass a suspect plugin, then match its output loudness to its input using the trim control, and switch back and forth. If the harshness is gone when it is bypassed but comes back at the same loudness, the plugin is the cause and you know exactly which one.
Third, rule out the monitoring chain. Drop the volume to a moderate level and listen again. Then play the track through headphones or a different speaker entirely. If the harshness disappears on the second system, your monitors are the problem, not your mix. Speaker protection circuits and headphone drivers both distort well before a mix is technically wrong, and this false positive shows up constantly.
Step 5: Fix the Problem Without Hiding It
Once you know the stage, fix that stage. Turning the master fader down until the harshness goes away hides the problem and takes your loudness with it.
Trim before the plugin, not after. If an EQ, compressor or saturator is distorting, bring the signal feeding it down until its gain reduction meter sits somewhere sane. Keep the fader where the rest of your mix expects it and fix the level in the insert chain.
Give yourself headroom on the bus. A premaster handed to a mastering engineer usually peaks around -6 dBFS, which leaves a limiter or a mastering chain room to work. Most people are mixing too hot because they are judging a mix by how loud it is, not by how it sits.
Check makeup gain on every compressor. It is the quietest cause of a hot master, and a lot of mixes get sent out already distorted because someone turned the makeup up and never compensated for it.
If the cause was intentional saturation, dial it back rather than deleting it. A saturator pushed too far and a saturator pushed on purpose sound identical for the first half of the range, then separate completely.
Common Mistakes
Treating loudness as clipping. A loud mix is not a clipped mix. Push the master up on a limiter and the meters may sit right under the ceiling while the track is twice as loud. Loudness and clipping are unrelated variables.
Trusting a single meter reading. One number from one moment is not a diagnosis. Sample peak, true peak, gain reduction, and the waveform picture each catch something the others miss, and you need more than one to be confident.
Pulling the master fader down as the fix. This is the most common bad habit. The internal plugins stay driven exactly as hard as before, the mix still sounds constrained, and you have simply made it quieter. Fix the source level and the bus level instead.
Using clipping as a louder version of distortion. Clipping is one technique inside distortion, not a substitute for it. If you want more grit, add a saturator or a tube-style drive plugin and control the amount. Hard clipping on a mix bus is almost never the answer you want.
Fixing the wrong stage. Running the problem back and forth in a plugin on the master when the actual overload happened three plugins earlier on a vocal bus wastes a lot of time. The mute-and-bypass procedure finds the stage; fix the stage.
Ignoring what is already destroyed. Clipped peak data cannot be pulled back out. A de-clipping plugin can reconstruct plausible peaks from a single isolated event, like one snare hit, but it is guessing, and a track that clipped on every loud line usually needs re-recording.
Frequently Asked Questions
Is clipping always bad in a mix?
No, and this is where most of the confusion comes from. Hard clipping on a mix bus or master is almost always a mistake, because it shears transients and the data is gone. Light, deliberate clipping on a drum bus or a parallel send is a legitimate tone tool. The test is whether you can dial it back to taste. If the amount of clipping is set by taste and by your ear, it is a choice. If it happened because you pushed a fader too far, it is a fault.
What is the difference between clipping and distortion?
Clipping is one specific mechanism: a signal exceeding a ceiling has its peaks sliced flat, and the lost data is not recoverable. Distortion is the umbrella term for any process that changes the shape of a wave and adds harmonics, which includes clipping, hard and soft saturation, overdrive, fuzz, and tube-style colour. Clipping is a type of distortion, not a separate universe from it. The practical difference is intent and recoverability, not the sound alone.
Can clipping be fixed after it has been recorded?
Not fully. Once a peak is sheared off, the original waveform data is gone, so a de-clipping tool can only estimate what should have been there. These tools work best on a single isolated, hard-clipped event such as one snare hit or one vocal peak. A track that clipped on every loud line is a re-record or a re-mix from the session. Masking with EQ or adding saturation can hide the artefact, but it does not bring the data back.
Does compression cause clipping?
It can, and it is one of the most common causes people never suspect. A compressor reduces level during transients, then makeup gain pushes the whole signal back up, often sending peaks straight through the ceiling. Limiting does the same thing by design. The tell is a channel showing steady gain reduction while its output peaks sit high. Trim the makeup gain or lower the bus until the peaks have room, and check the gain reduction meter again.
Why does my mix sound distorted only on speakers?
Usually because your speakers or interface are adding the distortion, not the mix. Driver overload, a protection circuit engaging, an underpowered amplifier, or a long cable run can all break up on loud passages while the file is fine. Lower the monitor volume and listen again. Then play the same track through headphones or a different speaker. If the harshness vanishes on the second system, the problem is your monitoring chain, and no amount of fader pulling in the session will fix it.
How much headroom should I leave before the master?
Aim for a premaster that peaks around -6 dBFS rather than slamming into 0 dBFS. That leaves a mastering engineer room to work with a limiter without destroying your transients. On the delivery end, a common target is a true-peak ceiling around -0.3 dBFS so the platform encoder does not clip on playback. For tracking, peaks near -18 dBFS give your converters plenty of room. These are starting points, not laws, but they prevent most clipping.
Conclusion
Start with the waveform, not the fader. Zoom into the loudest peak in your session and look at the top of it, because a flat top tells you in seconds that you have clipping and where to look for it. If the waveform is clean and the mix still sounds broken, mute your buses one at a time, then bypass plugins level-matched, and check a second playback system. The stage that answers back is the one to fix, and the master fader is almost never it.